
Four Image Edits Part 3
by Mickey Rountree
This is the third of my series where 4 photographers submit an image and it is edited by all four. My fellow photographers for this project are Bob Copeland, Bill Mueller, and Richard Smith.
For this third image by Richard Smith, we could edit in Lightroom, Photoshop or both.
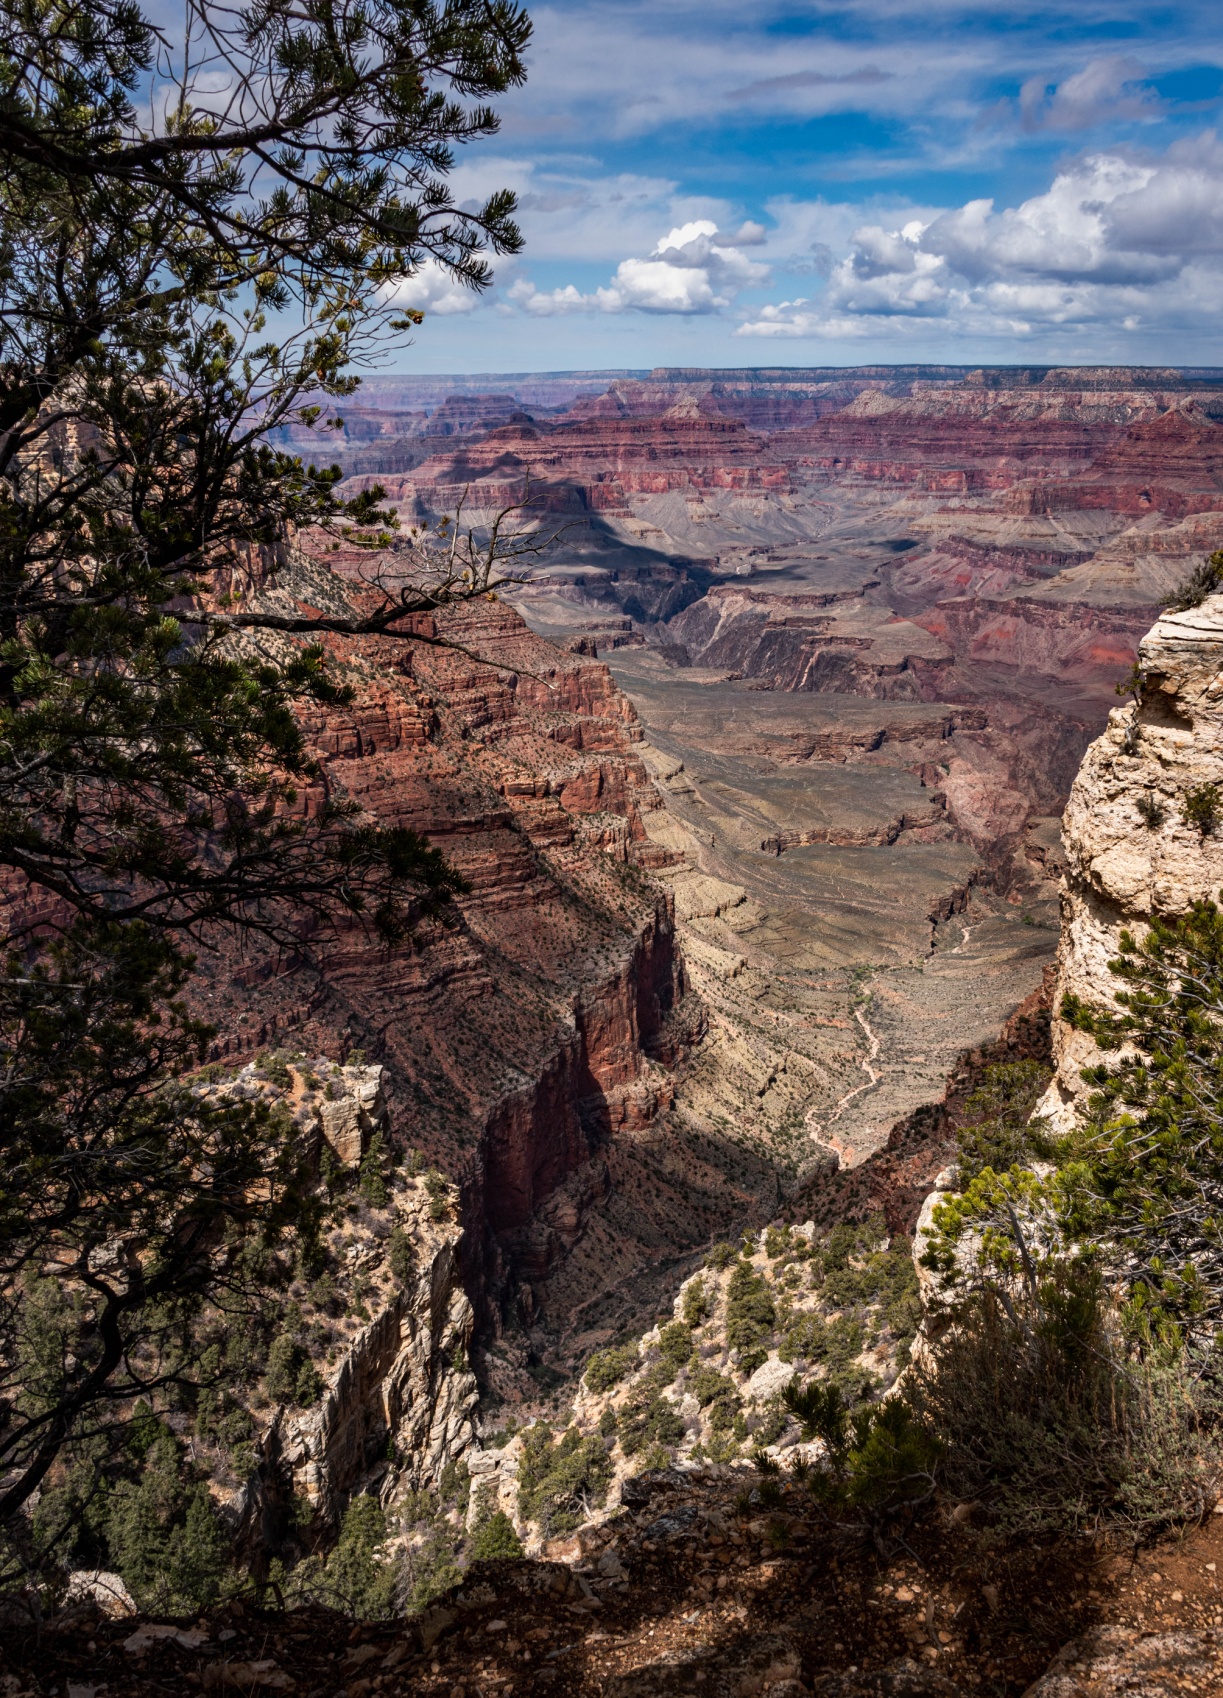
Richard’s RAW image was a DNG file with no editing applied.
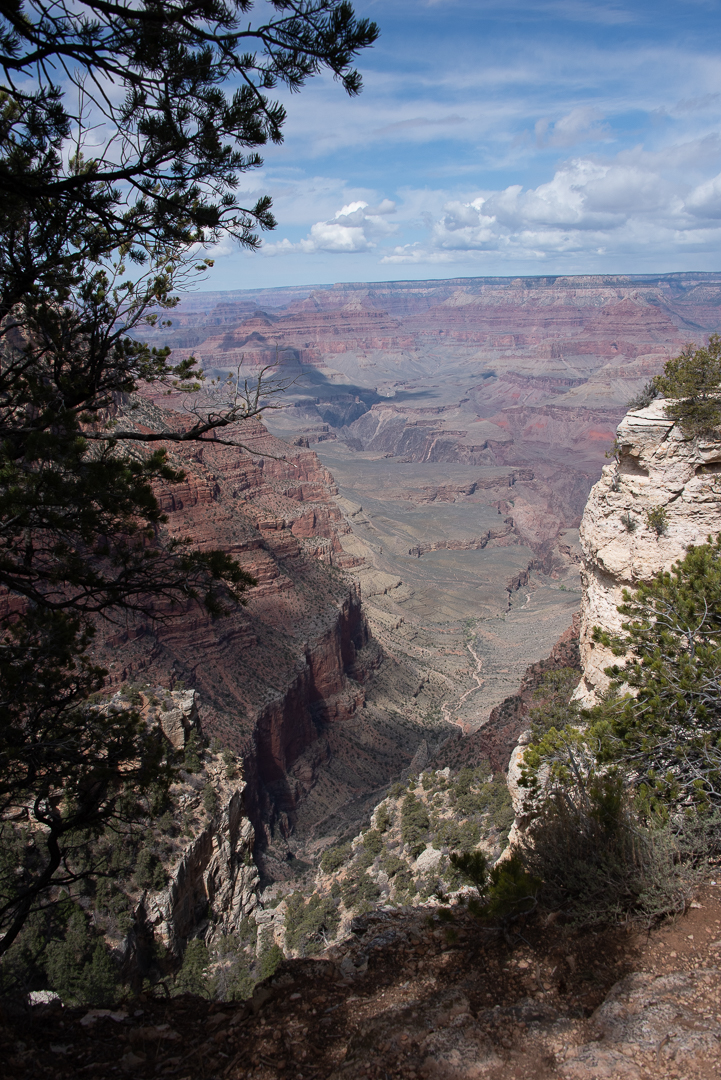
Original Image
My Edit
Global Adjustments
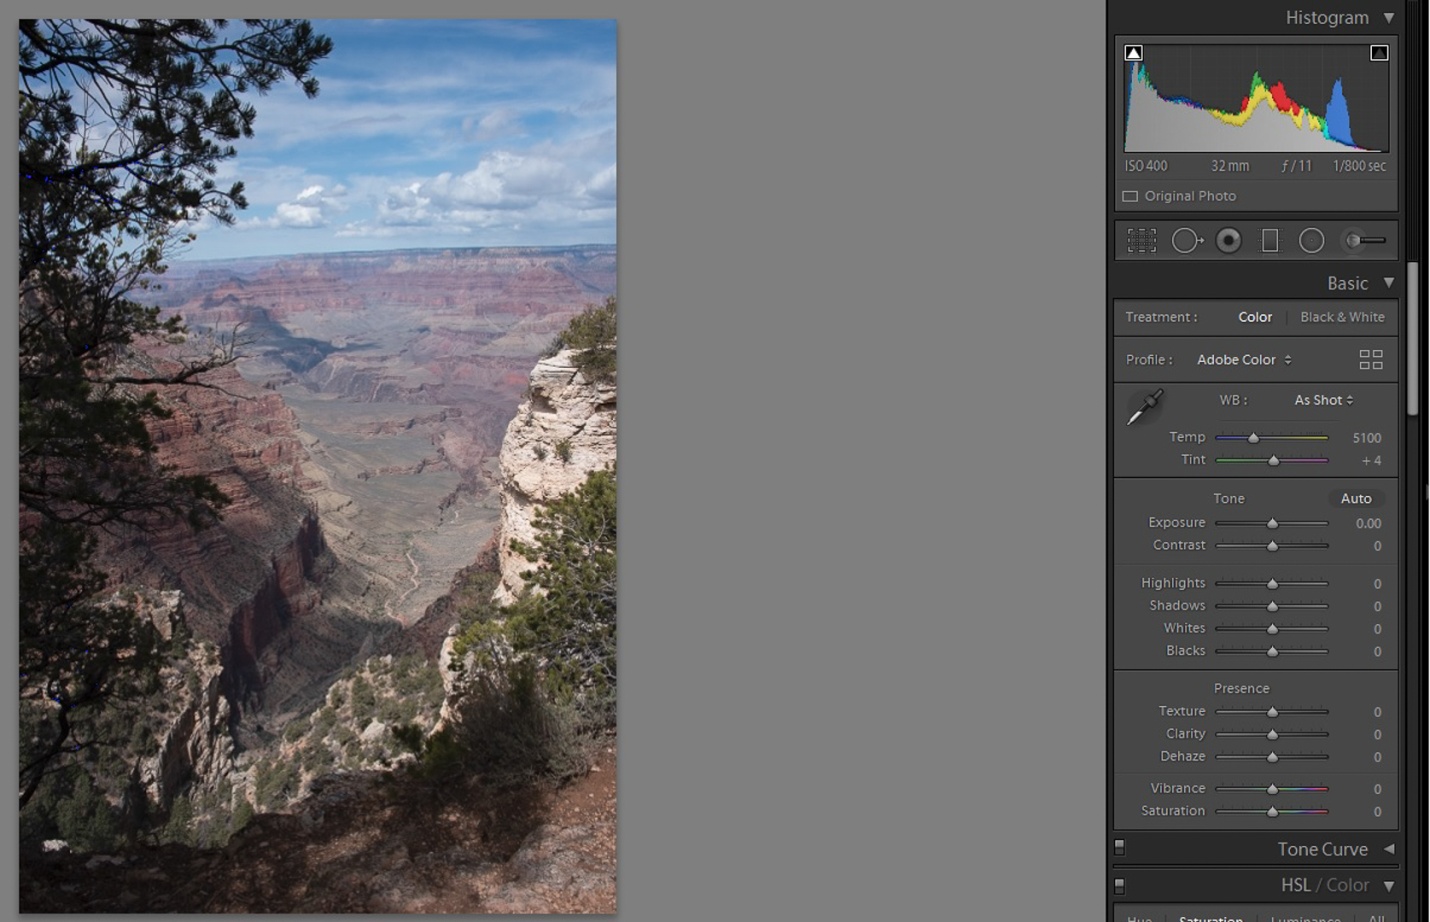
I brought Richard’s image into Lightroom with no editing or sharpening applied. It defaulted to Adobe color profile. A quick look at the histogram shows there is no highlight or shadow clipping and the histogram almost touches the right hand side, so the in camera exposure was perfect.
I started by doing all of my basic adjustments in Lightroom before moving the image into Photoshop.
1) I usually fix the thing that bothers me most first. In this case it was the crooked Horizon. I straightened it with the level tool.
2) I changed the color profile to Adobe Landscape, and that helped the colors a lot.
3) The sky seemed a bit too cyan, so I changed the temperature to 6050 and added +7 Magenta.
4) In the tone panel my settings were:
Exposure -0.12
Contrast +24
Highlights -100
Shadows +40
Whites +33
Blacks -19
Texture 0
Clarity +12
Dehaze 25
Vibrance +5
Saturation 0
Local Adjustments
Still in Lightroom I painted over the light color rocks with brush settings of Texture +80, Highlights -22 and exposure -.35 to tone these bright rocks down a bit. I used a second brush at -1.0 exposure and painted over all of the foreground rocks to keep the eye in the center of the photo.
Photoshop Editing
I sharpened the image using high pass sharpening, one of my favorite sharpening methods for landscapes and HDR. High pass settings were 8 pixels and softlight blend mode.
I used NIK Color EFEX tonal contrast filter on a new layer and masked out the sky so it didn’t become too extreme.
I used the camera raw filter and an adjustment brush to paint over the canyon wall in the center of image with +20 dehaze for even more contrast and to make the colors pop a bit more. (I could have done this back in Lightroom just as easily)
I tried turning this into a black and white image using NIK Silver EFEX, but it wasn’t effective to me, since the colored layers in the canyon walls are part of the images impact.
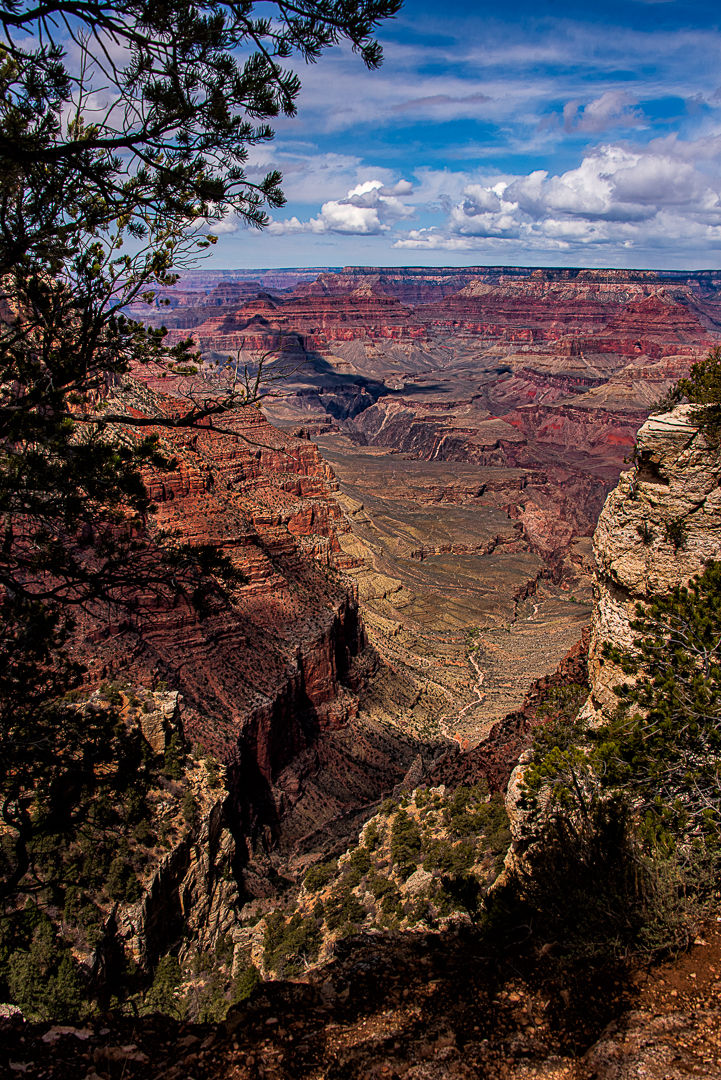
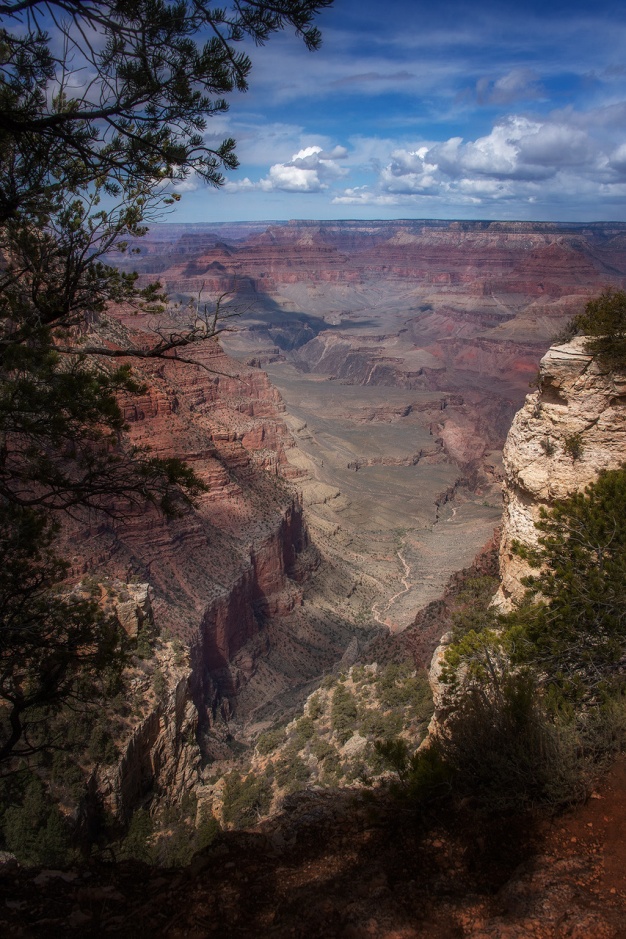
My Final Edit
Bill Mueller’s edit in his words
I decided to do this image entirely in Lightroom to experiment with the luminosity masking capabilities added in the last year to the adjustment brush. Usually, I move over to photoshop for those types of adjustments. With every image I go to the Transform panel and hit Auto. This straightens the image. Sometimes further adjustments are needed but this works about 99% of the time. Next I move to Lens Corrections and make sure that Remove Chromatic Aberration and Enable Profile Corrections are checked.
Global Adjustments
To start off I did some basic adjustments. I set the White +26 and Black -17 points of the image. I increased the exposure+12, increased the Highlights +17 and increased the shadows +100. In the Presence box I Upped Texture +24, Clarity +38, Dehaze +10 and Vibrance +24.
I felt the adjustments made the blue in the sky too dark so in the HSL panel I increased the Blue Luminance +36
To finish off, I added some sharpening to the edges. To mask out all but the most obvious edges I moved the masking slider up to 92, then increased sharpening to 107.
Local Adjustments
Then I moved to the Adjustment Brush to use the Luminosity Masks. I set the first one up to address the Shadows. If you haven’t tried this, you paint the entire image with the adjustment brush, then you set the Range Mask to luminance and then adjust the range. I this case I moved the right slider from 100 down to 41. If you click on Show Luminance Mask you’ll see the Red areas of the mask are the ones that will be affected by the adjustments. I made adjustments to Exposure +.44, Texture +33. Dehaze +15 and Saturation +80. I also increased Sharpness by +57.
Next I moved on to the Highlights. This time I moved the left slider from 0 to 69. The adjustments I made here were to Exposure +.52, Highlights -100, shadows -2, Texture +48, Clarity +17, Dehaze +11 and Saturation +50.
Bill’s Final edit
Richard Smith’s Edit in his words
Analyzing the Image
This is my image. I made it in the Spring of 2018, when Louann and I drove out west to find the parts of old Route 66 that remain. We arrived at the south rim of the canyon at mid-morning on a beautiful spring day. Good things never last. An hour after I made this image, a sudden snow storm hit the canyon. In a span of about 5 minutes a view of miles was reduced to 20 feet. Within 10 minutes after that, we were up to our ankles in snow. Time to go.
I have processed this image many times. None have captured the sense of awe and wonder I experienced seeing it with my own eyes. But I keep trying.
This is a RAW image so it needs more contrast, saturation, sharpening. If I had shot this in jpeg, contrast, saturation and sharpening would have been automatically added to the image, but those additions would have been uniform throughout the image. The adjustments needed for the sky are different from those needed for the canyon.
Global Adjustments
Lens Corrections and Transform Panels
First things first. in Lens Corrections I checked the boxes to Remove Chromatic Aberrations and Enable Profile Corrections for my Nikon lens. In Transform I clicked on Auto to level the horizon.
Cropping
I am not afraid of heights, I just have a healthy respect of heights, so I stood well back from the edge when I made this image. But I wanted you the viewer to have the feeling of standing right on the edge, so I cropped up from the bottom a little. I also cropped down from the top to eliminate the pine cone in the middle of the image.
Tone
I have two different methods for setting the Black and White points. I will choose one, depending on my subjective judgment of which one works best for the particular image. In the older method, I would move the Whites slider to the right and the Blacks slider to the left until you begin to see clipping. Then I saw a video by one the Adobe gurus who slammed the Highlights slider all the way to the left (-100) and the Shadows slider all the way to the right (+100). In this image I used the latter method. I then adjusted by increasing the Whites (+31) and decreasing the blacks (-8). This is just like seasoning a stew – everybody does it a little differently.
HSL Panel
Sometimes I will use the HSL sliders nears the end of the edit to made final adjustments to specific colors. This is all purely subjective. Here I made the following adjustments: Luminance Red, Orange and Yellow (-10), Saturation Red, Orange, and Yellow (+15,) Green and Blue (-5).
Local Adjustments
The Sky
I first used the Graduated Filter tool, starting from the top and bringing it down to the top of the rim of the canyon. This included part of the tree on the left, which needed a different adjustment than the sky. To exclude the tree I used the Luminance Range Mask embedded in the Graduated Filter. Holding down the Option key (ALT on PC), I moved the slider for the Luminance Range Mask to 85 which turned the tree black, thereby excluding it from my adjustments to the sky. (Remember: black excludes, white includes.) Staying in the Graduated Filter, I moved the sliders as follows: Highlights (-5), Dehaze (+30) and Clarity (+10).
The Canyon
Again I used the Graduated Filter this time starting from the bottom and going upward to the canyon rim. Within the Graduated Filter, I adjusted the sliders as follows: Highlights (-10), Shadows (+12), Saturation (+10), Sharpness (+10), Clarity (+10), Texture (+40), Temperature (+20).
Tree on the Left
Using the Brush tool, I painted over the tree. I was not careful about my technique, because I next applied the Luminance Range Mask embedded within the Brush tool. Moving the slider to left until it reached 10, this left the tree white (included in the adjustment) and the surrounding areas black (excluded from the adjustment). I then adjusted the sliders as follows: Exposure (+40), Shadows (+100), Clarity (+30), Sharpness (+10).
Foreground Shadow
Using the Brush tool, I painted over the area of shadow and then adjusted the sliders as follows: Shadows (+50), Clarity (+40), Saturation (+10).
Bright Rock on the Right.
I felt the brightness of this rock formation drew the eye. It is a part of the image, but not the focus of interest. To de-emphasize it, I painted it with the Brush tool and then made the following adjustments: Highlights (-30), Texture (+25), Clarity (+20), Saturation (+10), Sharpness (+10).
Canyon Floor
Looking at the image I felt the canyon floor was a little soft. I used the brush tool to paint the portion of the floor nearest to the viewer and then made the following adjustments: Texture (+15), Sharpness (+10), Clarity (+10), and Dehaze (+15)
Finishing Adjustments
Sharpening
Amount: 65, Radius: 0.8, Detail: 30, Masking: 45. I increased the Masking slider to 45 because at that amount the blue sky was black, meaning it would not be sharpened (black excludes). You do not want to sharpen a clear blue sky with a smooth surface.
Vignette
I added a Vignette of -7.
I stepped away from the image overnight and then came back to it. I wanted to do something that would give the image a little more 3D effect. I turned to the Tone Curve tool. This is a tool most people avoid, including me, but it has its place. Using the Custom Point Curve. I placed control points at the middle of the linear line and at at the top of the smallest square in the lower left quadrant. This covered the area of the shadows in the image. I then placed another control point close to the bottom point and pulled down on it very slightly. Boom! That was enough to make it pop. Using three points gave me more precise control as none of the areas outside the outer point were affected by the adjustment.
None of these adjustments are written in stone. It is important to get the correct exposure for your image, but after that it’s just seasoning for the stew. Everyone likes their seasoning a little different.
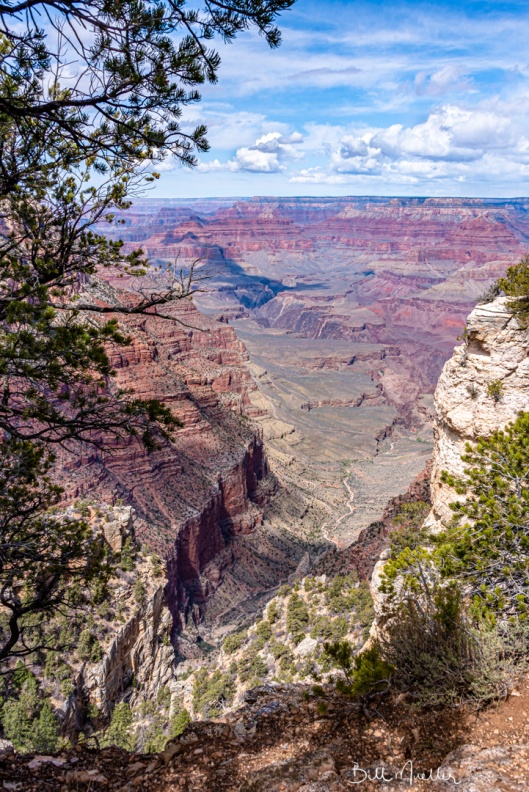
Richard’s Final edit
Bob Copeland’s edit in his words
Global Adjustments
In Lightroom I adjusted highlights (-100) Shadows (+100) White (-15) black (+2) and Dehaze (+16). I cropped to 2 by 3 ratio. I then took the image over to Photoshop.
I adjusted the levels with an adjustment layer, Shadows 0, Midtones 100, highlights 228
I created a curves adjustment layer input 118 to output 96. I then created a second adjustment curve layer with input 130 to 155 output -fill curve layer and filled the mask with black. I painted white on the mask using a soft brush at 25% in center area and puffy clouds.
Local Adjustments
I created a third curves adjustment layer input 121 to 71 output . Fill with black soft brush at 25% and burn bottomland around edges. Go back over bottom at 50%.
I created a duplicate background. I sharpened using unsharp mask 176%, Radius at 1.0 and Threshold 1 levels.
I copied the unsharp mask and used Gaussian blur at 50 pixels and set opacity at 35%. I created a layer mask and used a soft brush at 25% on center portion.
Bob’s Final Edit
Some closing thoughts
This is the image that we all edited most similarly. While we used different techniques, we were all using exposure adjustments and contrast to guide the viewer’s eye through the image.