This article might be a bit beyond basic, but only because it involves Photoshop and the use of layers and layer masks. Even if you have never used layers, you should be able to follow along and make this work for you.
I’m a fan of light painting, and the photographers who do it well. However, I find that I don’t have the patience or opportunities to learn and do it well. Traditionally, light painting is difficult, requiring light painting with flashlights during a single long exposure, or using speedlites or flashlights to light small segments of an object in multiple shots and then combining and blending them in Photoshop. The single shot is particularly difficult as the exposure on different parts of the subject requires counting the different exposures and rushing to get it done in one 30 second exposure. If even a part of the image is not properly exposed, you have to repeat the whole procedure, hoping you fix the bad part, and don’t produce any new errors. And then there is the issue of obtaining access to places and subjects at night which may not be convenient or possible.
So I have tried to come up with a way to produce a light painting effect in Photoshop that doesn’t require working in the dark, long exposures or merging and blending dozens of layers. This works on subjects that you wouldn’t be able to access at night, moving subjects like people, and you can work on your existing images.
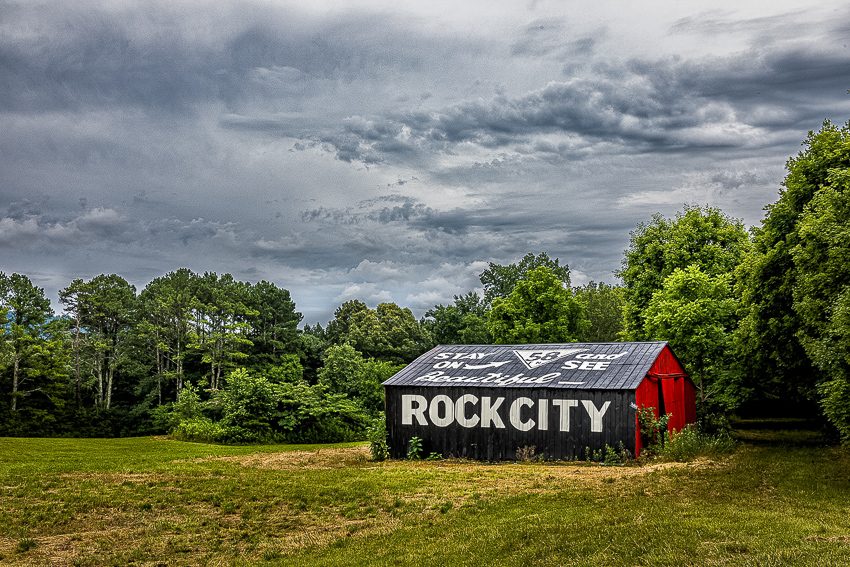
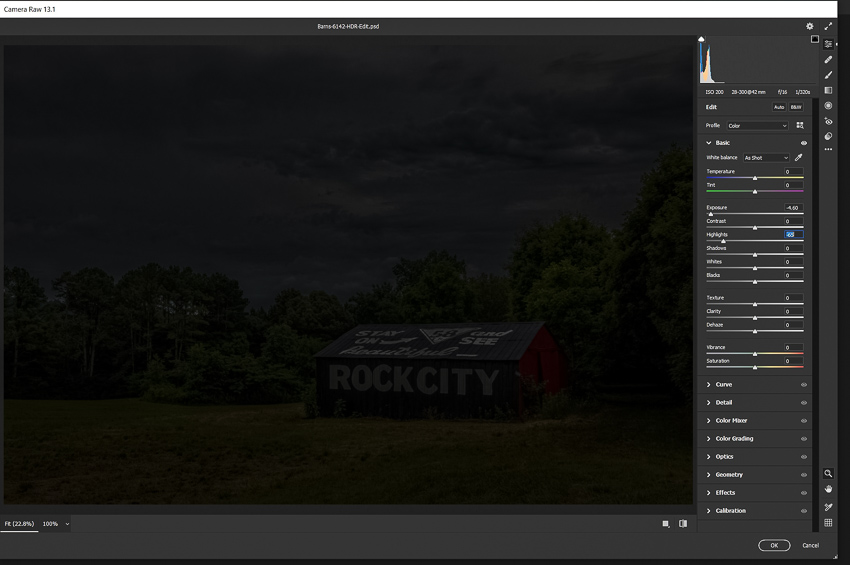
Start with an image (of course I usually use an HDR image) and edit it as you normally would. I usually do my basic editing in Lightroom and then move the image over to Photoshop. After whatever edits you do in Photoshop, flatten the image. Here is my starting image.
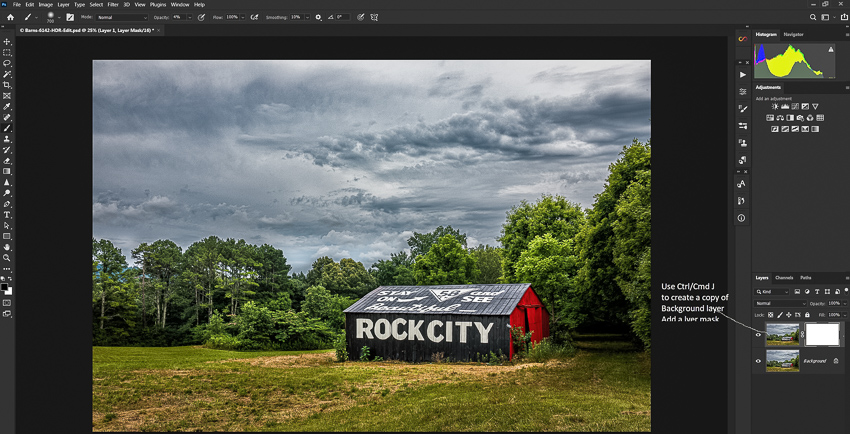
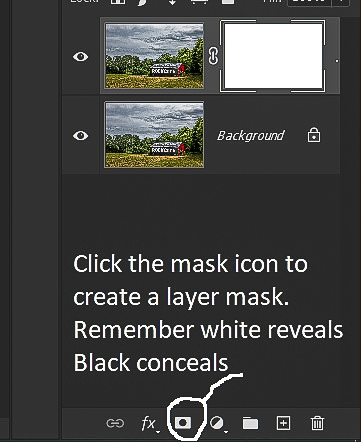
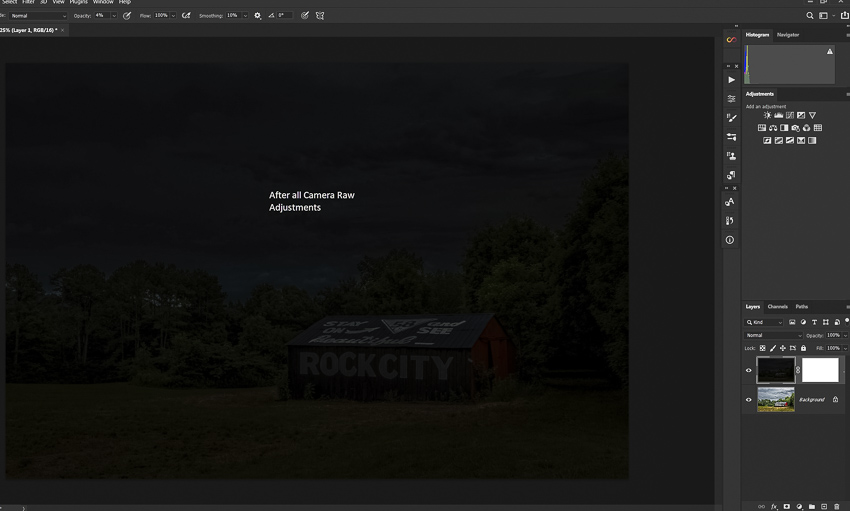
Use the shortcut ctrl-J (cmd-J on Mac) to copy the base layer and add a layer mask.
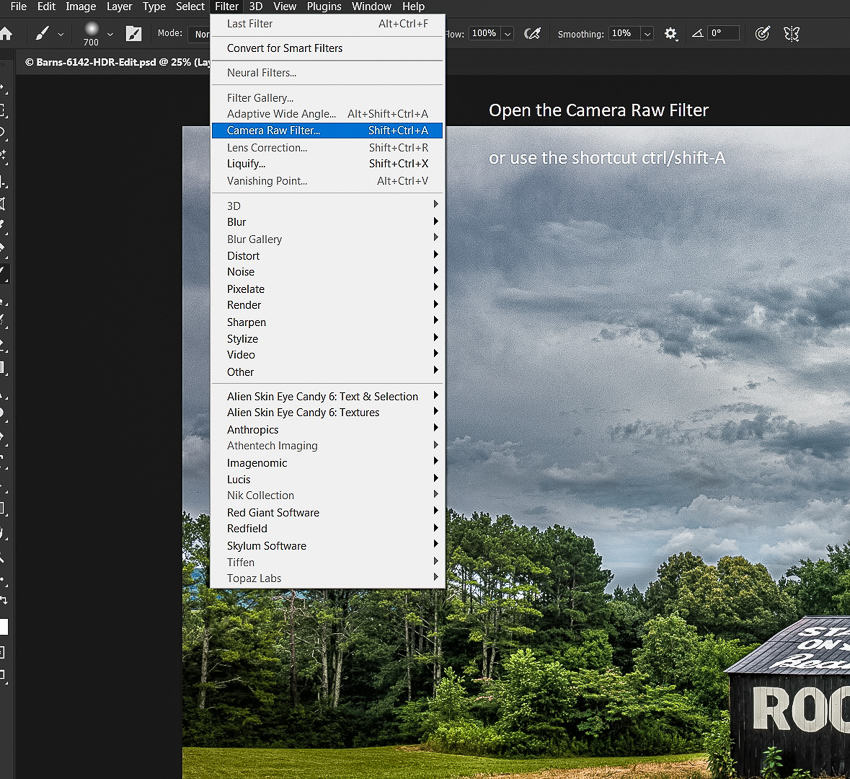
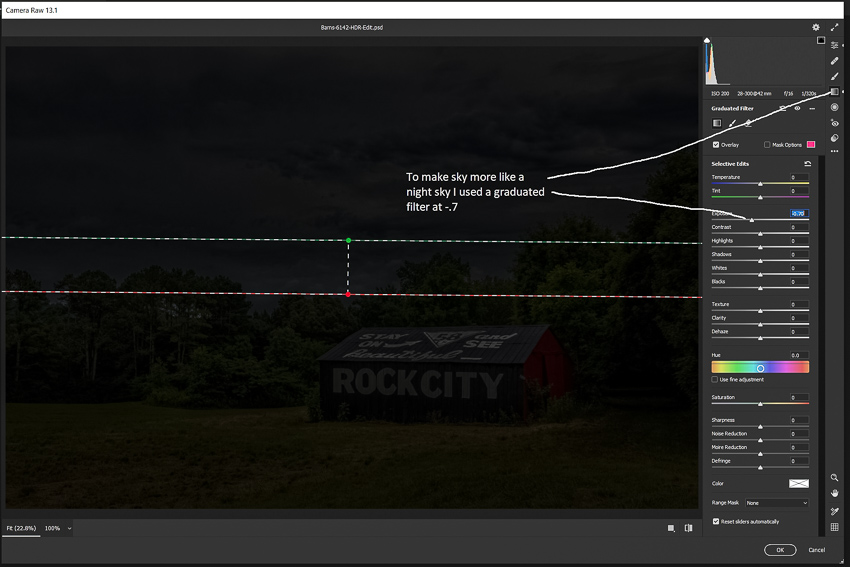
Next, use the camera raw filter (filter/camera raw or the shortcut ctrl/shift-A) to drastically drop the exposure of this layer, until it looks like night or is very dark. It doesn’t have to be solid black, but it should look like at least very late twilight. I find I usually decrease the exposure somewhere between -3 and -4.5. I usually also decrease highlights, and if there is a bright sky I may also use a graduated filter. Underexposure exposure increases saturation, so you may also need to decrease it.
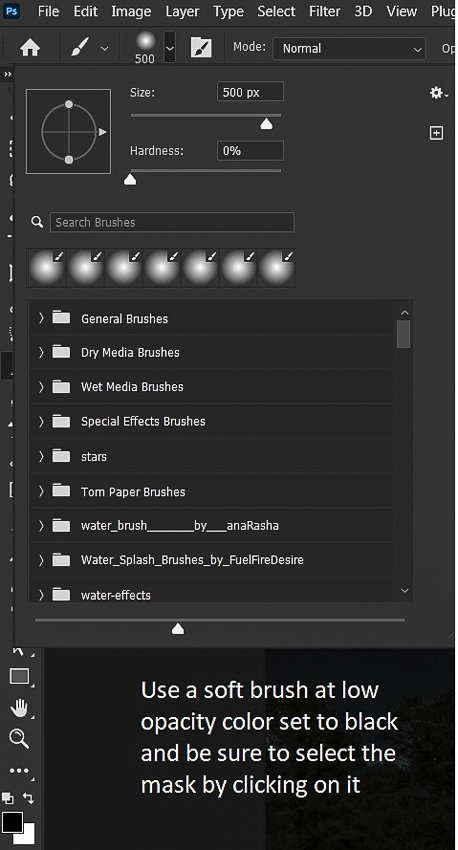
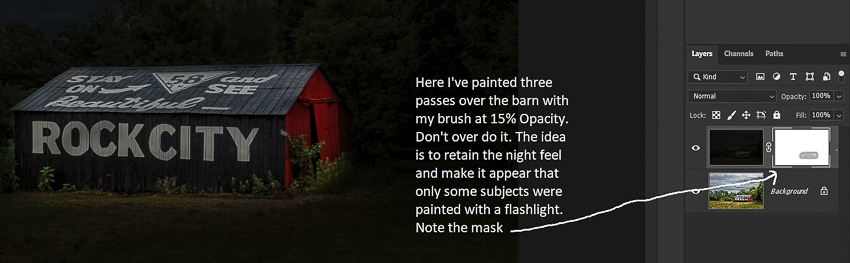
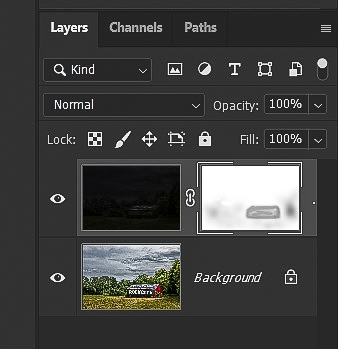
Select the layer mask by clicking on it, and use a soft, black brush at a low opacity like 10 or 15% to paint on the mask to begin lighting the subject. Vary the brush size depending on the size of what you need to paint. It’s better to use multiple painting strokes to build up the lighting rather than trying to add a lot of light quickly with high opacity brushes. Using low opacity also makes it easier to vary the exposure in different parts of the image. As you paint on the mask, you’ll see the objects you paint over begin to lighten. The more opacity you build on the mask, the lighter they become. Don’t overdo this. The goal is to have a picture that looks like a night scene with some light added selectively.
Below I’ve painted over the barn, lightly over the grass, and made some dabs on the surrounding trees. You can see the effect and the corresponding mask. Try not to light the sky, since that wouldn’t happen in real life night painting unless you have an aircraft search light. If you make a mistake, switch to white, paint over your mistake, then switch back to black, check your opacity, and continue.
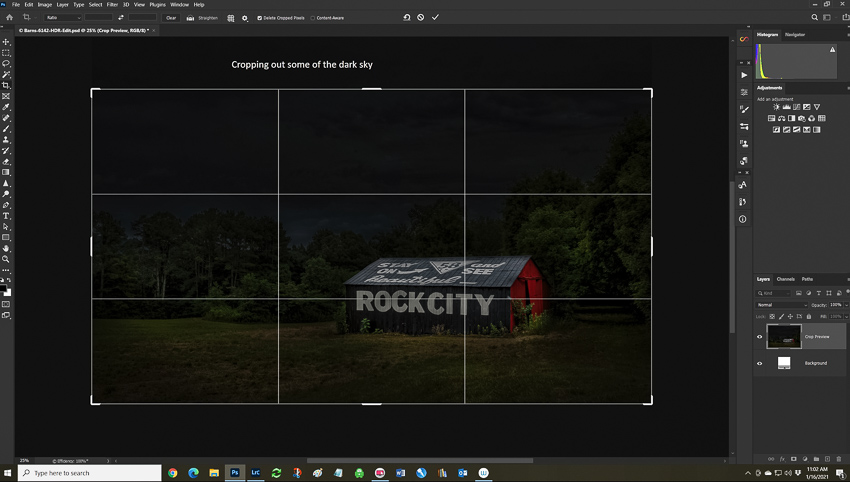
After my light painting I decided on a couple of finishing touches. First I cropped some of the sky off since while it was dramatic in the daytime shot, it was just black dead space in the night shot. You might also notice the rule of thirds coming into play.
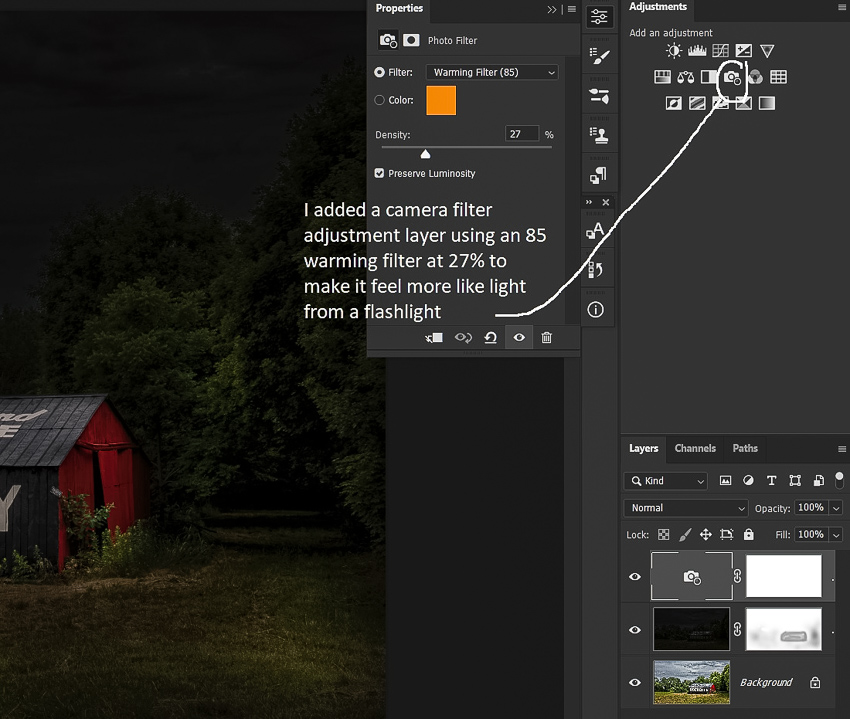
Next I added a photo filter adjustment layer. I chose an 85 orange at about 25% to warm things up a bit as an old tungsten flashlight would. Or you might even prefer a blue filter; it’s all personal taste.
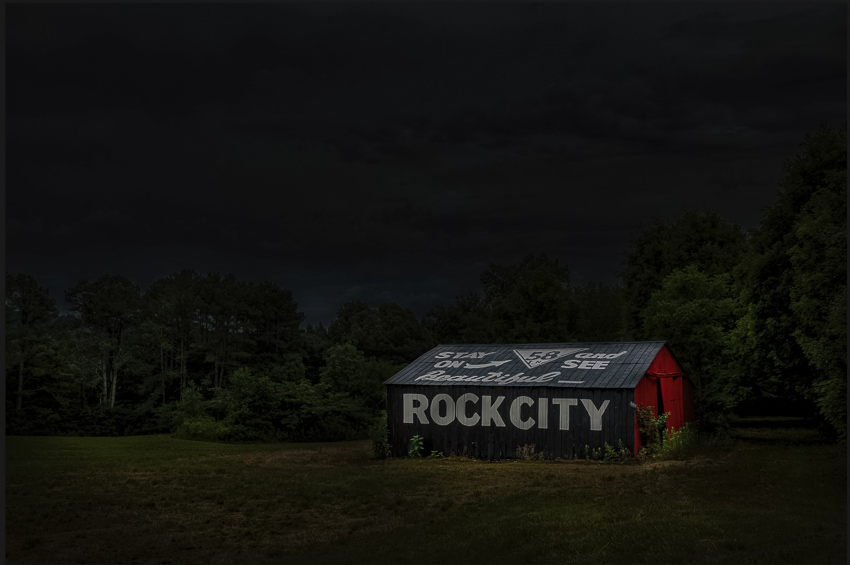
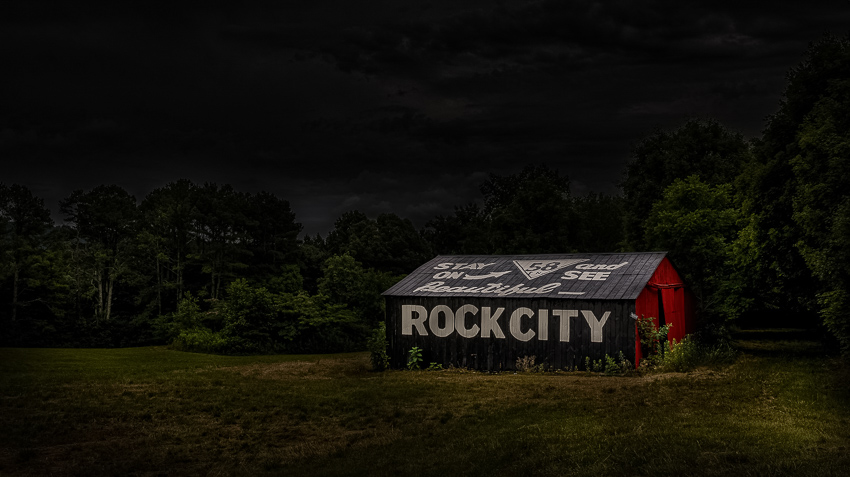
And here is the final image below. I would suggest that you don’t flatten your image and that you save it in Photoshop format (.PSD). That way if you decide later to change the image you won’t have to start over from scratch.
I’ve found that this technique works well on landscapes, Old Car City Cars, still lifes, flowers, low key portraits, and almost anything else you can think of. You can see some of my other examples at: