For the last ten years, whenever the situation permits I have always preferred to shoot on a tripod. So I’ve learned a few things that can make tripods more effective and easier to use.
Legs
First some general points about tripods. A good tripod and head will not be cheap. Tripods can be sturdy, inexpensive, or light. You can pick any two criteria. Also remember that a tripod that is too heavy to carry will do you no good. Sometimes the best tripod is the one you have with you. Spend the money on a good tripod once, rather than starting with a cheap tripod that doesn’t meet your needs and then working up through more and more tripods till you get a good one. It’s usually better to buy the tripod head and legs separately, as you may prefer different brands of each. Also one of the major choices in tripods is aluminum vs. carbon fiber. The same tripod in carbon fiber will be 25-40% lighter and 75-100% more expensive than the same model aluminum. Carbon fiber doesn’t resonate like metal, so it may have less vibrations, and they don’t feel as cold as metal in winter. Get a tripod that will be sturdy with your heaviest camera and lens, and ideally one that will bring the camera viewfinder up to or near eye level without raising the center column.
I have a Goldilocks collection of Induro carbon fiber tripods. For almost any situation, one is too big, one is too little, and one is just right. My 313 is large, heavy, and with the legs fully extended puts my camera above eye level. It is rock solid, but not the tripod I want to go hiking with. Within 50 ft of the car it will do everything I could ever need, but it’s not going on a waterfall hike. My 213 is smaller, lighter, puts my camera almost at eye level, and yet still supports a full size DSLR and my longest telephoto. I can and have carried this on long hikes. My 113 is the smallest and lightest. It doesn’t put my camera all the way to eye level, but it is small enough to pack in my suitcase. It will hold a DSLR with a normal zoom lens, And it’s perfect for a mirrorless camera. I also have a MeFOTO backpacker travel tripod. It’s best for a mirrorless, but it can hold a DSLR with a normal zoom if it’s not too windy. It’s big advantage is that it folds down to about 18in, so it fits in the smallest suitcase, or attaches easily to a small backpack. Costs range from almost $1000 for the 313 with a BH55 head ($450 for just the legs), down to $70 for the MeFOTO that I found on sale.
When extending the legs on a tripod, start by extending the thicker upper leg sections, and then extend the smaller sections if you still need more height. The exception is when your tripod will be in water, sand, mud or snow. Then you start by extending the smaller leg sections to minimize dirt and grit getting into the leg adjustment screws or clamps.
Bonus Tip for Using Your Tripod in Sand or Snow
To keep your tripod legs from digging into sand or maybe even snow, cut and fit tennis balls and slip them over the end of each leg. This will keep the legs from settling into the soft surface, and when you’re through and slip the balls off, your leg tips will be clean. I’ve seen buildings that require this to keep tripods from scratching marble floors, but it really worked well on my recent Florida trip. Cut a large “X” (about 1.5 inches each way), and then press your tripod legs through the “X”. Be very careful cutting the tennis balls. They are very tough, and it may take a lot of pressure and then the knife suddenly stabs in or through the ball. Never hold the ball while you are cutting it, because of the risk of cutting yourself. Just ask me how I know. It’s not because I lost a finger, but because from an early age my Dad always drilled “Never ever cut toward yourself and have your work supported” into me.
Here you see the lower leg sections extended first and a close up showing how the balls add stability in soft sand.
Always cut safely. Use a clamp or vise to protect your hands and fingers.
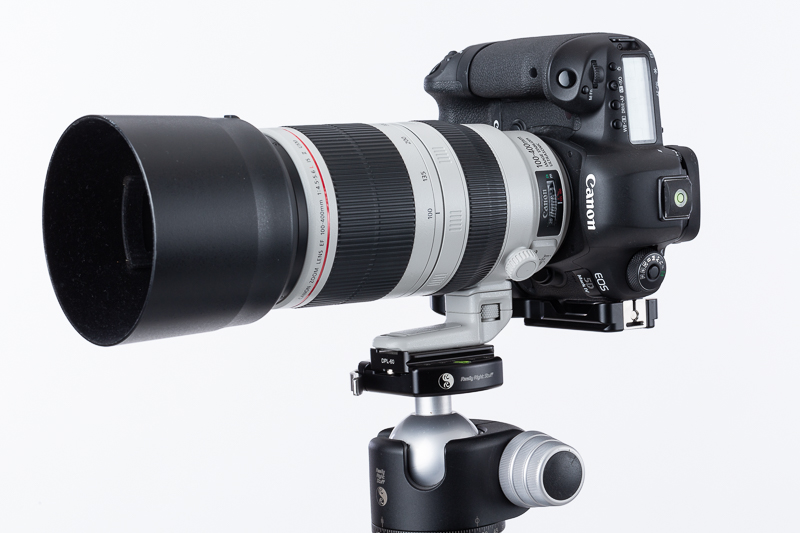
Heads
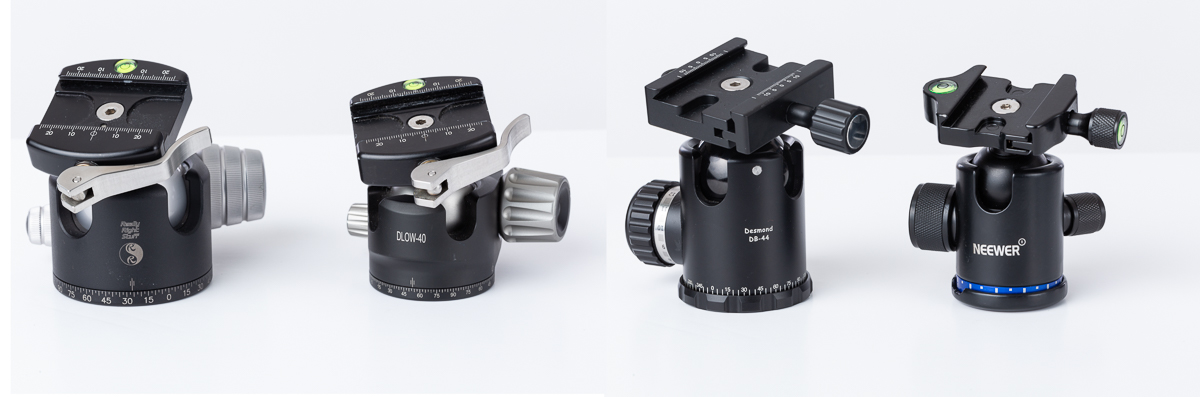
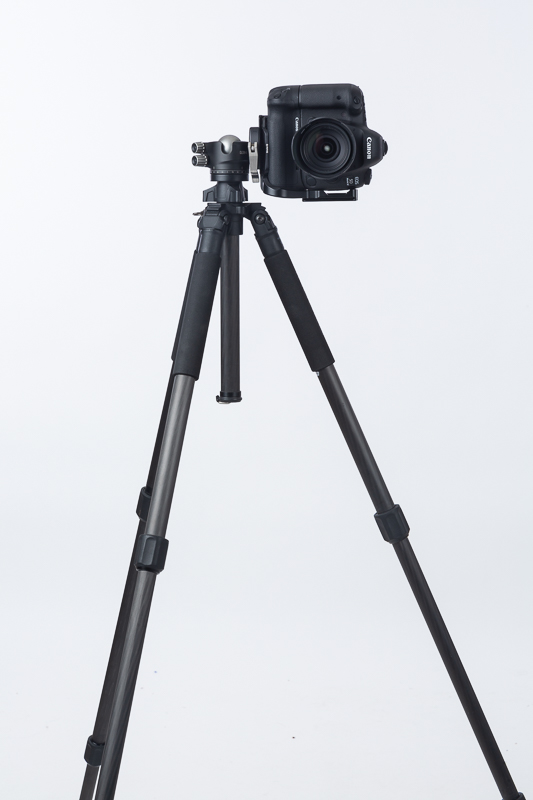
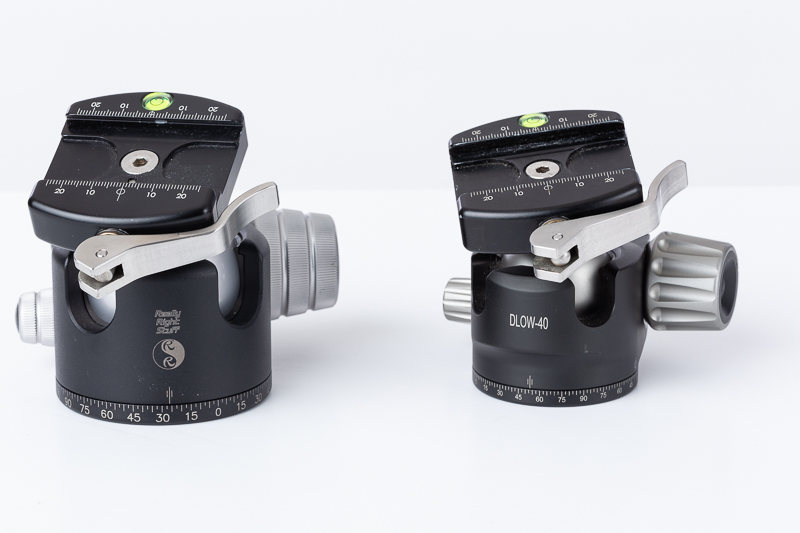
Tripod legs have a 3/8 in threaded stud that the head screws onto. Ballheads are definitely the way to go. You can adjust your camera in any axis just by loosening a single knob, positioning the camera and tightening. The better ball heads have a tension adjustment so that when you loosen the main knob, the camera can be moved, but it won’t flop down uncontrolled. Also most ballheads have a separate panning knob that is loosened to swing or pan the camera side to side. Do not get a ball head where a single knob does everything, and has no tension control. Ballhead prices vary widely. More money gets smoother controls, larger weight capacity, and greater stability. My RRS (Really Right Stuff) BH-55 with quick release plate cost right at $500. I found a Chinese DLOW 40 on Amazon for $140 that is a joy to use, but I did spend $130 to add a RRS lever quick release plate to it. the DB-44 on EBay was about $80, and the Neewer head from Amazon was under $25. It’s not smooth, but for a lighter camera it is fully functional.
Attaching the Camera
Most ballheads attach the camera with the Arca Swiss system, This is a beveled plate that attaches to the camera. It has become an industry standard (except for Manfrotto which uses their own proprietary system) and it makes swapping cameras and lenses quick and easy between different ballheads and even among different photographers which can be very useful. The most basic system is a plate with a screw clamp that attaches to the ballhead, and a beveled plate that attaches to the 1/4-20 tripod hole of the camera (or lens). The disadvantage of the single plate is that it may twist on the camera, and to shoot a vertical image the whole tripod head must be turned to vertical.
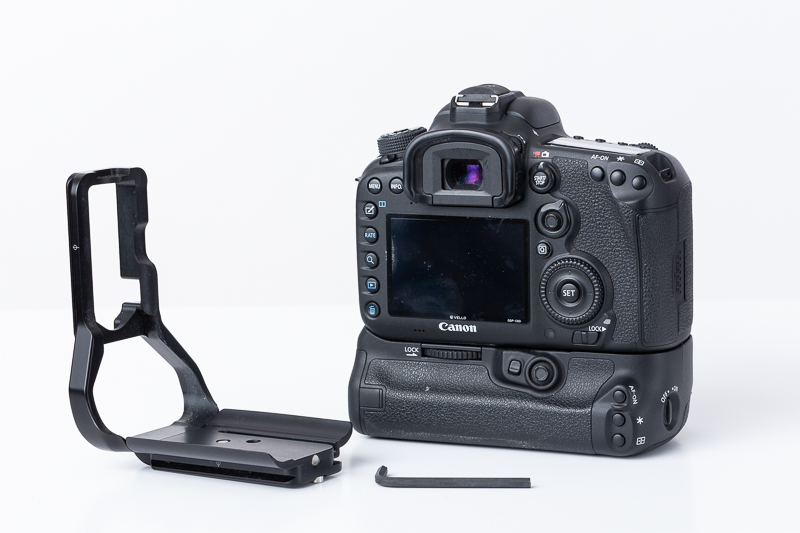
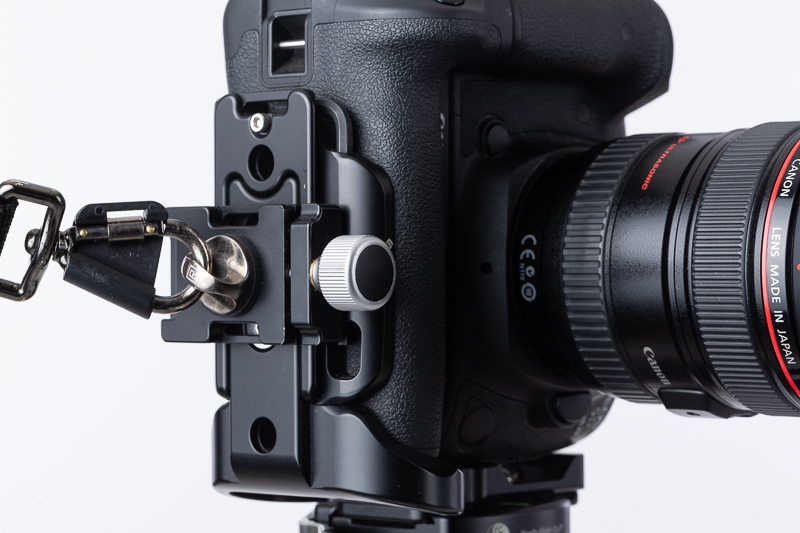
L Plates or Brackets
One of the biggest improvements I’ve found for efficiency and ease of use and speed is the L plate. These attach to the camera tripod screw hole, but have an Arca Swiss bevel on the bottom of the camera, and on the left side. Once the ball head is leveled, to switch from horizontal to vertical, just unclamp the plate and rotate the camera to vertical and tighten the clamp back up. The camera stays centered, the composition doesn’t change, the ball head stays level and the weight stays centered over the tripod. Using a single plate, going to vertical shifts the composition, the head must be readjusted and leveled and the weight is off center, making things less stable.
RRS makes custom L Plates for most current cameras. These fit perfectly, allow access to batteries and cards and cable connections, but they aren’t cheap. Other companies make cheaper fitted L Plates, or you can buy universal L Plates that fit (or misfit) most cameras. I have also found that a lever quick release plate really speeds up mounting the camera and switching between vertical and horizontal. I use the RRS plate which is $130 and sometimes costs more than the head I attach it to. There are cheaper ones, but I tried one and it didn’t grip my L plate tightly. You really don’t want a cheap plate to allow your $6000 camera and lens to slide off.
Attaching Telephoto Lenses
Most telephoto lenses include a tripod foot that is mounted to the tripod. This takes the weight of the lens off of the lens mount, and also centers the weight over the tripod for greater stability. To use these with a ball head, get an Arca Swiss plate for the lens tripod foot. These can be ordered in different lengths to fit your lens foot, and they have two tabs which snug up to the foot and keep the plate from twisting. Almost all lenses with a tripod foot have a collar that swivels, so to switch from horizontal to vertical, loosen the collar and rotate the camera without adjusting the head.
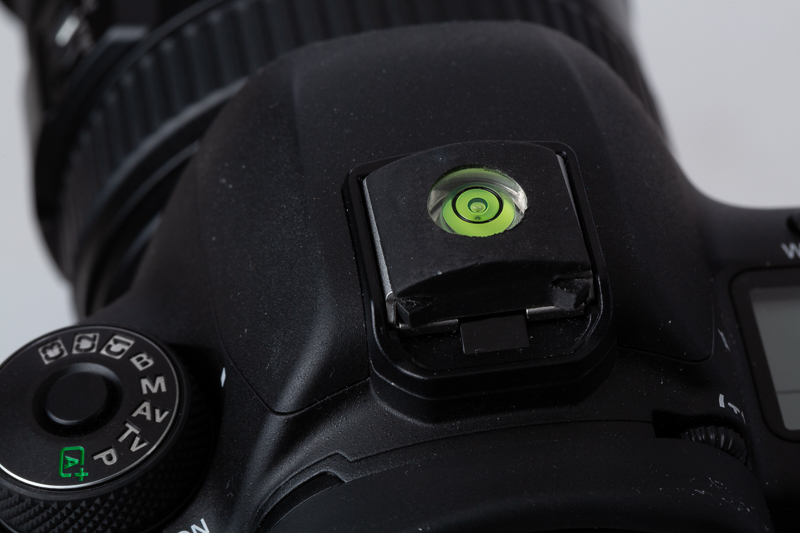
Leveling the Camera
Most modern cameras have an electronic level indicator either in the viewfinder, or the LCD. If your camera doesn’t, you can get levels that fit in the hot shoe. The simplest is small and cheap and is a small bubble in a circle. It’s good if you need your camera level in every axis, but not so good if you need to tilt up or down. Or you can get bubble levels that are more like a carpenter’s level, This works better when you need to tilt up or down. And once your camera is level, if you have an L Plate, you stay level when you switch from vertical to horizontal.
Attaching Straps
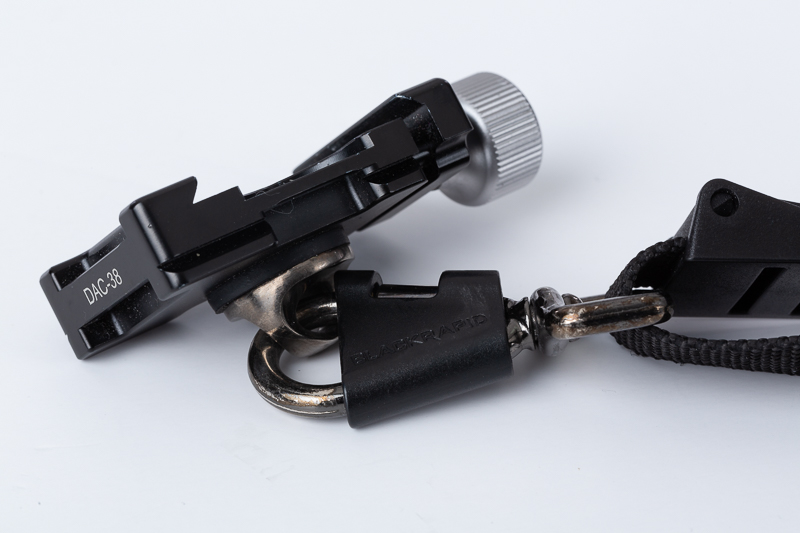
If you use the old fashion strap that came with the camera, it will work fine with Arca plates or L plates. But be aware that if your camera is on a tripod with a wind, that strap can blow and create movement in you tripod. If you use a sling strap like the Black rapid, there is a conflict between mounting the strap and using a tripod. The sling straps have a connector that screws into the tripod hole of the camera. So to use a tripod, you have to unscrew the connector and attach the mounting plate. What I do is leave my L plate attached to the camera at all times, and mount the strap and its connector to an Arca screw clamp and then clamp that on my plate for carrying, and unclamp it to mount on a tripod. Be sure to get a screw clamp that has a 1/4-20 threaded hole. Do not use a 3/8 to 1/4 adapter as it might come out and drop your camera. I would be hesitant to use this on a single universal Arca Plate as they might twist, loosen and let your camera drop. There are fitted base plates available that won’t twist and I would trust these, but why not just go all the way and get a L plate? In use, point the screw toward the front of the camera, so it is out of the way and you won’t accidentally bump it.
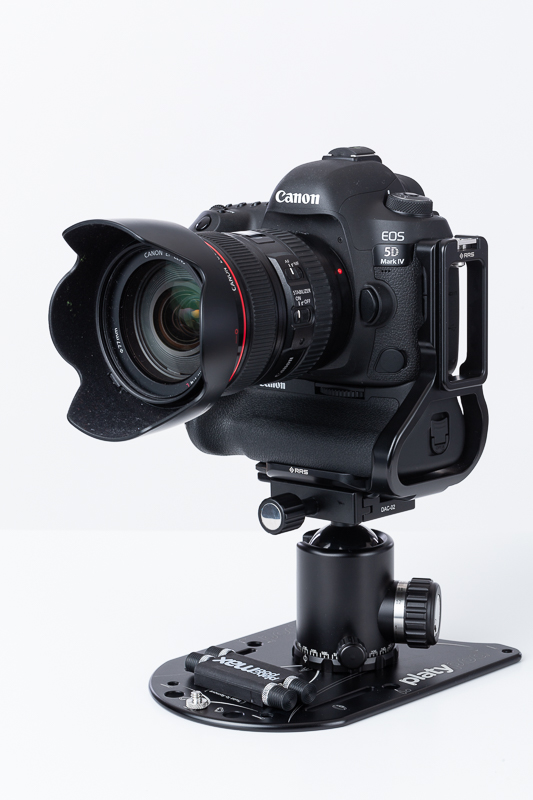
Flat Tripod Base as an Alternative
Platypod and a few others make a flat aluminum plate with a 3/8 screw for mounting a ballhead. It can used flat as is or it has adjustable feet that screw on to the base. These plates can give you an ultra low viewpoint, or you may be able to set them on the floor, in a chair or on a table in places where regular tripods are not allowed. You can buy a smaller, lighter (cheaper?) ball head to keep on your flat base, or just swap the head from your regular tripod. Platypod makes the smaller Ultra and the larger Max. Below is a generic base from Amazon with and without the feet, and the Platypod Max.