If you have used or looked at buying studio strobes, you know how expensive they can be. When you start adding on accessories and light modifiers, the cost can quickly skyrocket. Also shooting on location with studio strobes can be difficult for many reasons; the lights and stands are heavy, they require electrical power which may not be available on location, or require heavy batteries and inverters. The two biggest advantages of studio strobes are lots of power and modeling lights which allow you to preview your lighting.
If you want to get into lighting more cheaply or want a more portable location kit and are willing to work without modeling lights, speedlites (small flashes) may be a good, cheap alternative. With our ability to quickly review the image on a digital camera it should be possible to adjust your light placement with a couple of test shots. Exposure can be metered with a flash meter for the greatest accuracy or judged on the image with some trial and error. If the exposure on the subject is too dark, increase the power of the flash. If the flash is already at full power then open the aperture (lower f-stop number). If the subject is too bright decrease power or close down the aperture.
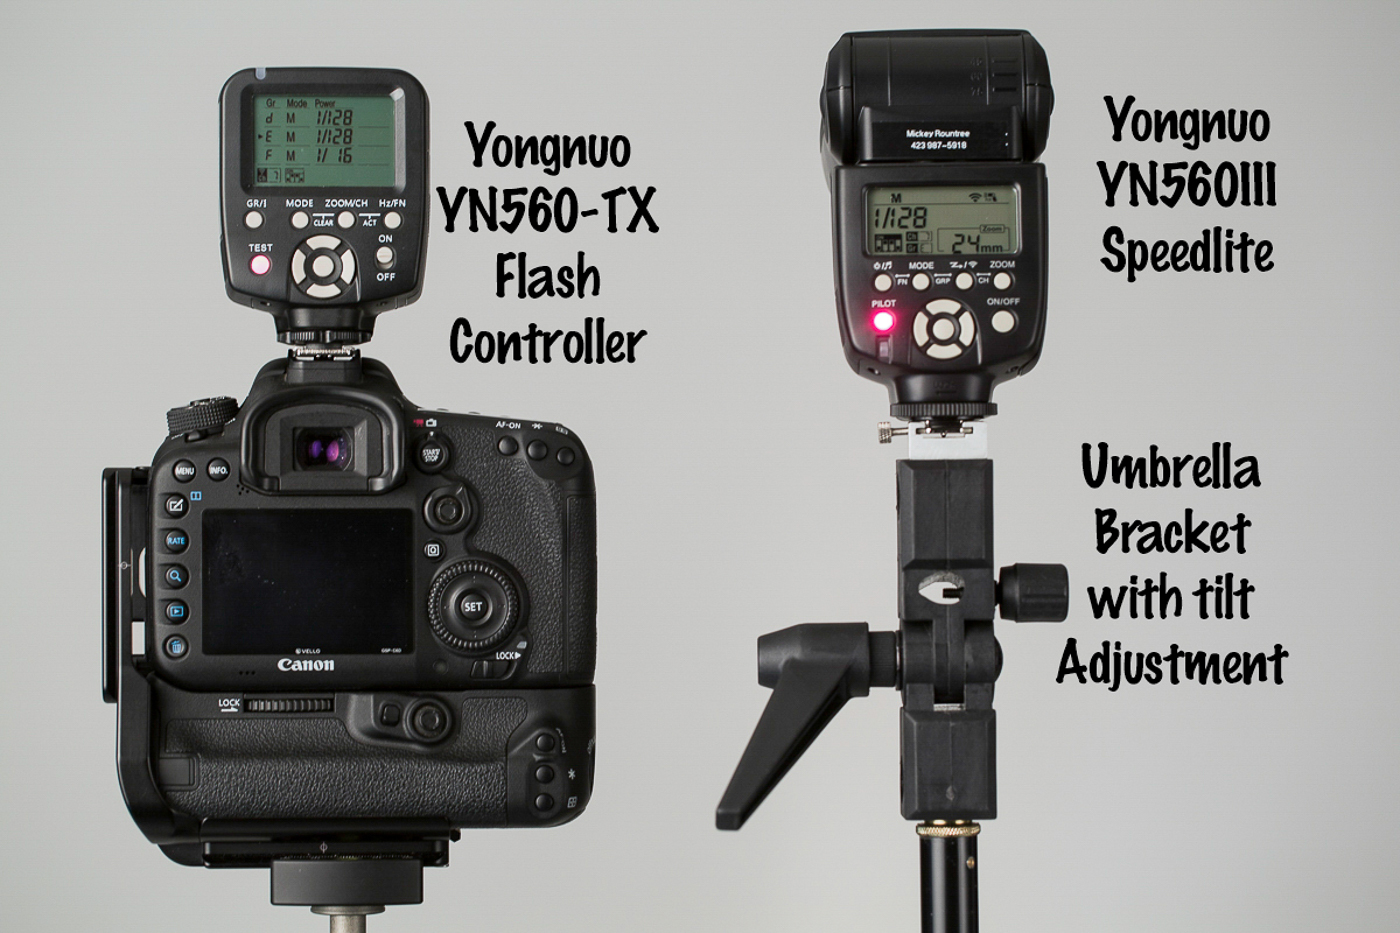
Now here is where we begin to really get cheap. The top of the line speedlites from the major brands can easily cost $600 each. They feature TTL (Through the Lens) flash metering which can be wonderful when it works, but it can also be difficult to understand and hard to troubleshoot when using multiple lights off camera. I put together a kit using Yongnuo 560III (the current model is the 560IV) speedlites. Each flash is about $65 and the controller that makes this such a useful system is only about $40. While my system uses the Yongnuo flashes, there are several other inexpensive brands if you search the camera stores or even Amazon.
Why so cheap you ask? First there is no TTL. To change the exposure output you must manually increase or decrease the power of the flash and you can do that on the flash or from the controller which mounts on the camera. The build quality may not be as good as the major brands, but at 10% of the cost of the name brand, replacing an occasional flash won’t break the bank. Also dropping or having the wind blow a flash over and breaking it won’t ruin your day. And at this price you can afford to buy several for multi-light setups and backups.
The 560TX controller attaches to the camera hot shoe. It sends out a radio signal that fires the flash, and can also remotely increase or decrease the power of each flash and zoom the head in or out. In use, all of your flashes should be set to the same channel so the controller fires them all at once. Each flash is assigned a group (a,b,c,d,e or f) and you can have several flashes share a group if you want the settings for all flashes in that group to be the same. Changes in flash power or zoom are made individually by group. Using the controller is very useful when the flash is hard to reach or contained in a soft box. I have found that there is a slight time delay with the wireless controller, so you may have to use a slightly lower maximum shutter speed. For example my Canon camera lists a synch speed of 1/250 sec, but with the controller I have to set 1/160 or slower.
Each flash uses 4 AA batteries. You can (and should) buy an external battery pack that holds an additional 8 AA’s. These increase the number of shots you can take and also decrease the recycle time. Be careful because shooting a lot of full power flashes in succession with short recycle times may cause the flash to overheat. If you’re lucky a safety feature will cause the flash to shut down until the electronics cool down. If you aren’t so lucky the flash may be permanently destroyed. Using disposable batteries gets expensive fast. Buy Eneloop rechargeable batteries and get a high quality charger like the Powerex which can charge 8 batteries at a time. The Eneloops can maintain a charge for months, unlike most rechargeables that drain down rapidly even without being used.
To use your speedlites off camera you will need a light stand for each flash. Because speedlites are so light weight you don’t need the heavy and expensive stands required for studio strobes. A 7ft stand is tall enough for most uses. I was able to but 4 7ft. stands on Craigslist for $8/ea. Even new they should be under $30. You will also need an umbrella mount for each stand. These are $10-20. Even if you don’t plan to use an umbrella this is what will allow you to tilt your flash up or down and provides the means of attaching the flash to the stand.
Light Modifiers
Modifiers are used to alter the quality and spread of light. The larger the light source is in relation to the subject the softer the light quality will be. Smaller light sources are harder and may cast shadows that are unpleasantly harsh for portraits, but may add drama and mood for other uses. A flash with no modifier is a small and harsh source.
ExpoImaging makes the Rogue Flashbenders and grids. The flashbender acts as a larger reflector to soften the light. They also have accessories to convert this into a small softbox. Grids are used to minimize the spread of light and are used for adding accents lights with a lot of control.

Umbrellas are just modifications of the basic rain umbrella. They come in varying sizes, and materials. There are white or silver reflective where the flash is aimed into the umbrella and bounces out toward the subject. With white shoot through umbrellas, the closed side of the umbrella faces the subject and the light is fired through the umbrella. The major advantages of umbrellas are low cost ($10-50), light weight, and compact storage and transport. The two major disadvantages are difficulty controlling the spread of light and they become wind sails with even the lightest breeze. Either use sandbags to weight your light stands outdoors, or better yet have an assistant constantly holding the stand.

Soft boxes do just what they say and enclose the flash in a an enclosed box. They can be square, rectangular, or octagonal. Softboxes for speedlites can be made light, compact and relatively cheap. The Impact Quickbox is a folding soft box that folds down flat and is popped out to form a 24″ square softbox with a mount that holds a flash and attaches to the stand. It is normally $135 but you can find it on sale sometime for as low as $85. I found a 32″ Octagonal softbox by Neewer on sale at Amazon for only $35. The construction is light weight, but should be very usable if taken care of. It folds down and stores like an umbrella. Like umbrellas, softboxes offer a lot of surface area that is easily blown by even minor breezes.

Beauty dishes offer a light quality with more control than an umbrella, and a slightly crisper look than a softbox. The light comes in from the back of the dish, strikes a reflector that blocks light from striking the subject directly and spreads it across the whole face of the dish and on to the subject. For several years they have been all the rage for beauty headshots and even full length fashion photography. Impact makes a folding beauty dish that is fairly light and compact for around $80. I found a metal beauty dish with adaptor and mount for a speedlight on sale for $50, but it is normally closer to $100. Metal beauty dishes are large, heavy and easily dented. Both folding and metal beauty dishes catch the wind, but are a little more aerodynamic than umbrellas and softboxes.

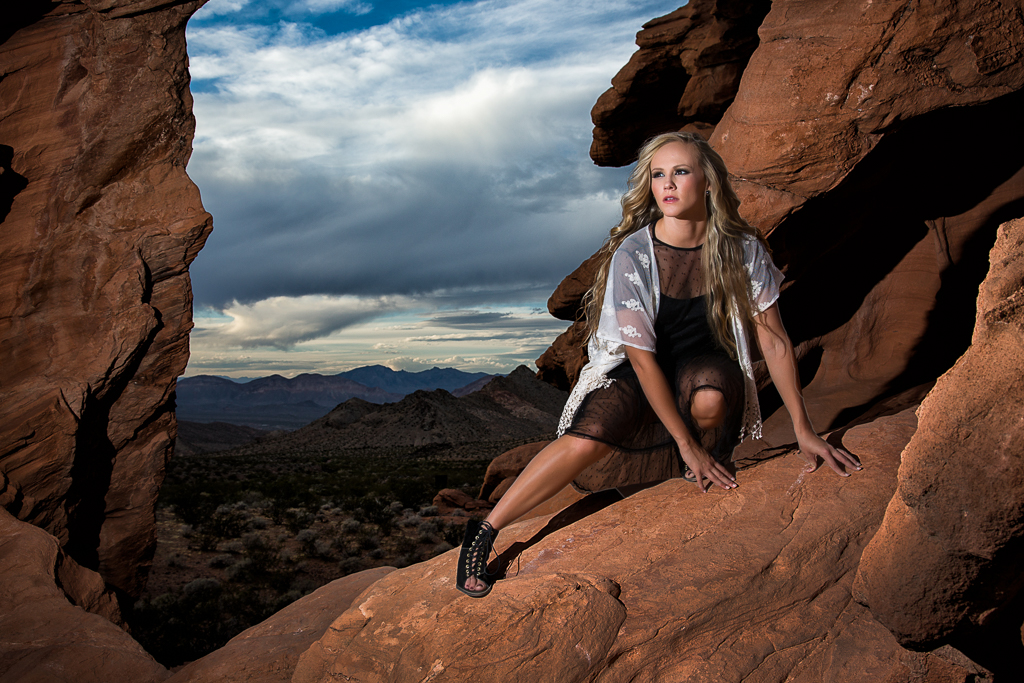
The shot below was taken with a single flash with no modifier placed about 6 feet from the model. Normally I would use a modifier to soften the light when photographing a female subject, but in this case there were several reasons that I didn’t. She was young, with great skin and professionally applied makeup, so there were no imperfections to exaggerate with harsh light. She was in the shadow of some large rocks, and I wanted the light to look more like the low sun lighting the background. Also I needed all the power I could get out of the strobe, and most modifiers cause at least a one stop loss of light. And perhaps most importantly my flash was on a stand at full extension, balanced precariously on a large rock. I didn’t want a breeze to blow my flash crashing to the rocks below and a modifier would have made the wind more likely to do just that.
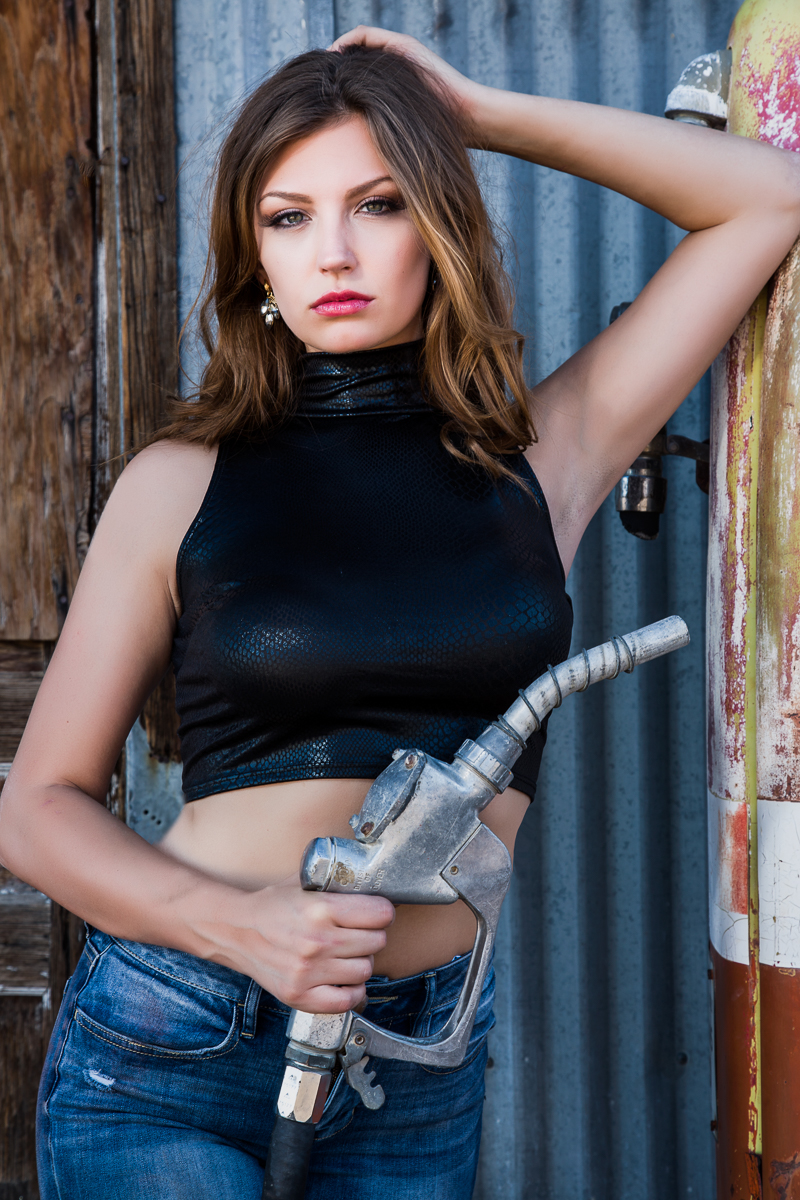
The shot below was taken in the shade of an old gas station. The light was soft, but flat and nondirectional. I added a flash with the Rogue Flashbender to light the model, add some directional light and keep her eyes from disappearing into shadow. The Flashbender helped soften the light and prevent harsh and unflattering shadows.
In part 2 we’ll look at a basic portrait setup using just one speedlite, and compare it to studio strobes.
