In an earlier article I explained how to create color profiles for your camera. Now I’ll show how to create develop presets that you can even use when you import your images into Lightroom.
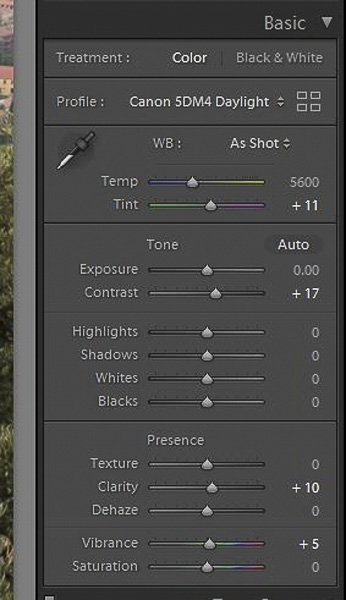
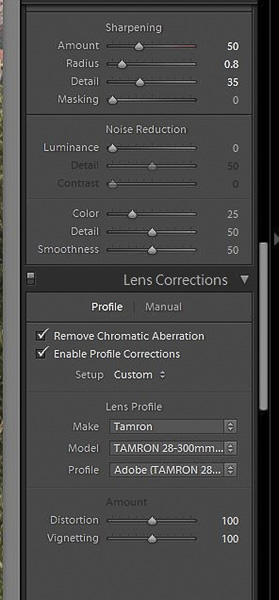
Once you’ve created a camera profile, open an image shot with the same camera and go to the develop module. Choose the color profile you created for that camera and lighting. Now make any edits that you would normally apply to any image. So I selected my 5DM4 Daylight profile, and added some contrast, clarity and a bit of vibrance. I also added some sharpening, and selected “remove chromatic aberration” and “enable lens profile correction.” I use two different levels of sharpening depending on my subject. For scenics and objects I use amount 40, radius 0.8 and detail 35, and for portraits of females I use amount 35, radius 1.4 and detail 15. These are good starting points but I may make adjustments later.
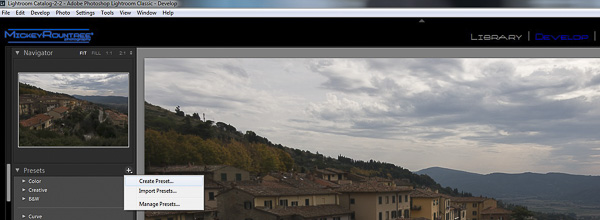
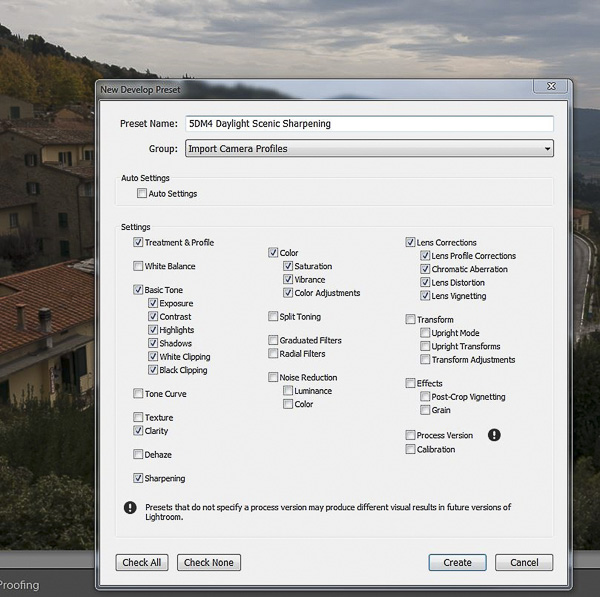
Now to begin to automate this so that all of these steps are done as we import the image, we’ll save these settings as a develop preset. Still in the develop module go to the left hand panel, scroll down to presets, and click on the “+” sign. Select create preset.
Give your preset a name and which folder to place it in. I created a folder named Import Camera Profiles. I name my presets with the name of the camera, the light, and whether I used portrait or scenic sharpening. So for each of my cameras, I have eight presets, the four color profiles with scenic sharpening, and the four color profiles with portrait sharpening.
Check treatment and profile, basic tone, clarity, sharpening, color and lens correction. Click create.
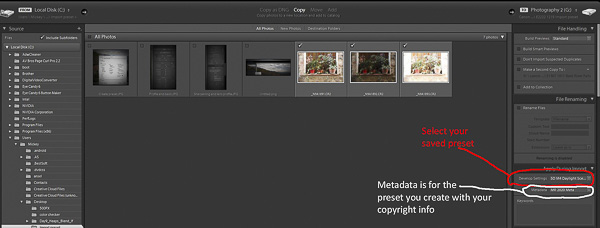
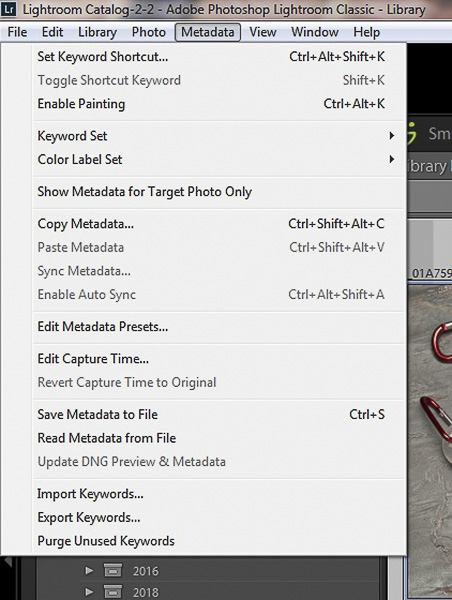
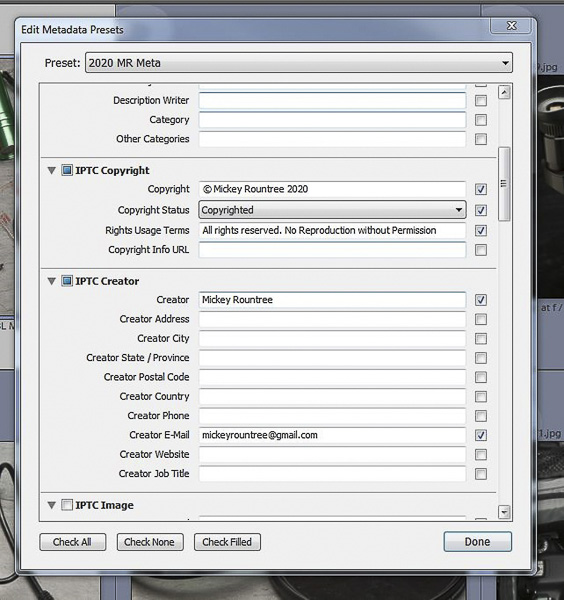
While we’re at it, let’s create a metadata preset with our copyright information. Mine are specific for the year taken, so each year I make a new preset. Go to the metadata tab/edit metadata presets and enter your copyright information. Save it with a useful name like 2022 copyright. Under IPTC Copyright I enter the copyright symbol and the year, status=copyrighted, and under rights usage I enter ” All rights reserved. No Reproduction without Permission”. Under IPTC Creator I enter my name and email. Save this preset, and remember to make a new one each year. Now when you apply this preset anyone looking at your image should be able to check the data, see that it’s copyrighted and how to contact if they want to use your image.
Now here’s how to use all of these steps to automate basic processing and add our copyright information when we import our images into Lightroom. Open Lightroom and go to file and import images. Select the images you want to import, and on the right hand side of the import panel click the down arrow beside develop settings and choose the appropriate preset. Remember that profiles can only be applied to the camera they were created for. Below that click the down arrow next to metadata, and select the preset you created for the year. Now when you import your pictures, they will have the right color profile, some basic editing and sharpening and current copyright info.