In an earlier article I wrote about using a gray card for setting the white balance. This corrects for the color of the light hitting the subject. It still doesn’t guarantee that all colors are accurately represented. Every camera sensor sees various colors differently and if you’re being really picky, different lenses transmit colors differently.
To adjust for this, I use the X-Rite Color Checker Passport test target and software to make color profiles for each of my cameras. I make four profiles for each camera based on the lighting I usually encounter, so I have a daylight, overcast, studio strobe, and fluorescent ringlight profile for each camera. So here are the steps to create a color profile for your camera.
First shoot the test target in the lighting you want to create a profile for. The target should be relatively large in the image so the software can see it well. I’ll shoot in daylight, studio strobe, with my fluorescent ringlight, and then when there is a very cloudy day.
When you purchase the color checker, it will come with software including a Lightroom plugin. Make sure you have the most current version, or download it from the X-rite site.
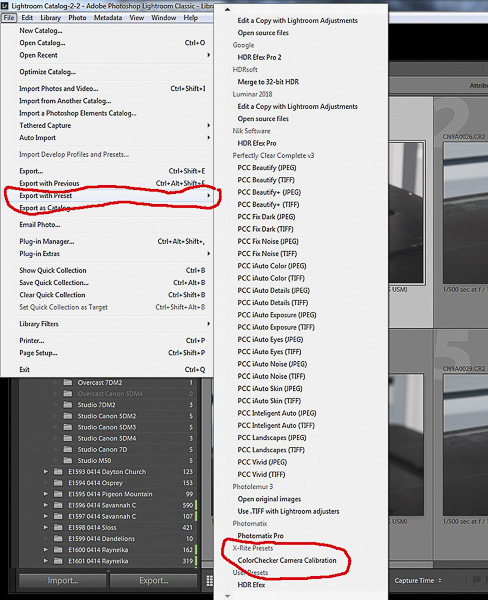
Next import those images into Lightroom. It would be helpful to name them based on the light source so you can keep that straight in creating your specific profiles. Once the images are in Lightroom select an image of the test target and then go to file/export with preset/ ColorChecker Camera Calibration.
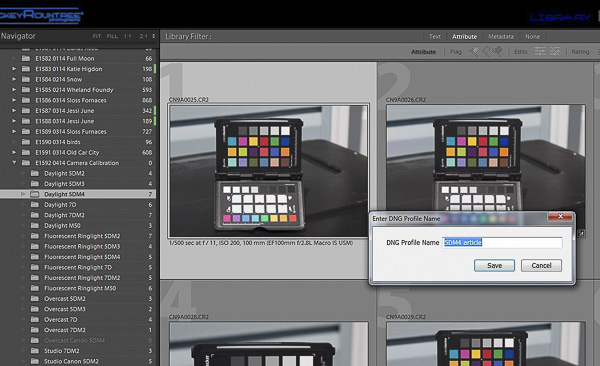
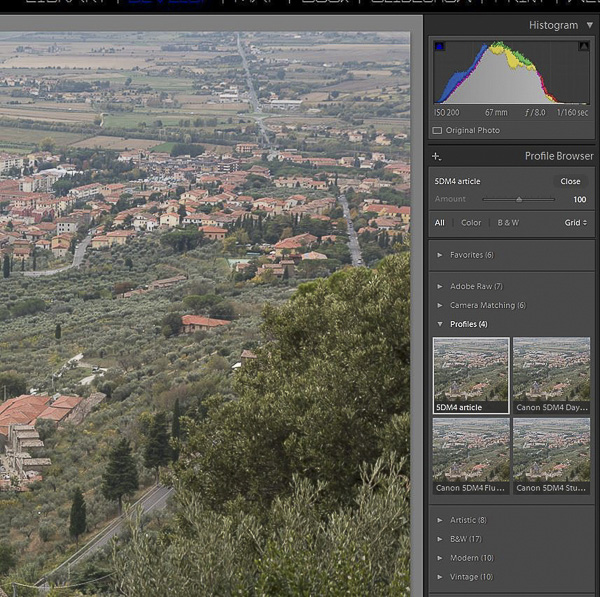
After the software develops a profile, it will ask you to name it and save it. I normally name mine with the camera name and light source. But for this example I named mine “5DM4 article” so it wouldn’t overwrite or get confused with my existing profiles. In practice my profiles for the 5D Mark IV are 5DM4 Daylight, 5DM4 Studio, 5DM4 Fluorescent, and 5DM4 Overcast. I have the same 4 profiles for all of my other cameras.
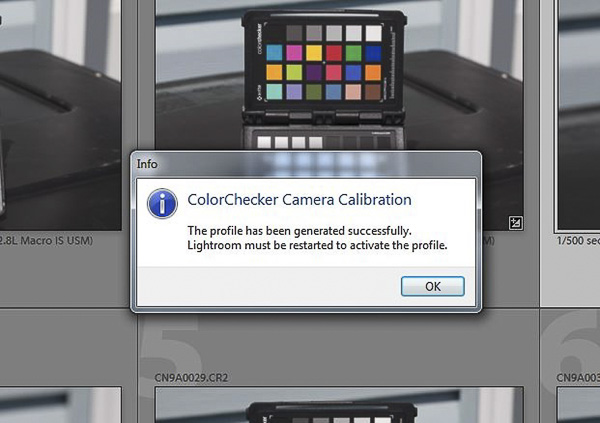
After you name and save your profile, you will be told to restart Lightroom before the profile can be used.
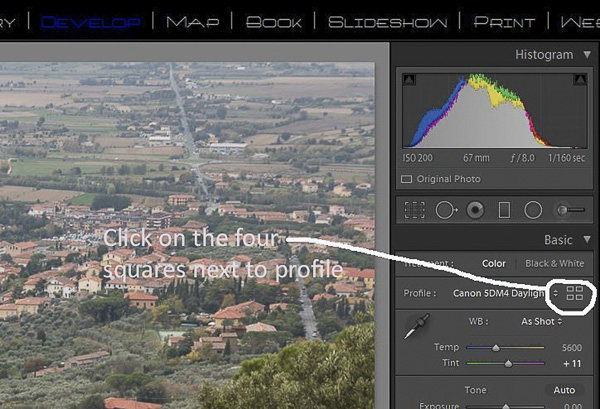
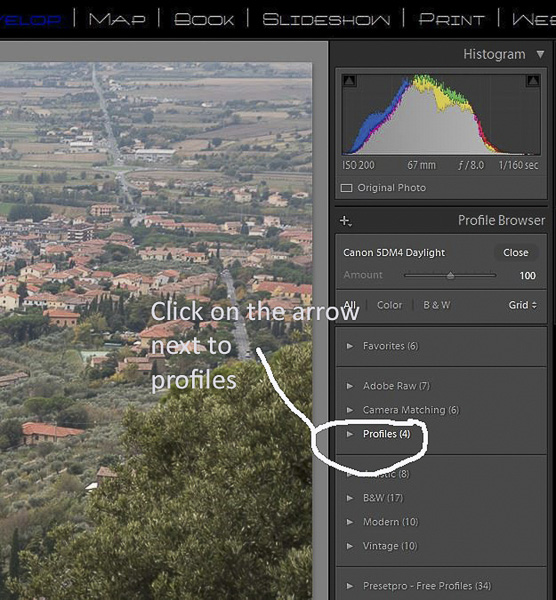
Now to use your profile, open an image in Lightroom and go to the develop module. Right above the color sliders you will see profile and four squares to the right. Click on the squares and in the list that opens, select profiles, and you should see the list of profiles for your camera. The profiles are camera specific, so even though you may have four profiles for each of four cameras you will only see the profiles for the camera used for that image. It is not possible to apply a profile for a Canon 7D to an image shot with a Canon 5D Mark V. Select the profile that matches your light and click to apply it.

It may be subtle, but you should see a difference in the colors of your image. Below are the Adobe standard profile which is the default, and my “5DM4 article” profile. The differences are subtle, but the green trees and orange roofs are more vibrant and the is more color contrast. It may be hard to see in these small screen captures, but here are the before and after images.

Creating a profile for each camera in daylight, strobe, overcast and strobe is as far as I go and it works well for my needs. Some photographers go as far as to create profiles for each camera and lens combination. Still others shoot a test target and create a profile for each shoot, and each lighting change within the shoot. That may seem like overkill, but for fashion or product photography where colors must be completely accurate it is probably a good precaution. Here is a link to a YouTube video by X-Rite on how to create profiles.
https://www.youtube.com/watch?v=TEzP8AynPos
Extra note for windows users. The camera profiles are stored in the directory:
C:\users\your_name\app data\roaming\Adobe\camera raw\camera profiles
I always make a backup of this folder and store it on a separate drive in case I need to restore them or install Lightroom on a new computer. This would also be a good practice for Mac users, but I don’t know where they are stored on a Mac.

