Photography Basics – Removing Reflections
by Mickey Rountree
There is a new feature in the October 2025 update to Lightroom for removing reflections. And since it’s in Lightroom, it’s also in Adobe Camera Raw (ACR), including the camera raw filter in Photoshop.
When these articles are converted to PDF and sized for the newsletter, the resolution and quality of the images is seriously degraded. If you would like to read the article and see the images as I did, you can see this article on my website at this link.
https://mickeyrountree.smugmug.com/Articles/Basic-Photography-Series/
Adobe recommends removing reflections before doing any other editing, but it has worked for me after editing. In Lightroom, choose the remove tool that looks like a pencil eraser. Directly below that make sure that “use generative AI” is checked. Expand the distractions panel and expand reflections. To run reflection removal first select preview, standard or best for the quality, and then click apply. The filter will run fastest in preview mode and be slowest in best mode. You can run preview for a quick look and then run best mode if you like it and want the best detail.

The interface is virtually identical in the camera raw filter in Photoshop, or opening an image in camera raw.

After running the effect, you can use the slider at the bottom of the panel. The +100 setting shows the image with reflection removal complete. The “0” setting shows the original image without reflection removal and the “-100” setting shows what the program thought was the reflection. You can use the slider to vary how much or little reflection you want removed.


The reflection removal can work shooting out of a window or car window, or outside looking in. It works best if there are defined reflections and an obvious subject on the other side of the glass. Think of the times when you wish you had your polarizing filter with you.
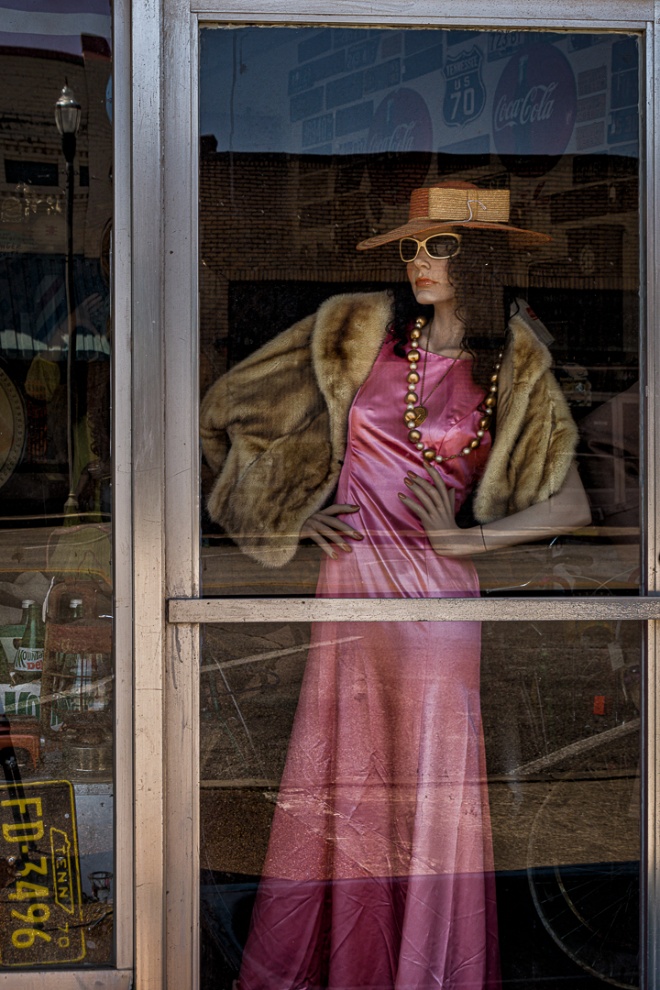
I had very few examples to show because I usually just avoid shooting when there are strong reflections. However, one day I was shooting in Rockwood TN and reflections actually were part the image I wanted.
Below you can see it removed a lot of the reflections, but left some of the reflected buildings. It seems if the reflection is very sharp it sometimes can’t decide if it’s subject or reflection.