by Mickey Rountree
Shooting in mixed light sources, with fluorescent lighting, or at varying times of day can result in inaccurate color balance. One of the simplest and most accurate ways to correct the color balance in post processing is to shoot a gray card in the same light as your subject in one shot, and then shoot the rest of your shots.

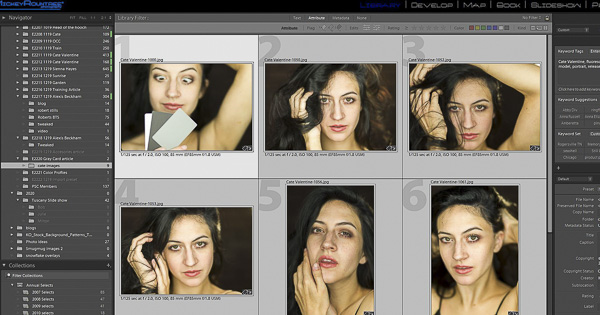
Once you import and open your images in Lightroom, select the image with the gray card, and then select all of the other images shot in the same light. With all of the images selected, go to the develop module, be sure that “autosynch” at the bottom left of the develop panel is turned on.

Select the white balance eye dropper.
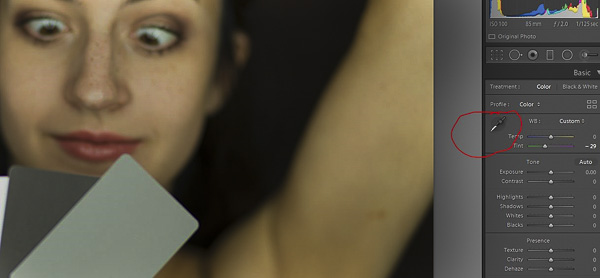
Then click the eyedropper on the gray card, or middle gray card if you are using a set of three like this example.

At that point all of your images should be color corrected. It may take a few seconds for all of the previews to update to the correct color.
Here is an example where I was using a fluorescent ringlight, and the results are slightly green. After selecting all of the images and clicking on the middle gray card, you can see the corrected images.
Images have a slight green cast before correction
After clicking on the gray card, you can see the green cast is now gone.

At this point your color is technically accurate. Keep in mind that accurate may not be exactly what you want artistically. Some people prefer portraits of people to be a bit warmer (increased yellow and possibly slightly increased magenta) while landscape photographers may prefer a slightly cooler (more blue) image for some scenes. But the gray card gives you a good starting point to work from. While I always shoot RAW and feel that it gives you the best options for color balance, this technique works just as well with JPEGs and even cell phone pictures.
