by Mickey Rountree
Very few images come out of the camera that couldn’t be helped by some basic adjustments. Every time I’m involved in judging a contest, the most frequent comments by the judges are lack of sharpness, lack of contrast, and poor exposure. There is not much you can do about sharpness after the fact, but there is a great deal you can do to improve contrast and exposure. As I’ll show you it’s even possible to salvage what starts out as a bad image.
I’ll be using Lightroom, because that’s what I use regularly and what I’m most familiar with. You could also use Camera Raw in Photoshop or Photoshop Bridge, Canon Digital Photo Professional, Nikon’s ViewNX 2, or even free software like GIMP.
One very important fact to know about processing in Lightroom is that it is non destructive editing. The changes you make do not directly change the image file, but go into an instruction set that tells the computer how to display the image. If you make a change you don’t like you can step back, or you can even select reset to undo all of your changes.
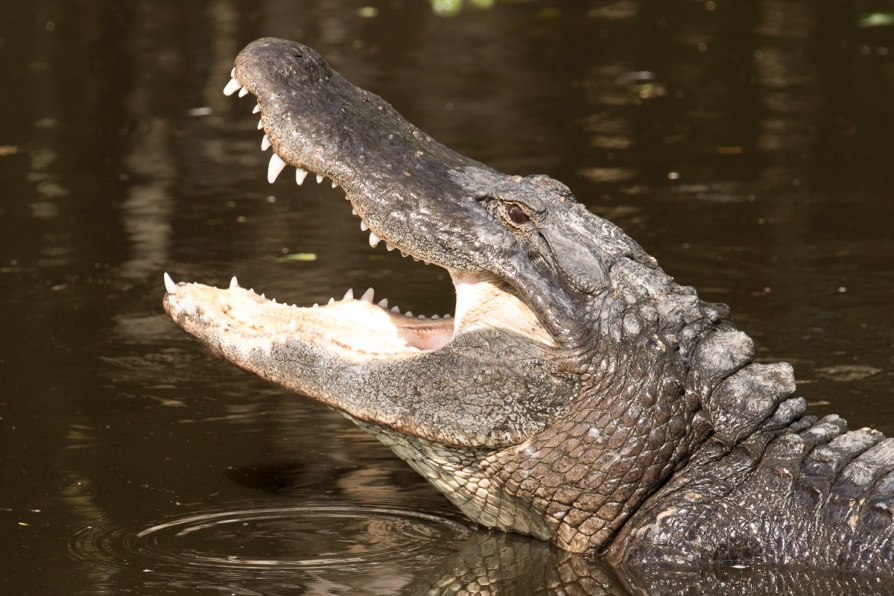
Here are a couple of images that don’t look good at all straight out of camera (SOOC). Even I can take less than perfect pictures, but I also know when it’s possible and how to rescue them.
This shot of the alligator is badly over exposed and flat looking. He came up and snapped so quickly that all I had time for was one quick grab shot with no time to correct exposure as I shot.
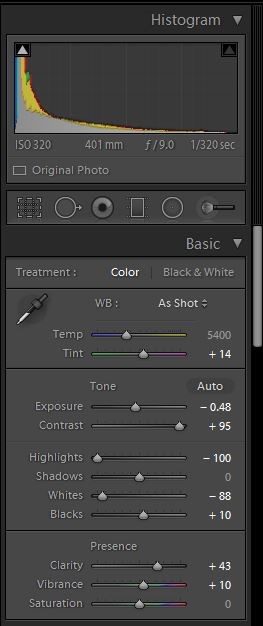
In Lightroom I switched to the develop module and began my corrections. I usually adjust the white and black points first and then follow the order of the sliders as I make my adjustments. To have Lightroom adjust them automatically, place your cursor on the word “black” hold shift and then double click. Then repeat for white. I decreased exposure to -48, just by trial and error. Remember, you won’t hurt your image my playing around with the sliders. I wanted a very dramatic image, so I took the contrast all the way up to 95. Normally 25-50 works for most images. I also completely decreased highlights, because the light inside of his mouth was so extremely overexposed. I increased clarity to 43 to improve midtone contrast and increase the appearance of sharpness, and just slightly increased vibrance. Vibrance increases the saturation of colors which have low saturation, without affecting colors that are well saturated or skin tones. I rarely increase saturation because it can quickly cause colors to block up and look posterized.
Lightroom usually adds a sharpening value of 25 by default, but here I increased it to 40. Also you can just see below that that I almost always check profile correction and remove chromatic aberration. Lightroom can usually detect the lens used and adjust for its distortion and vignetting. It doesn’t make a huge difference on this image, but it can drastically improve architectural shots or images with straight lines.

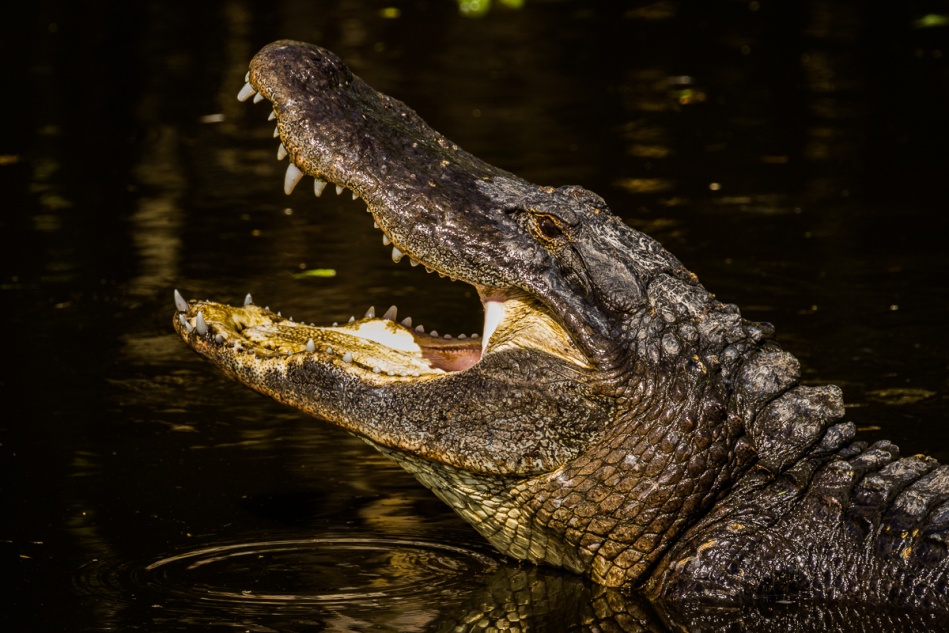
Here is the final image with only basic adjustments. I hope you’ll agree that it is much improved over the original.
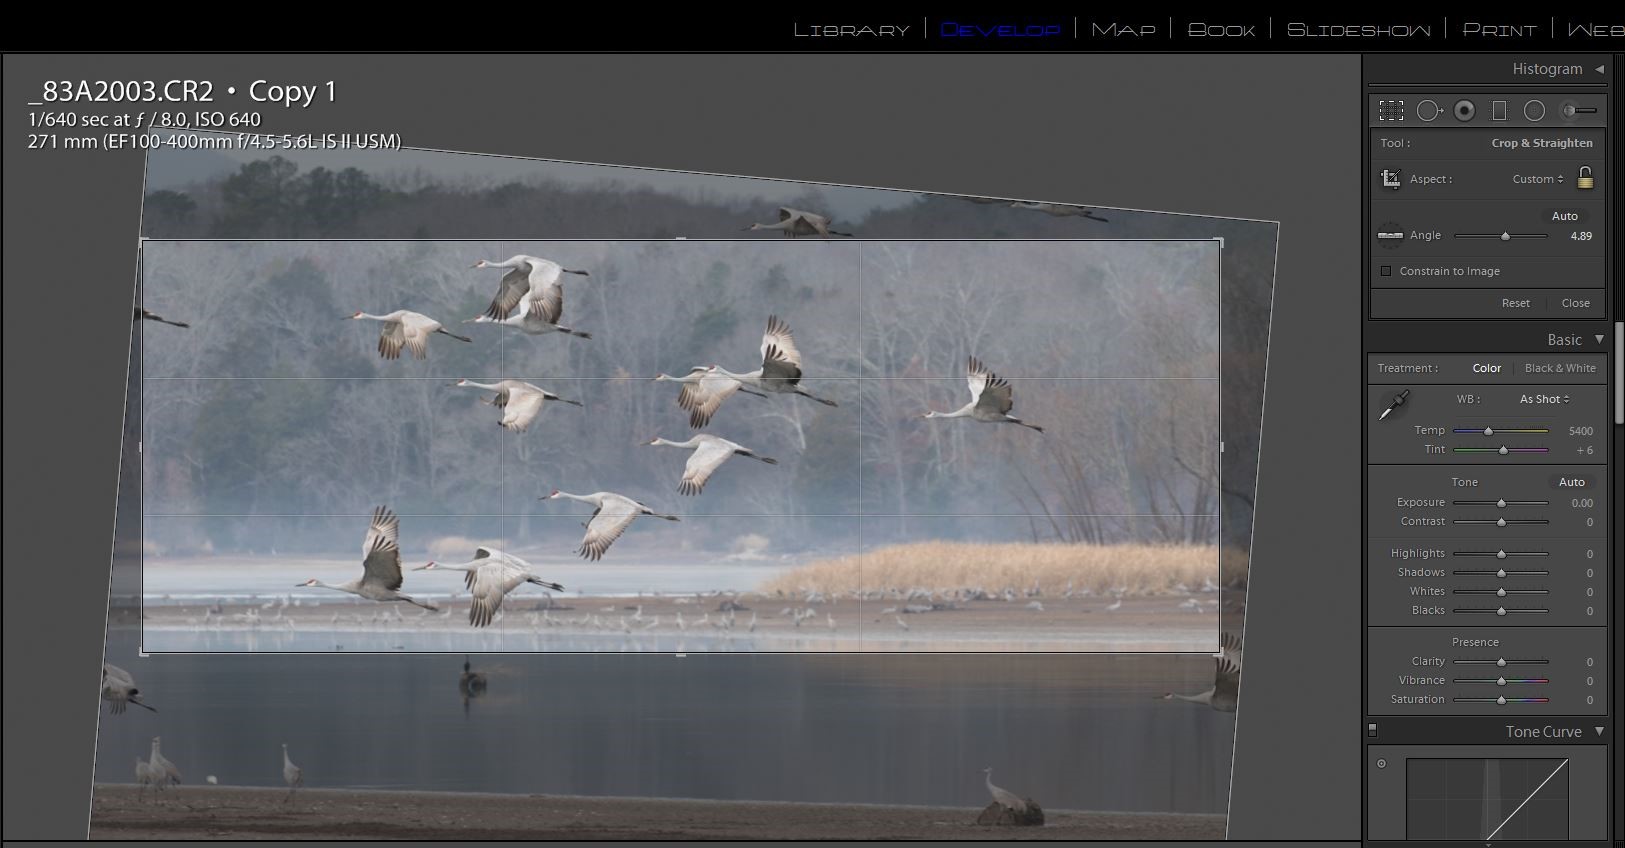
Here is one more quick example. This shot of Sandhill cranes in flight was made on a very overcast day which caused it to have very low contrast. I was also shooting quickly from a moving boat and the horizon is badly tilted. Here is the SOOC image.
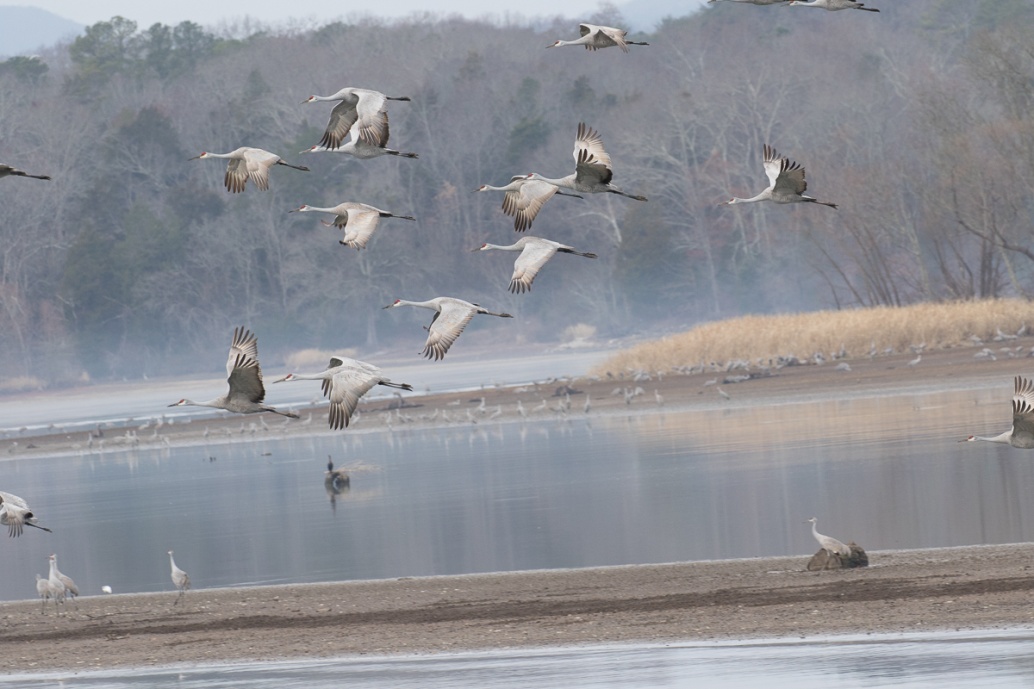
I like to fix the really annoying errors that distract me before I do even the basic edits. In this case it was the badly tilted horizon and cropping. I selected the crop tool and then the level tool and drew a line across the waterline to fix the tilt. Then I cropped in on the main flight of cranes and eliminated the partial birds and the foreground elements that didn’t add to the image. You don’t have to keep the original perspective or keep to the standard picture frame dimensions. Here I preferred a panoramic format.
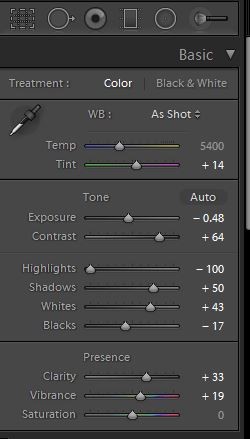
Now that the cropping and horizon are fixed, it’s easier to see what needs to be done. I first adjusted the white and black points as described above. Then I decreased the exposure by about 1/2 stop, and made a large increase in contrast to +64. I decreased the highlights and increased shadow exposure a bit. I added some clarity for details, and added +19 of vibrance to bring out the cranes’ red heads.
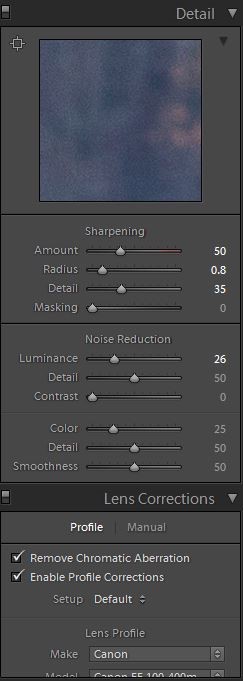
I increased sharpness from Lightroom’s default 25 up to 50 and checked lens profile and chromatic aberration. Since this image was shot at a high ISO to allow a fast shutter speed, I also increased luminance noise reduction from the default of 0 up to 25.
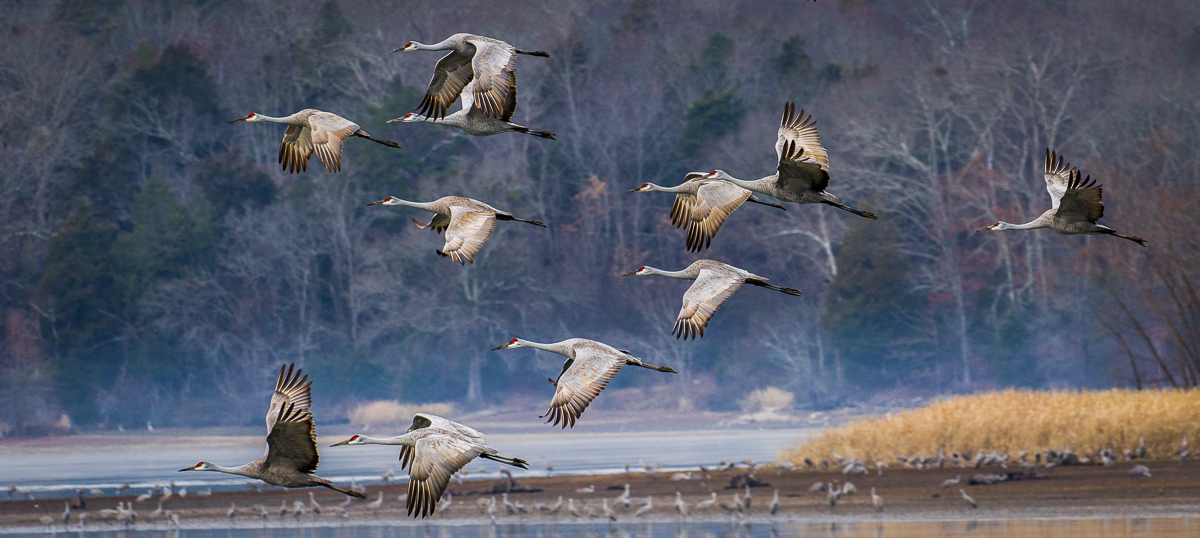
Here is the final image with corrections.
So now you see how much an image can be improved with just basic adjustments – no Photoshop magic, no “cheating”.
