Adobe Photoshop has had HDR Pro built in since version CS5. I rarely ever use it because I either create my more photorealistic HDR images in Lightroom, or the wilder images in Photomatix. But here are the basic steps involved in creating an HDR within Photoshop.
Again I’ll be using the same six images we’ve worked with in the previous articles. The first step is getting you images into Photoshop HDR Pro. As usual there are a couple of ways to do this.
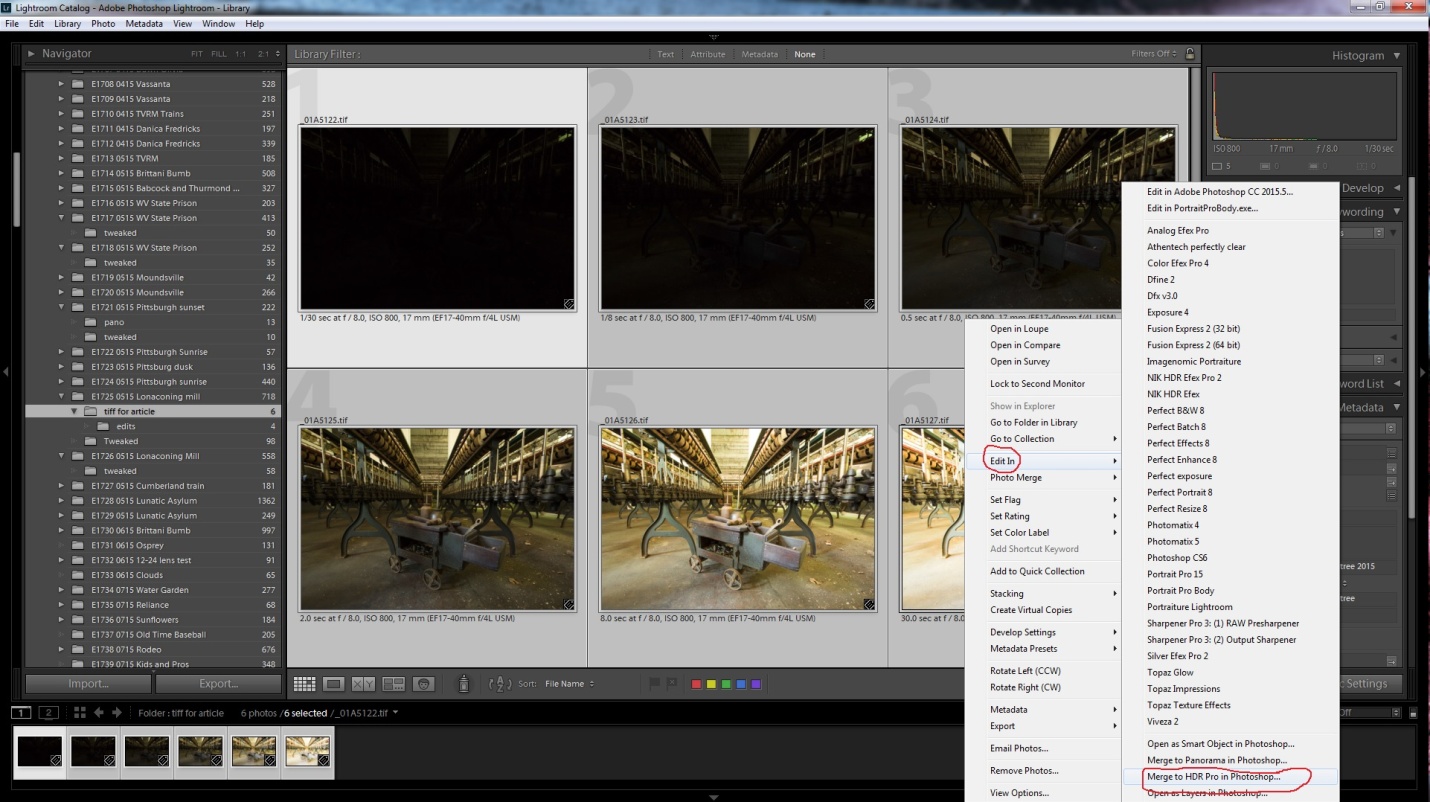
If you use Lightroom, select your images, right click and choose edit in/merge to HDR in Photoshop.
If you don’t use Lightroom, there are two ways to get your images into HDR Pro.
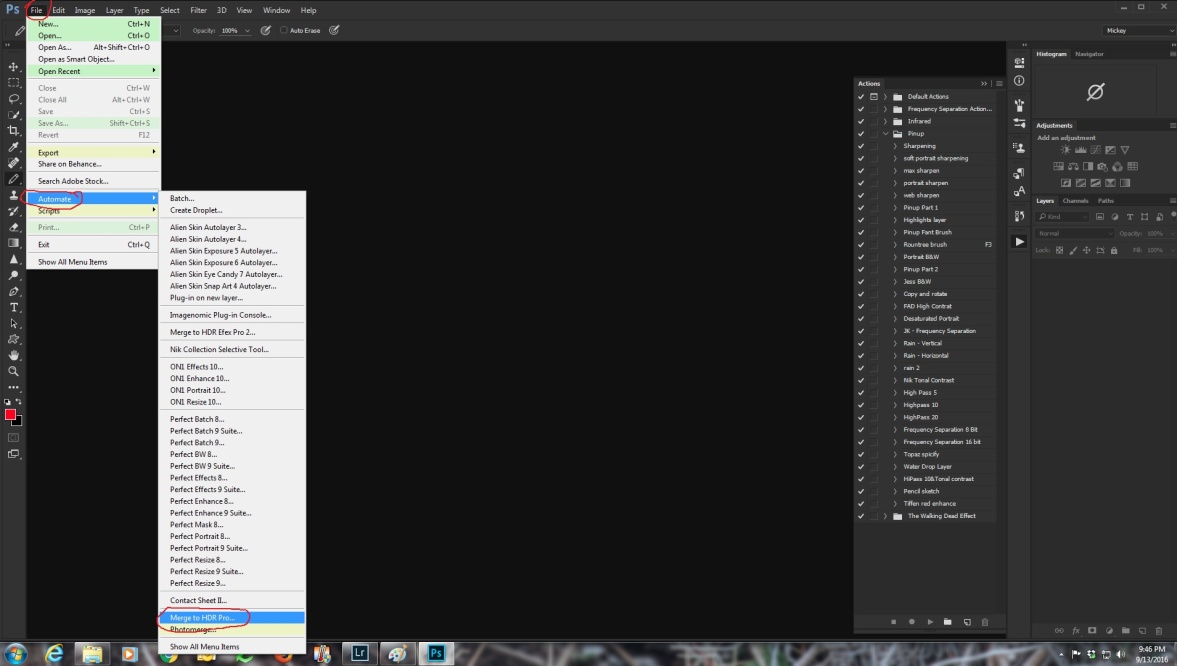
The first is not so obvious because it begins with file/automate/merge to HDR Pro.
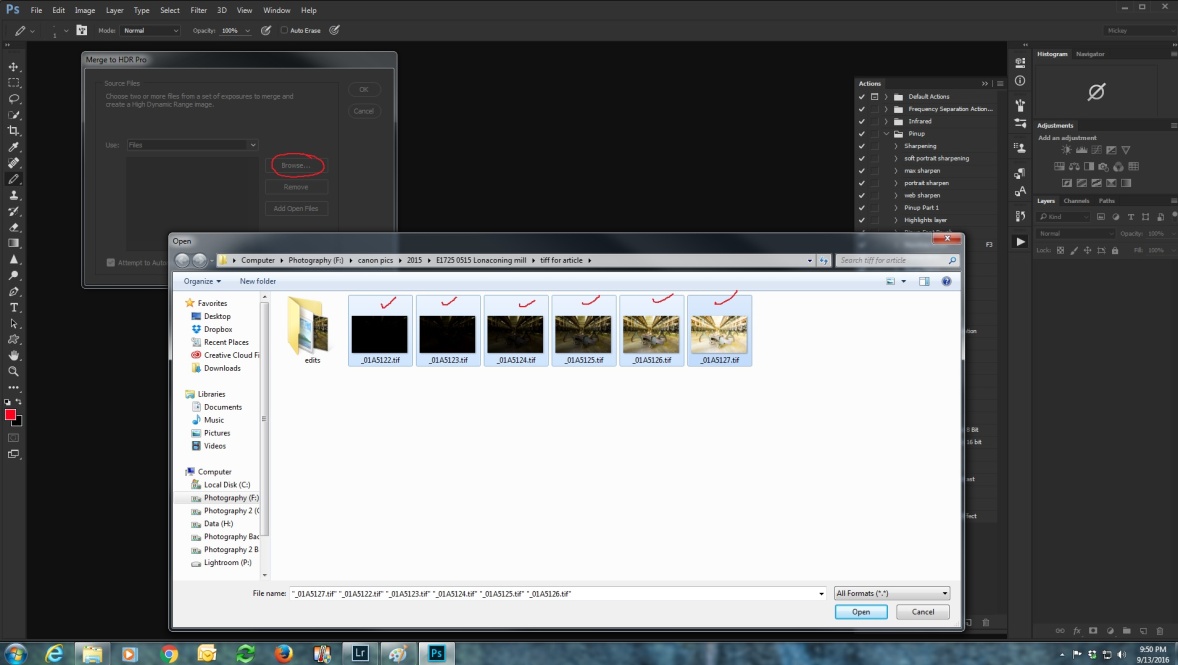
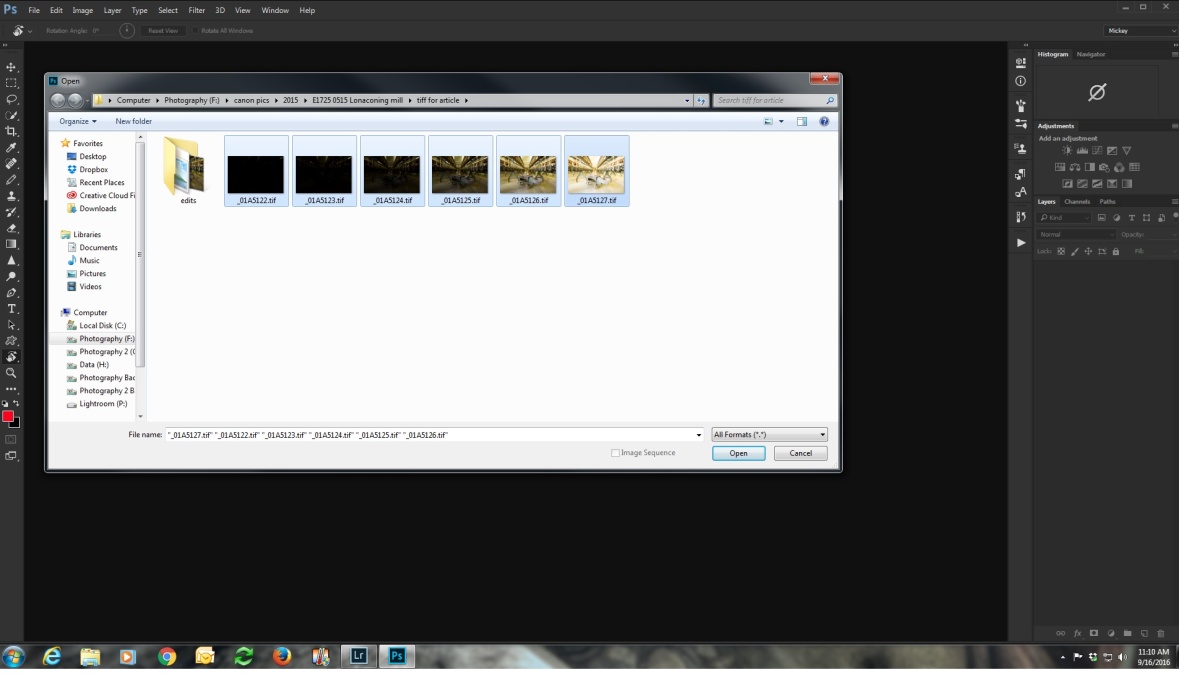
After you select Merge to HDR, you’ll see a dialog box where you can browse and select your images. Once you select them click open.
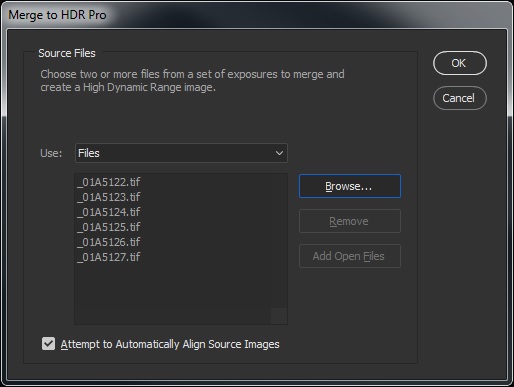
After opening the files you’ll see the dialog box below. Check attempt to automatically align images and click OK.
The other way is to open Photoshop, and choose file/open and browse to select your images. When you have them selected, click open.
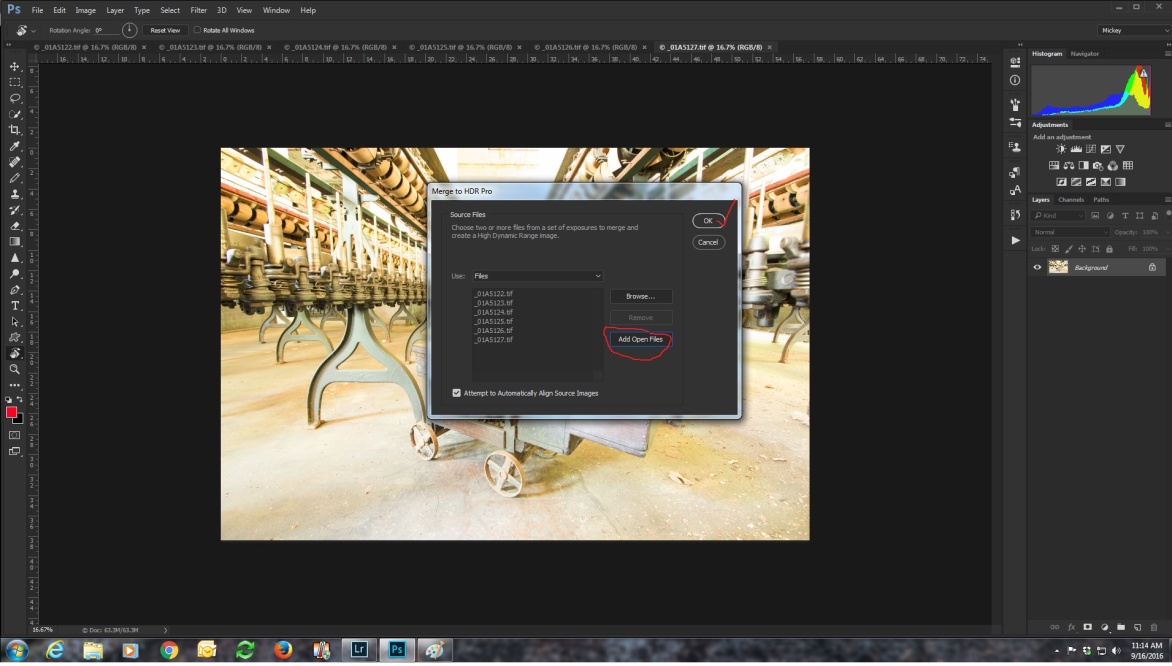
At this point you have six separate files open. Now go to file/automate/merge to HDR.
Click add open files and click OK.
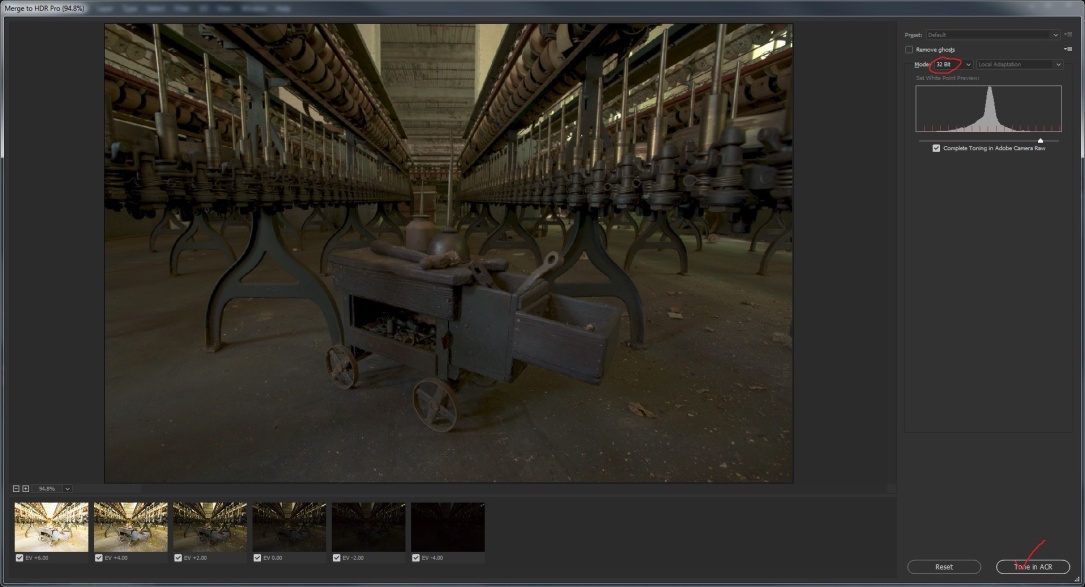
Now the next screen opens, and you can select two ways to process your image. Again only check remove ghosts if there was movement in the images. If you leave the color depth at 32 bits, “complete toning in Adobe camera raw” will be checked.
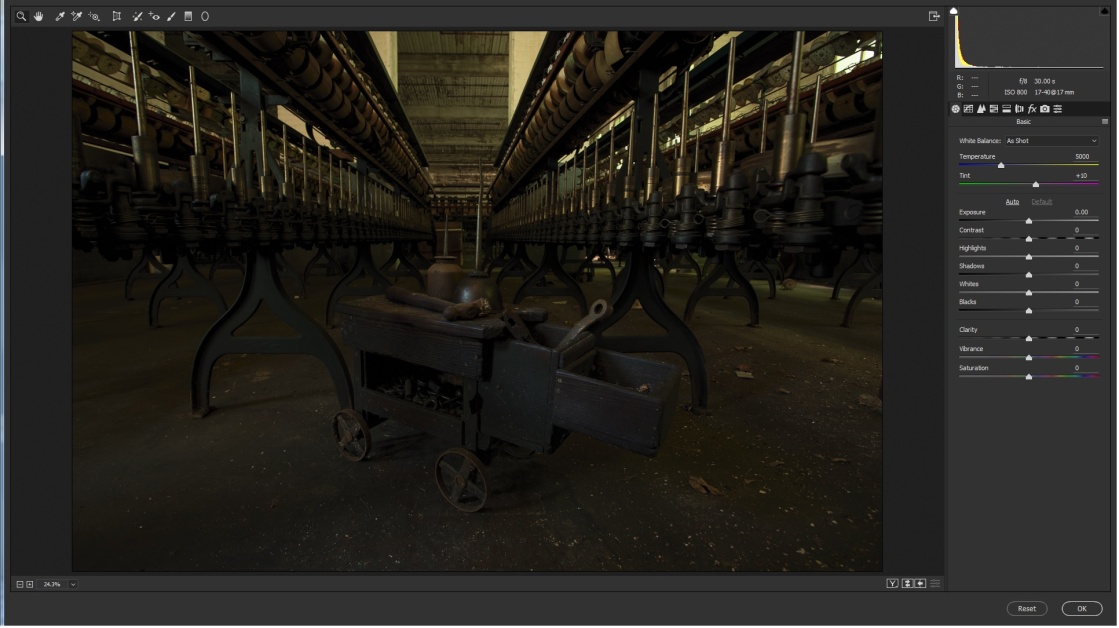
Click tone in ACR and you will see the screen below. If it looks a lot like editing in Lightroom, that’s because it’s exactly the same. I won’t go into details here, because we covered that in part 3.
If you select 8 or 16 bit color depth, toning in Adobe camera Raw is not an option. You’ll see the screen below. If you leave the preset at custom, basically you’re on your own. So start moving sliders and see what you like. Here I adjusted strength, gamma, and exposure.
You can select from a range of presets and see if any are close to what you like. Most of the presets are pretty much unusable, but you might find Scott5 (named for Scott Kelby) or RC5 (named for RC Concepcion) useful starting points. Below I’ve selected the Scott 5 which is my favorite starting point.
As usual, I would either make further edits in Lightroom, or in Adobe Camera Raw (ACR) since I’m already in Photoshop. And then I would do my final touches in Photoshop which is the subject of Part 6.