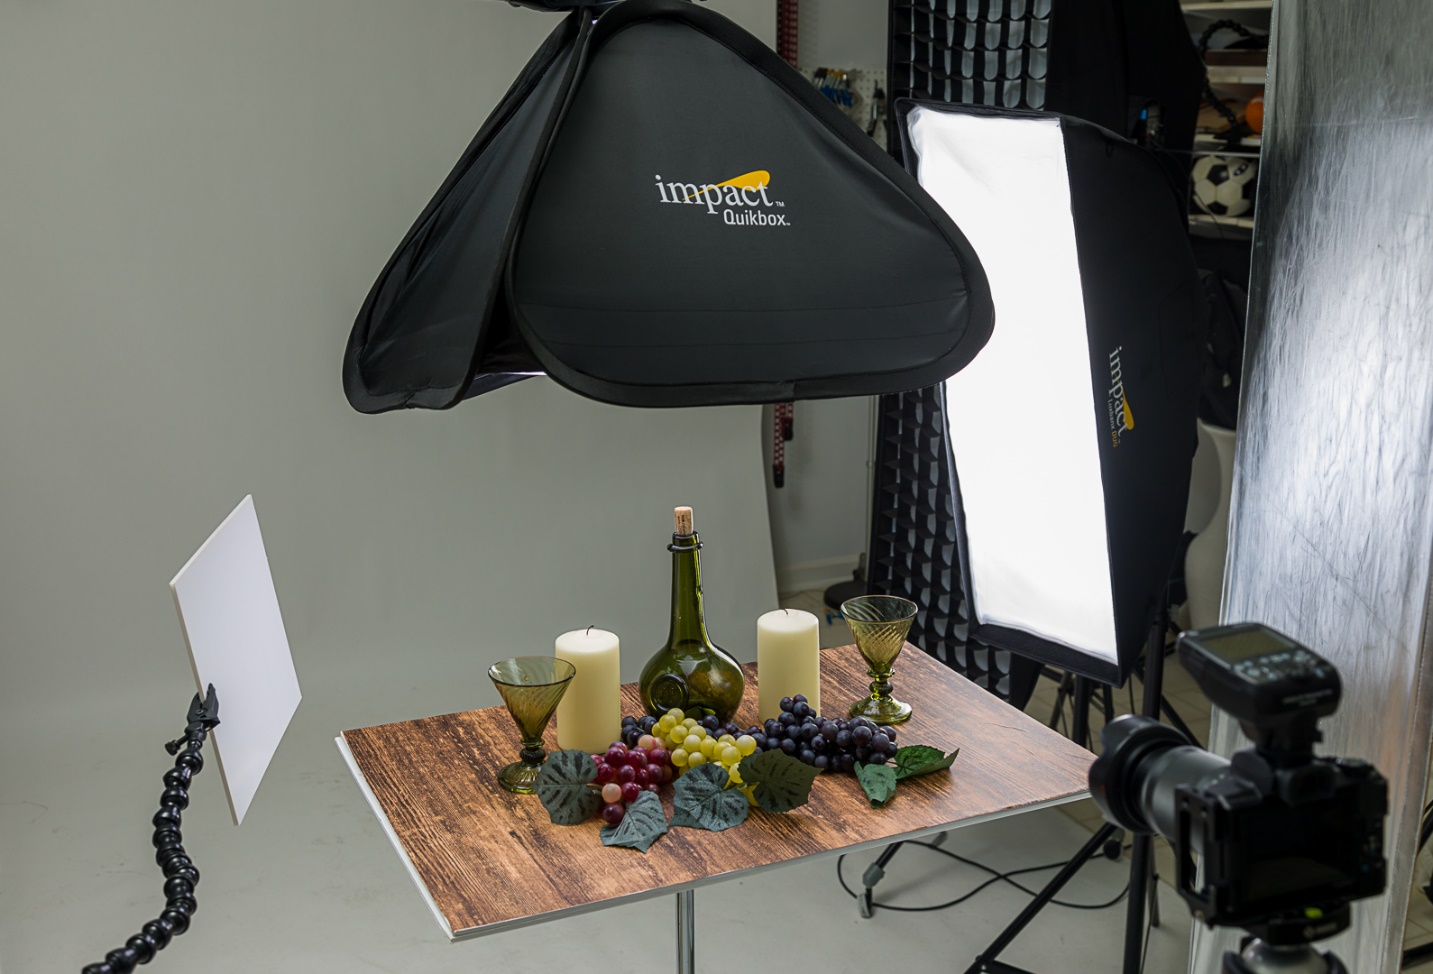
One of the simplest and most versatile lighting setups for still life photography is a small or medium softbox almost directly above the subject. The most important concept to keep in mind is the larger the light source is in relation to the subject, the softer and more even the light will be. That also means placing the light as close to the subject as possible without blocking the camera’s view. For the shots below, I used a 24 inch square softbox, because it gives me good control of the light. But in most cases a small translucent white shoot-through umbrella would work just as well and is much cheaper. Depending on the subject you will often have to add reflectors to fill the shadows, flags to block light or occasionally even add an accent light.
While I used a Yongnuo speedlite and remote, you could use any speedlite, a studio strobe or even a continuous light source like a tungsten or quartz light, CFL, or LED. If you use a tungsten or quartz light be sure the softbox or umbrella you use is designed to work with these hotter lights without catching fire.
This is a great setup to use to photograph small objects for insurance records, or selling on EBay or Craigslist. Or just use it to create still life images when you don’t want to go out shooting.
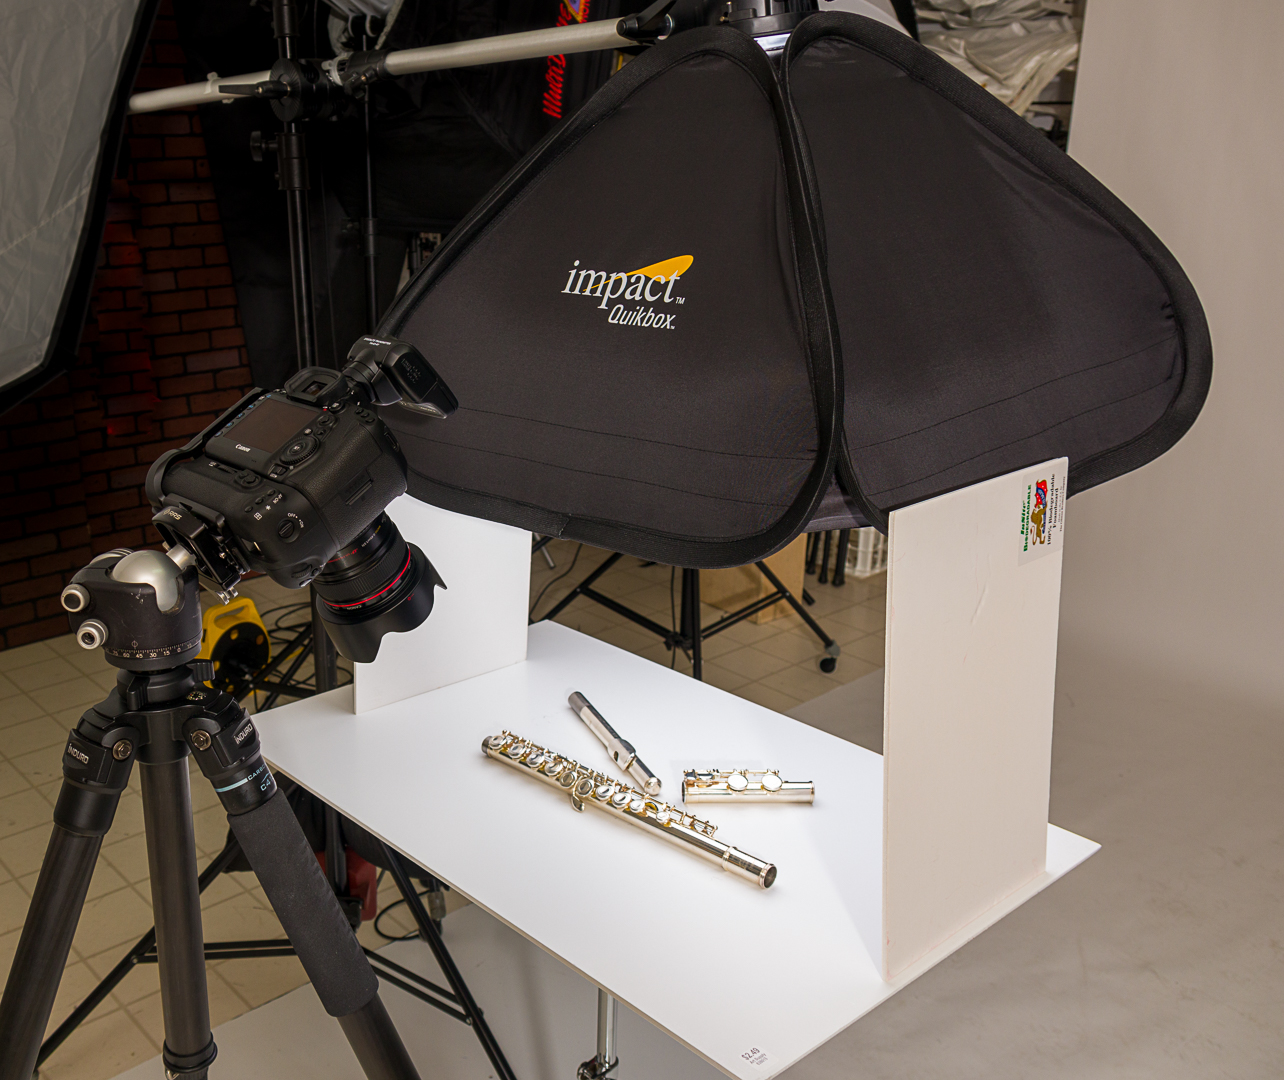
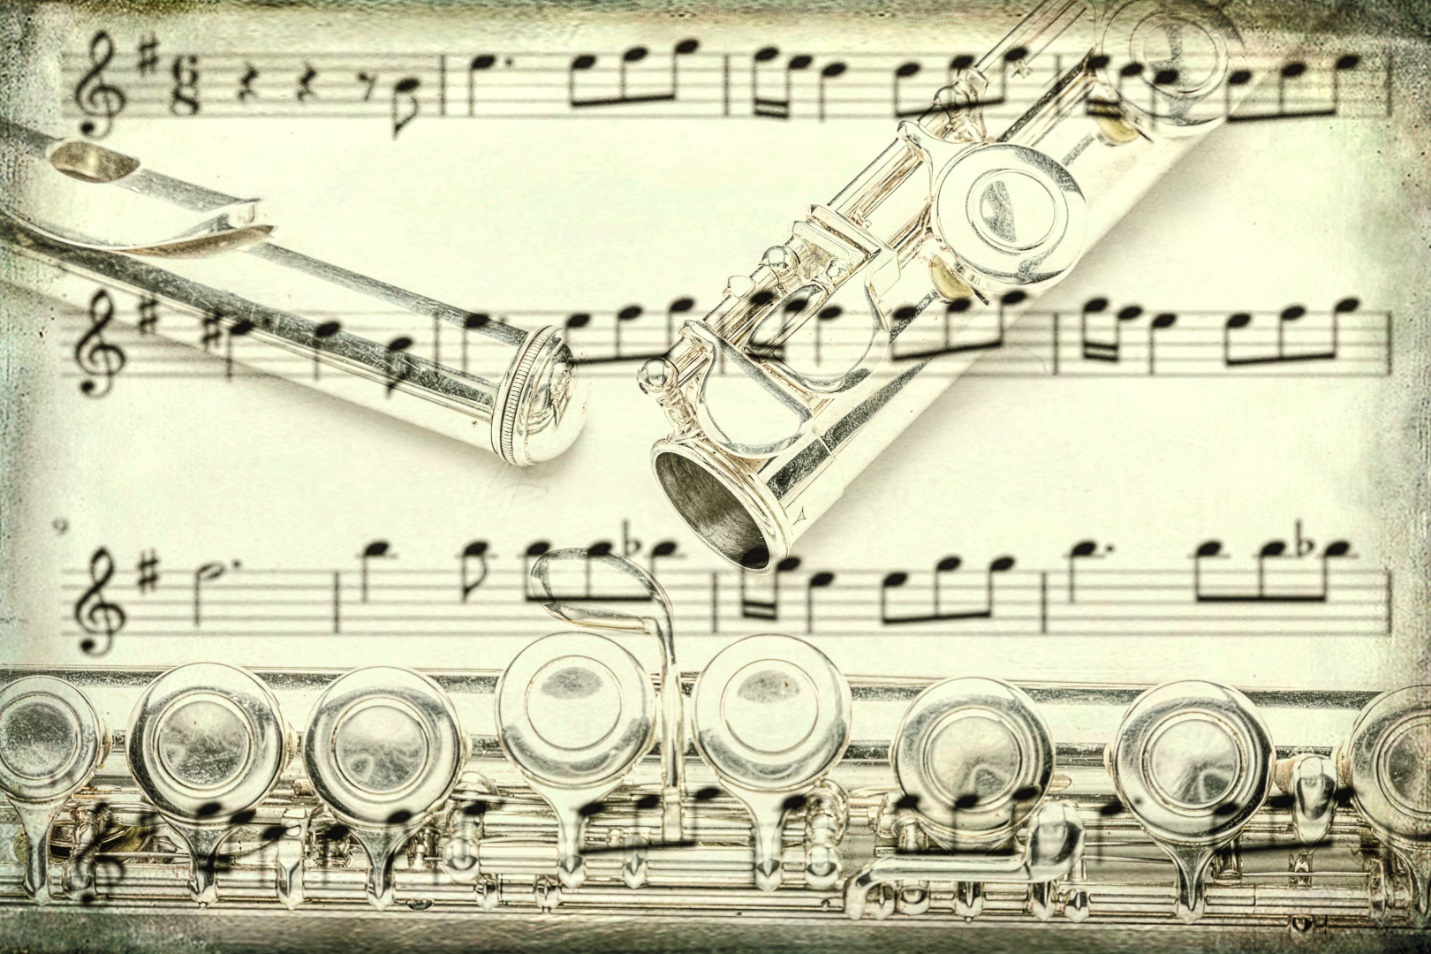
Shot 1 High Key Flute
This is the basic setup described above. I’m shooting almost straight down and the flute is placed on a piece of white foamcore. A flute is highly reflective and shows everything around it, so white foamcore reflectors were needed on each side, and even though it’s not shown in the setup photo, I had a circular silver reflector over the lens to add fill from the front. The most important part of shooting high key is to keep the feel light and airy, but be very careful not to blow out the highlights.
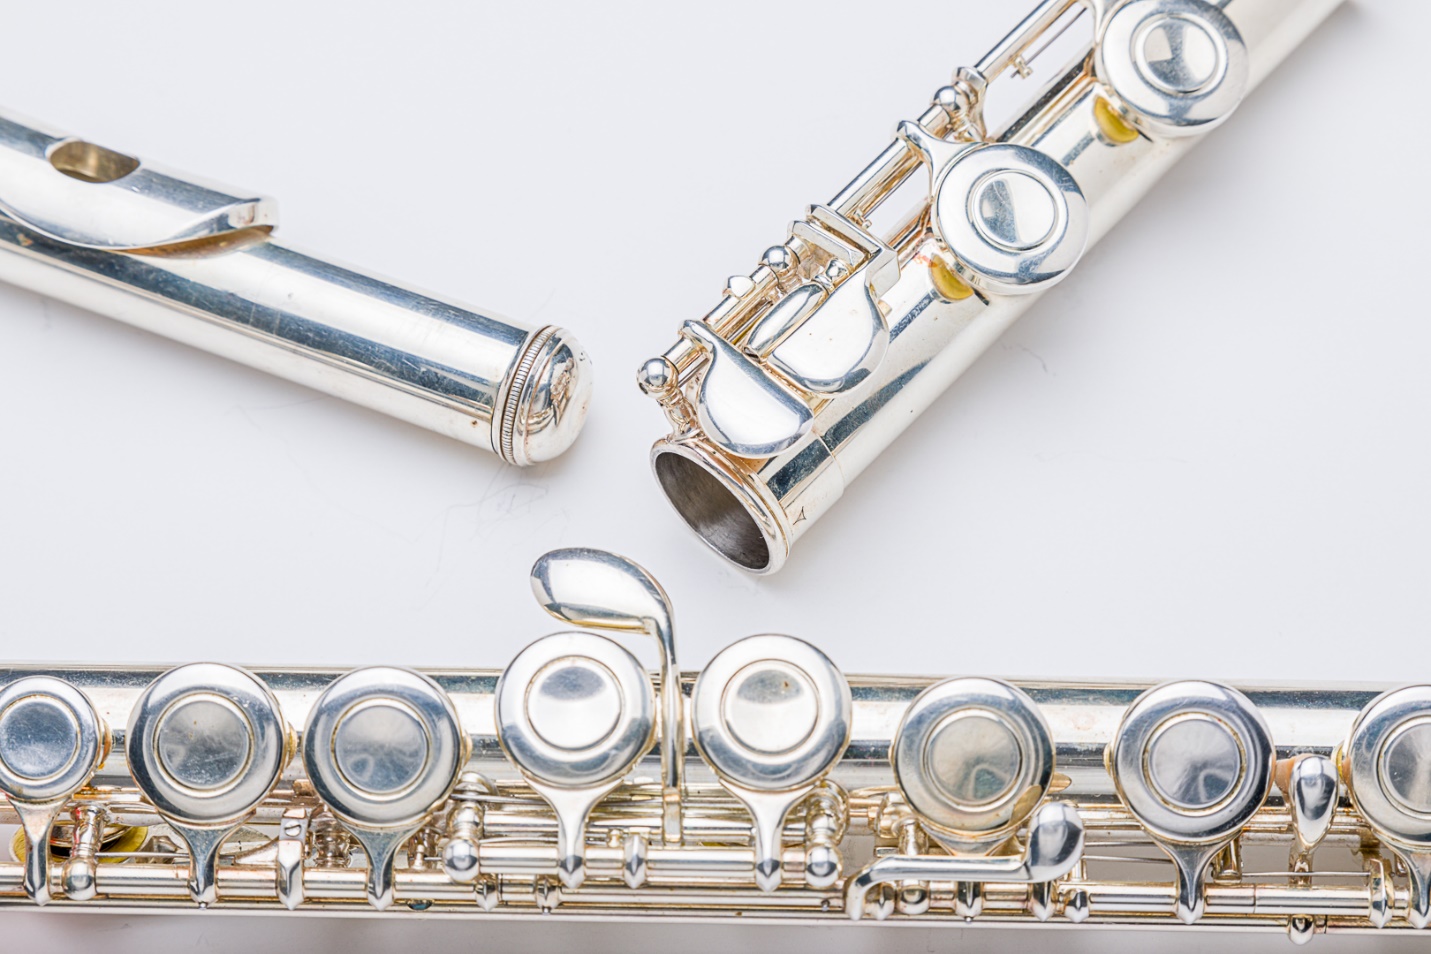
This is the basic shot. If I made the foamcore background pure white, the shiny highlights were totally blown out, so I shot and processed for a light gray rather than pure white. Also at his point every flaw and scratch on the flute and background shows clearly.
Even before I shot this, I had envisioned it as having music superimposed on the flute, and then textures and color added over the whole image. I scanned a sheet of flute music and in Photoshop I added it to my base image and selected darken as the blend mode, so only the notes the notes would be added without blocking out the flute image. I added a couple of textures and some color grading which also minimizes the scrathes and flaws and here is the final result.
Shoot 2 Low Key Still Life Grapes and Wine bottle
Again this uses the same basic setup. Behind the setup is a sweep of white background paper, but since it isn’t receiving any light it will appear as black in the final image. Because the dark green bottle blended into the dark background, I added a second light coming in from behind and about 45 degrees to place a highlight on the edge of the bottle and glasses and also a white reflector camera left to fill in the shadows. Again I had a silver reflector (not shown) over the lens. The base was a sheet of foamcore covered with woodgrain bulletin board paper. Normally I would shoot at my synch speed of 1/200 sec, but here I slowed the shutter to 1/6 sec to allow the candle flames to show better.
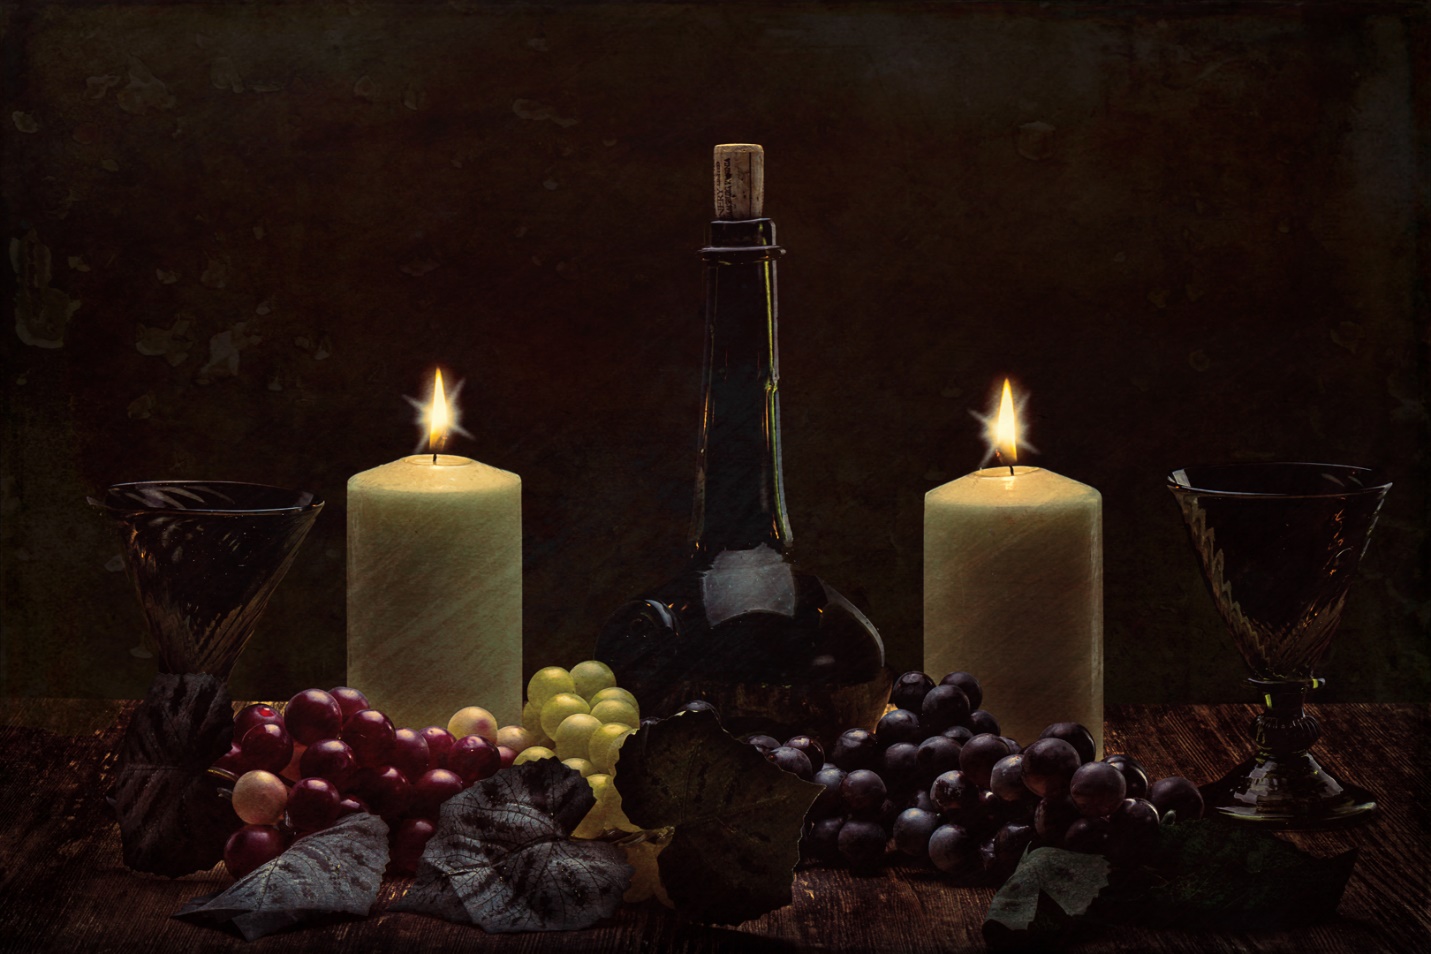
Here is the final image. In Photoshop I added a blur to the candle flames for the soft glow, and used a star brush to produce the starburst in the flames. I used Topaz Texture Effects, and a vignette to complete the image.
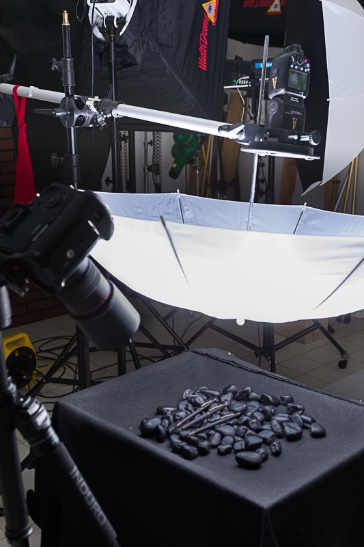
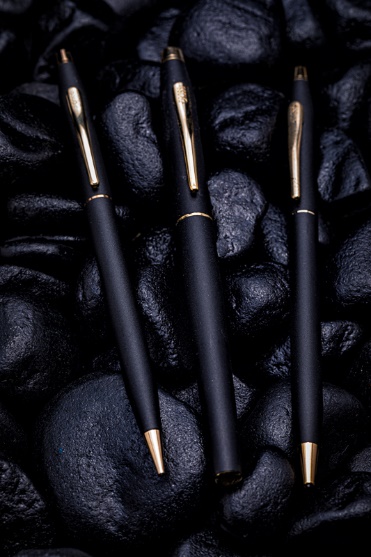
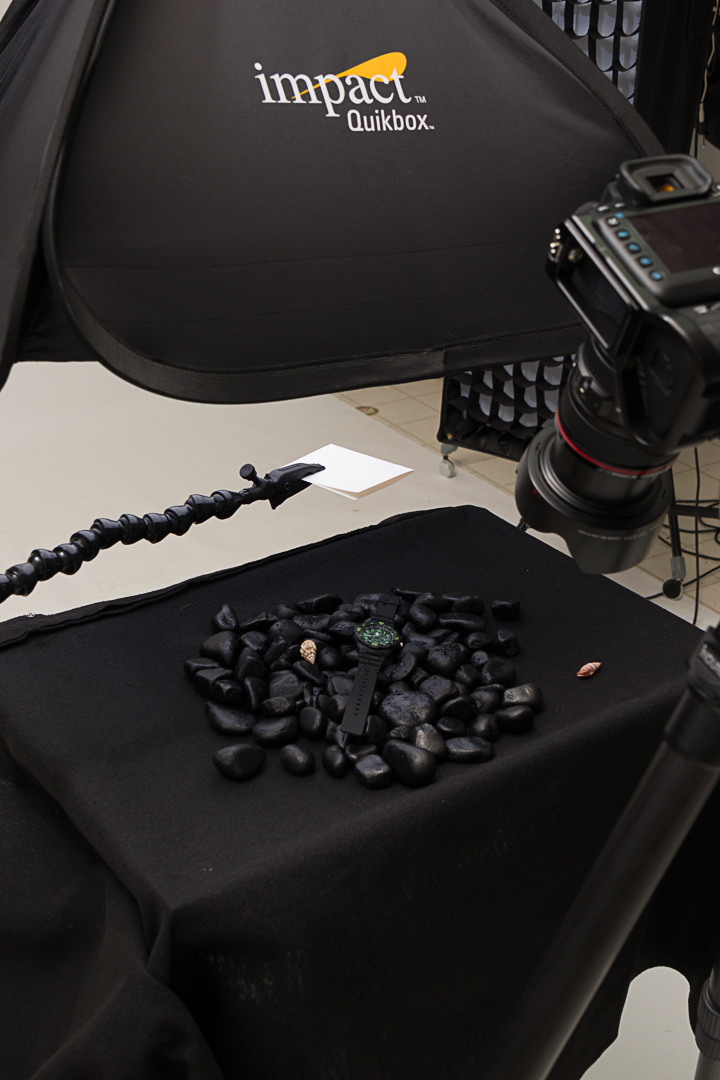
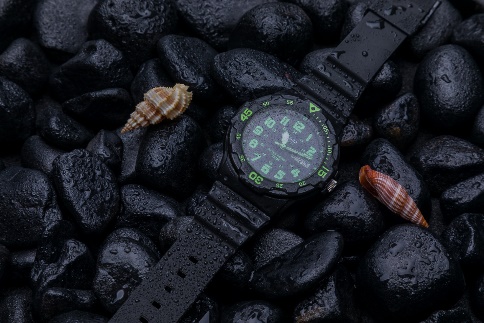
Shoot 3 Watch on Black Rocks
This the same basic setup again. My background is a piece of black felt, and some river rocks I spray painted black. I first used the rocks over 30 years ago and they are such a useful background that I still use then frequently. There is a small card held by a “plamp” to block some light from the watch crystal. More about that later. And of course I used a sprayer to mist everything.
One of the problems in this shot is that the watch crystal mirrors the light source so it has a white reflection over the whole face. Since this was a relatively large light, the highlight is even and diffuse, and not specular like a small light source would produce. Some would find this acceptable, but I wanted the watch face to be more clearly visible. My solution was to use a small card as a gobo to block light from the crystal. It was mounted on a “plamp” to make it easier to reposition. With a continuous light source or a studio strobe with modeling lights, it is simply a matter of looking through the camera or using live view and moving the card until the reflection was gone. Since I’m shooting without a modeling lamp I had to position it through a series of test shots, and I usually got it right within three shots. The card had to be readjusted every time the watch or camera moved. So why don’t we see the shadow of the card or the plamp arm? With a small harsh light source, we would, but a softbox that is relatively large in comparison to the subject casts light from its entire surface from different directions eliminating the shadow. If we were using a small harsh light source the shadow would be obvious. Here you can see the reflection over the whole face, covering about half after my first adjustment, about a quarter after my second adjustment, and completely gone in the final image.