In my earlier article on composition, I wrote that the goal of composition was to guide the viewer’s eye through the image and to our subject. If we have control of lighting, we can also use that to direct the viewer. If we don’t have control of lighting, we can fake lighting effects to a degree in Lightroom (or Photoshop or Adobe Camera Raw). In these two images, I’ll do basic editing and then show how we can direct the eye to our subject, using the localized adjustments including the adjustment brush, the radial filter and vignetting. Remember that the eye tends to go toward the brightest parts of an image, so if our subject is dark or in shadow, we can lighten it to draw the eye.
Here, we have a single subject working in a field. Straight from the camera, it’s flat, our subject is not well lit, and his face is heavily shadowed by his hat. Our goal is change the light to make him brighter, and in particular to open up the shadows on his face.
This is the original with no adjustments at all.
First I’ll do just basic corrections using the tone panel in Lightroom. I’ve set the white and black points, the highlights and shadows, the overall exposure and contrast. I’ve also added some clarity and vibrance to bring out details and colors. Already it looks a bit better.
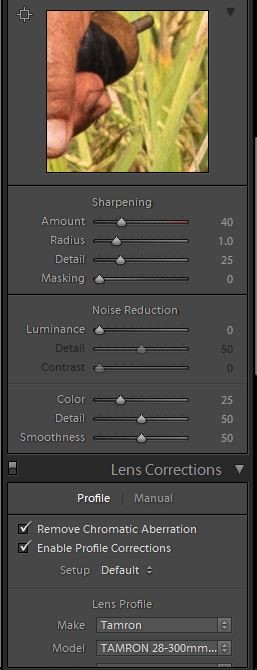
I always add camera profile and chromatic aberration adjustments. The camera profile corrects for geometric distortion and light fall-off of a lens. It is specific for each brand and lens model. Normally Lightroom automatically determines the lens used, but occasionally it needs prompting using the drop down menus. It is probably more important in images with straight lines than in this image, but I do it with all of my images anyway. Chromatic aberration is the slight color fringing along sharp edges. It is worse with some lenses, and this setting usually helps.
I also add sharpening. By default Lightoom adds some sharpening, but for a subject like this with a lot of detail, I increase that to the settings shown here.
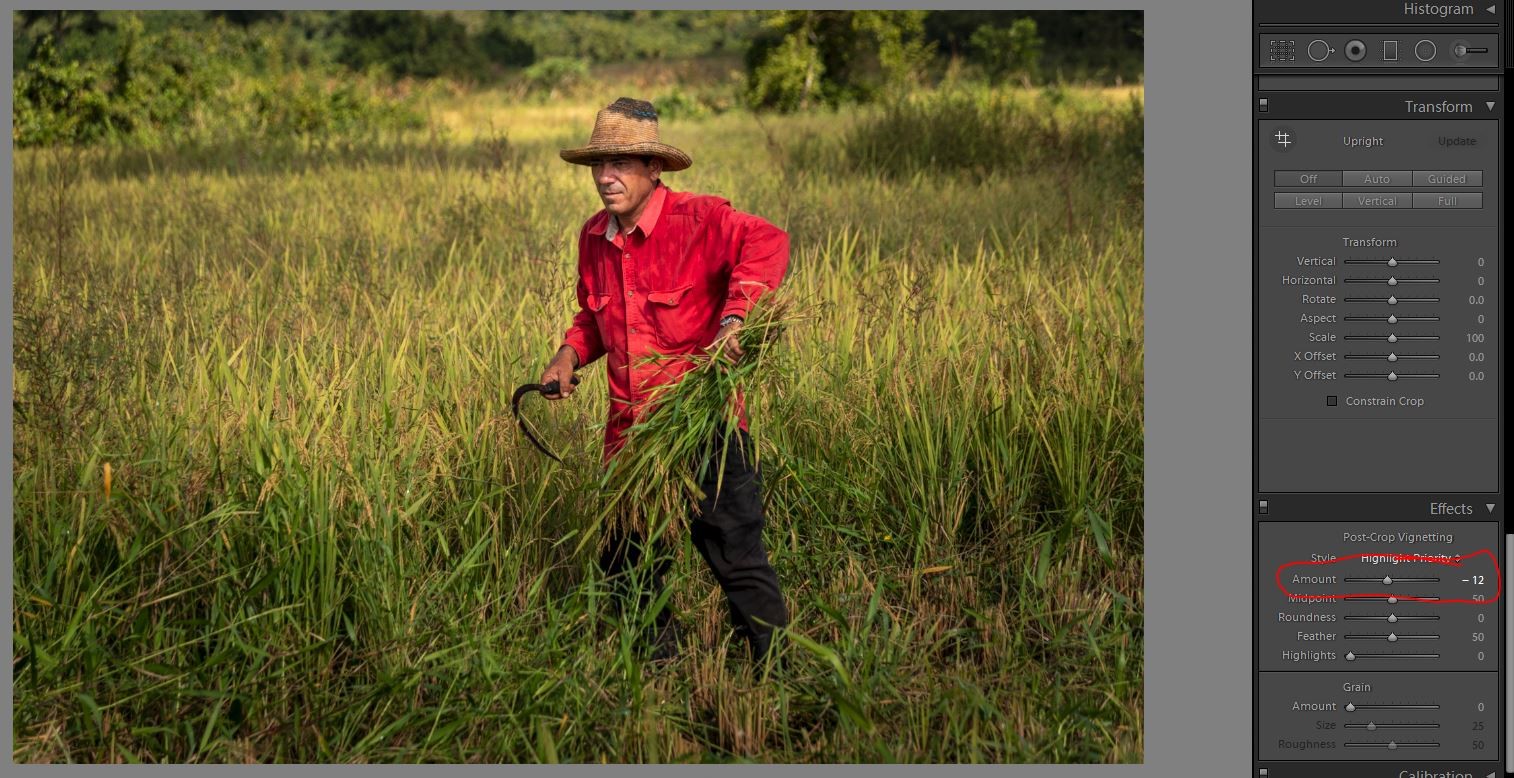
Here I’ll use the radial filter to darken everything around our farmer. By default, the radial filter effects what is outside of the selection. It’s also important to keep the feathering at at least 50% so the effect isn’t so sharp edged and noticeable. Here I’ve gone with -.6 exposure. Notice that invert is not checked, so the effect is outside of the selection oval.
While this pulls our eye to the farmer more, his face is still in the shadow of his hat. I’ll use the adjustment brush to increase the exposure on his face by +1.22. Make sure the feathering is set to 100 so we don’t see a sharp edge to the lightening.
To add some more emphasis to our subject, I’ll use a second brush adjustment to darken the foreground and corners. I selected a large brush, again with 100% feathering and -0.96 exposure.
As a last touch I’m adding a slight vignette at -12 to darken all of the corners just slightly. The vignette should be so subtle that it’s hard to see where it begins and ends. It should never be as extreme as my bad example below.
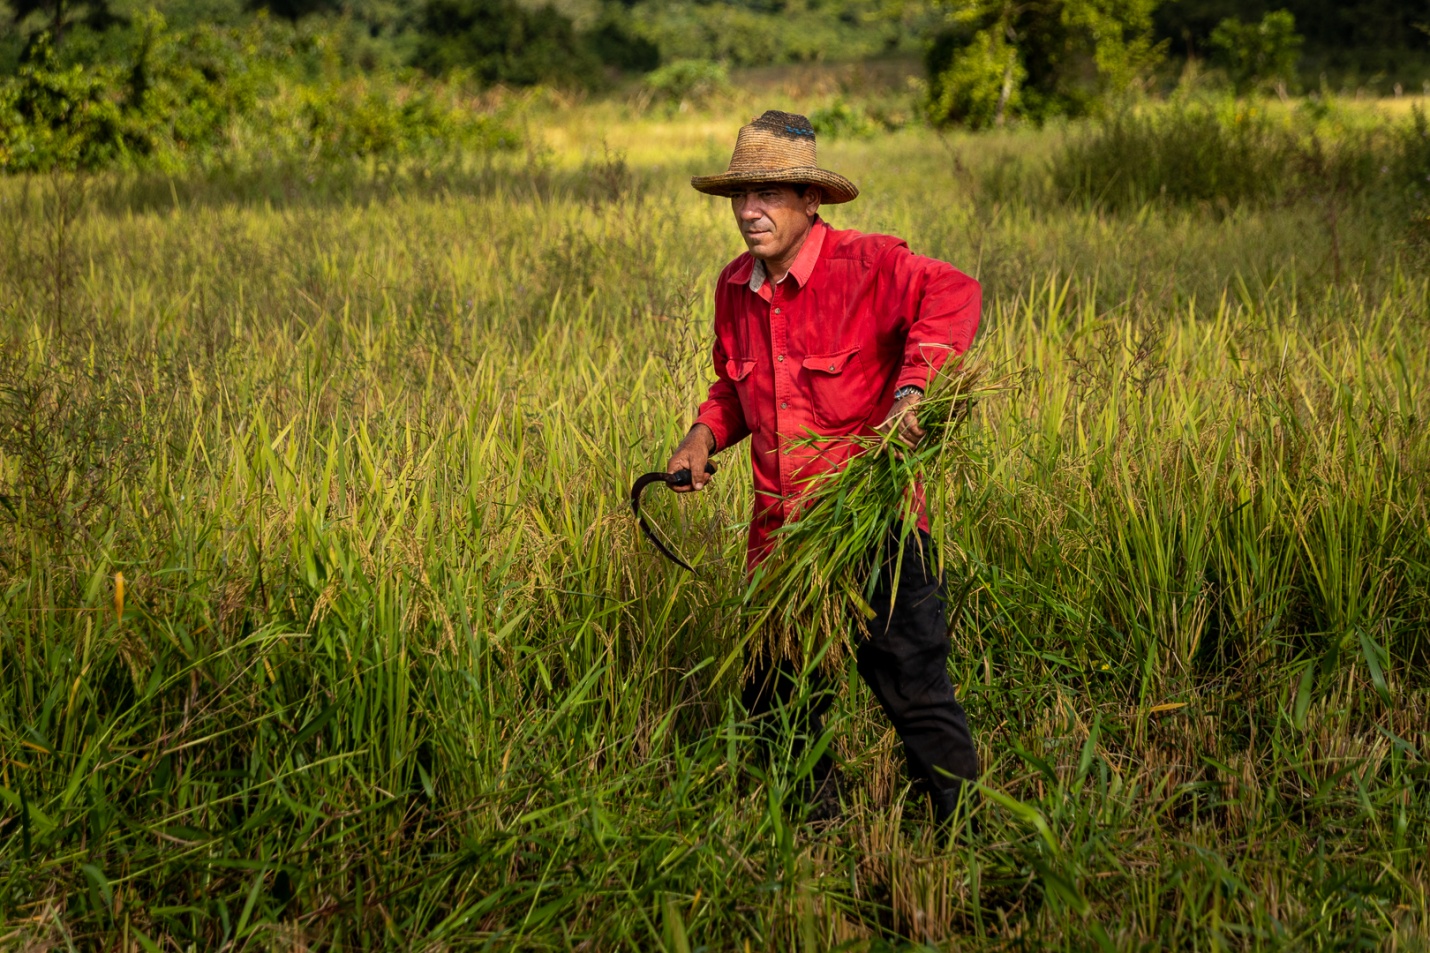
So here is the original image straight from the camera, and then the final edited version. Hopefully you’ll see the difference in how your eye is drawn to the farmer.
In this second picture, my goal is still to draw the eye to the two farmers, but I’ll have to use the radial filter a bit differently.
The original image was a bit flat and the farmers are dark and don’t attract your eye. Here I’ve done the basic tone edits of exposure contrast, and set higlights and shadows and white and black points and added vibrance. Notice I’ve made the overall exposure a bit dark, but you’ll see why when I use the radial filter in the next step.
Now I’ll use the radial filter to highlight our farmers. By default, the radial filter darkens everything outside of the selection, so if I try to highlight one farmer, I darken the other.
So I made my overall exposure a bit dark, and used the radial filter to lighten the farmer on the left. But to make this work I checked invert, and raised the exposure within the selection rather than the usual darkening.
I’ll repeat the effect by right clicking on the radial filter and select duplicate. I can then drag this over to the second farmer, and resize it and now both farmers are highlighted equally.
Rather than use the vignette tool, I’ll use a large adjustment brush at -.70 to darken the foreground and left side of the image. The reason I chose not to use the vignette is that it would darken the sky in the upper right.
Now the image feels a bit dark overall, so I’ll go back to the basic panel to increase the overall exposure from -.36 to +.24.
As a final touch I’ll crop in a bit to position the farmers for more impact.
And here is the original image followed by the final edit. Again I hope you feel how the emphasis has shifted much more to the farmers.