As I usually do, I’m calling this article beyond basic because it involves Photoshop rather than Lightroom or other basic editing programs. With that said, this is now a pretty easy technique.
One of the most important elements in outdoor photography is the sky. It can it can complement our subject, be plain and neither add or detract, or be downright ugly and ruin an otherwise good image. A couple of years ago Adobe added sky replacement to Photoshop, and if you haven’t tried it, you should.
I’ll start with an image I shot back in 2016. I’m happy with the helicopter, but the sky isn’t helping the image, even if it is that nice clear blue we associate with the postcards of the past. Back in 2016, I’m not sure if I even had the skills to do a sky replacement, and if I did it would have taken a lot of tedious time consuming work, but as I’m about to show you, now it’s a couple of clicks and a few seconds.
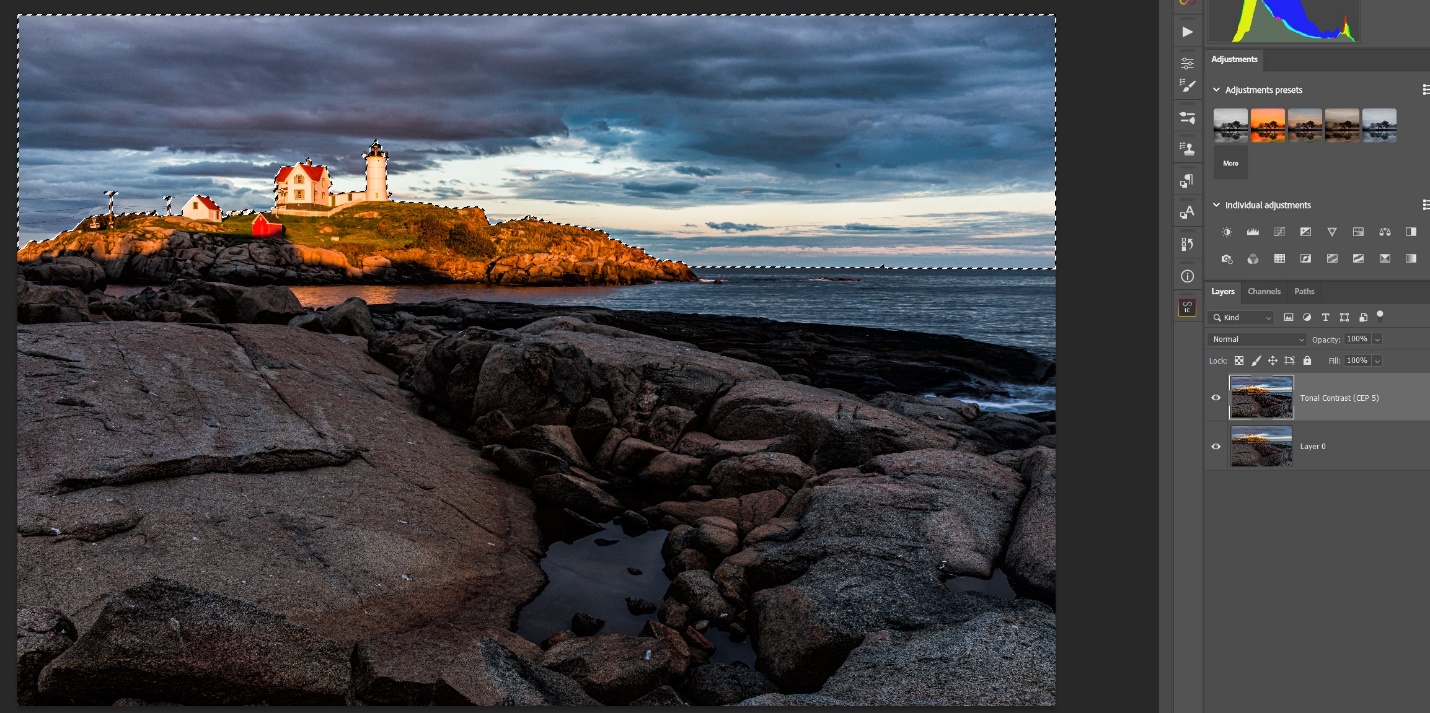
Open the image and go to Edit/sky replacement. There are several skies already available in Photoshop, or you can use your own (more about that later).

Here I selected one of the skies from a collection of skies I have shot.

I actually tried this with two different skies. Notice how the skies blend in perfectly with the blurred rotor. This is the part of sky replacement that was very difficult in the past.


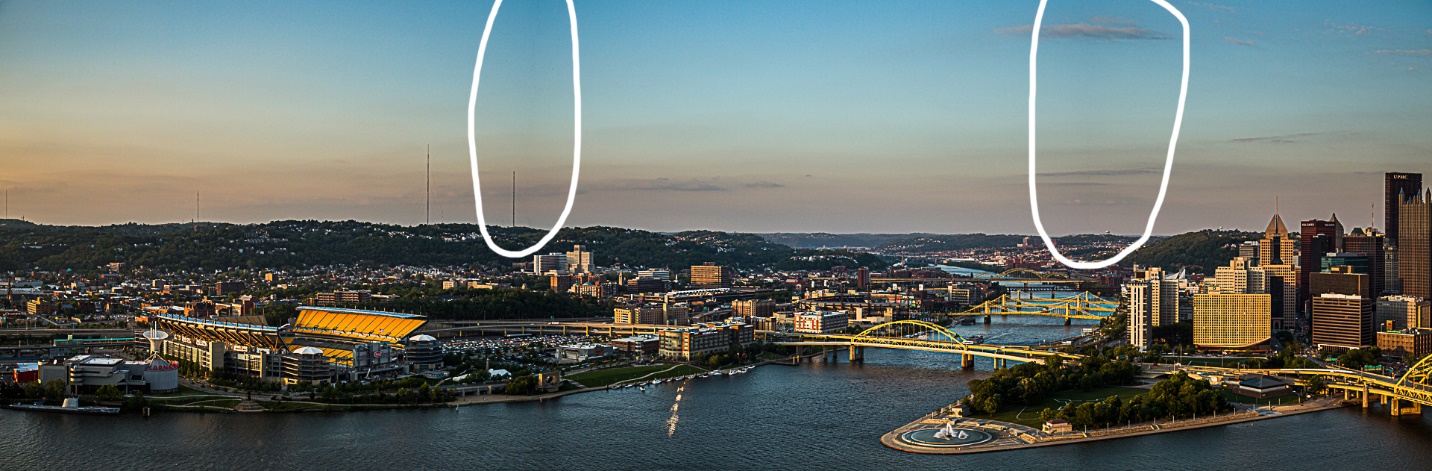
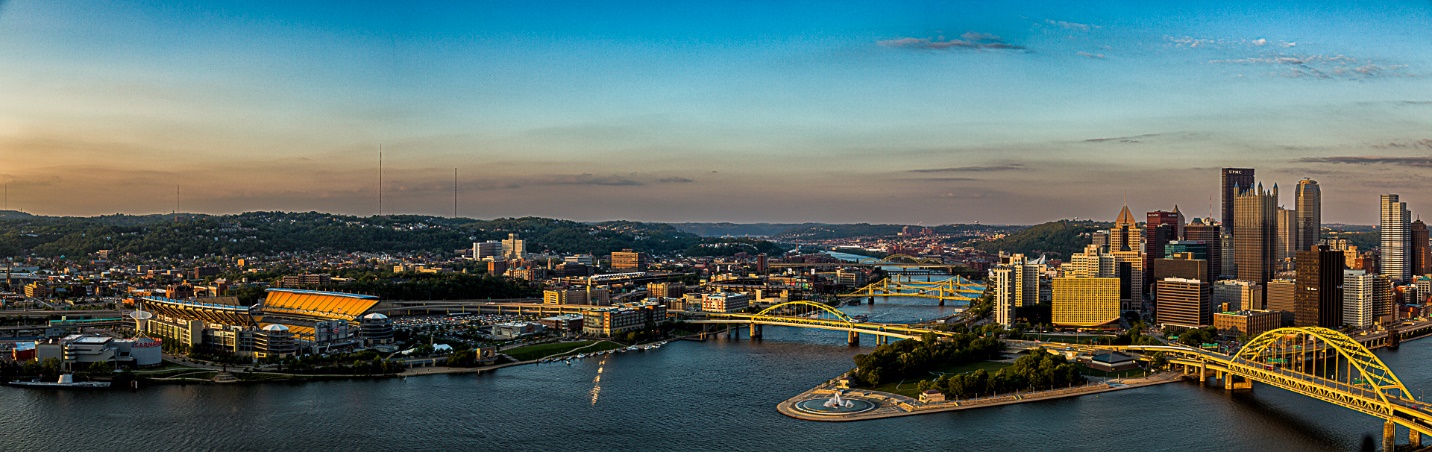
After trying sky replacement a few times, you will probably want more skies than are in Photoshop. You can search and find sky sets to download, and some are even free. Or you may want to create collections of your own skies for more variety, and perhaps to feel that it makes the sky replacement feel more like “your” image. With sky replacement open, click on the gear icon for settings, and select “Create new collection” and “import sky images” and a browser will let you select your sky images. I created three collections of my own; blue skies, sunset/sunrise, and cloudy skies.


Whenever you are out shooting and see interesting skies, shoot some images of just the skies. Shoot vertical and horizontal, and shoot at different focal lengths. You could save all of your cloud files into a single folder so you know where to find them. I tag mine with the key word “clouds” and in Lightroom I created a smart collection of all images containing the keyword “clouds” so I can see all of my cloud pictures with one click.
Once you have selected and imported cloud images into your collection, there is an option to export selected skies. This puts all of the images into a single file with the suffix “.sky”. I would encourage you to do this for all of your own sky collections for two reasons; first, it makes it easy to share your skies with friends, and second, but more importantly, these files can act as a backup, and also save time the next time you install Photoshop on a new machine. As with any backup, store these in a safe place.

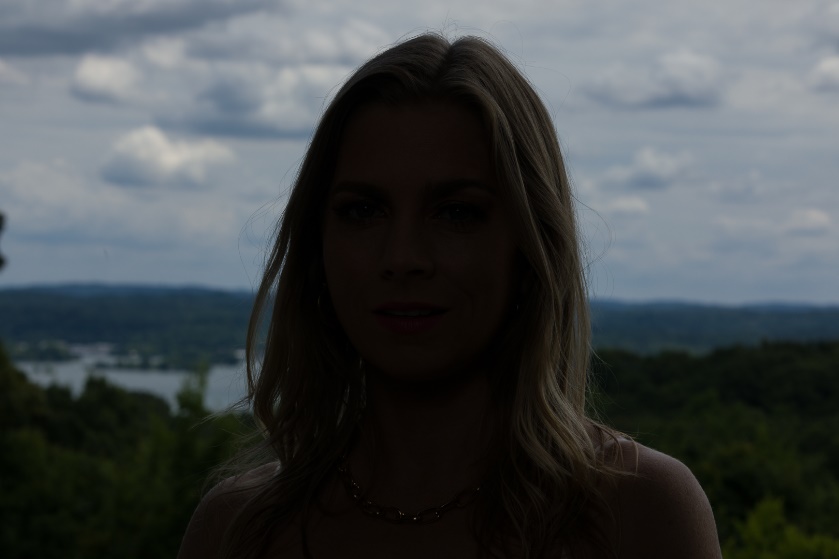
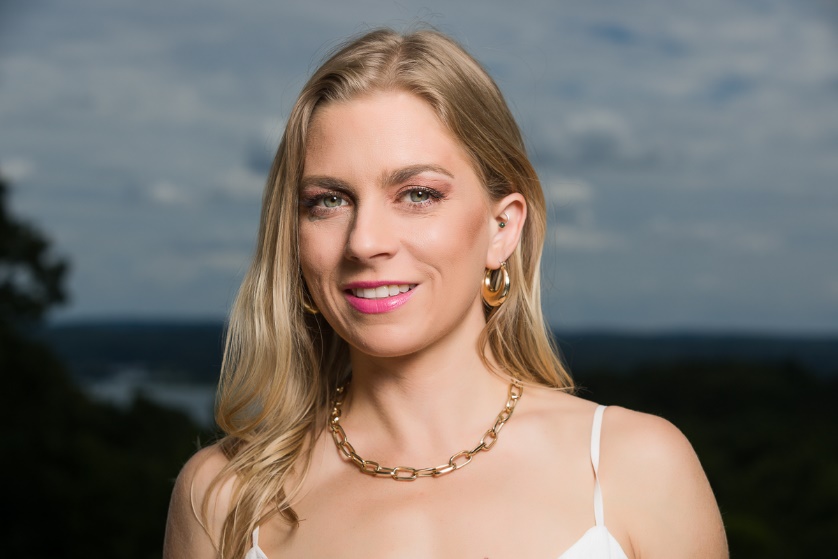
When you replace a sky, there are a couple of things to watch for. Look at the direction of light; if the clouds are lit from one direction and your subject from a different direction it will look obviously fake. The sky replacement allows you the option to flip the sky image to fix this. Also look at the color balance of your sky and subject. If the sky is very warm, but the subject is cool, either choose a different sky image, or there is a color balance adjustment within sky replacement. Also try to match the brightness of the sky and subject, and again there is an adjustment within sky replacement.
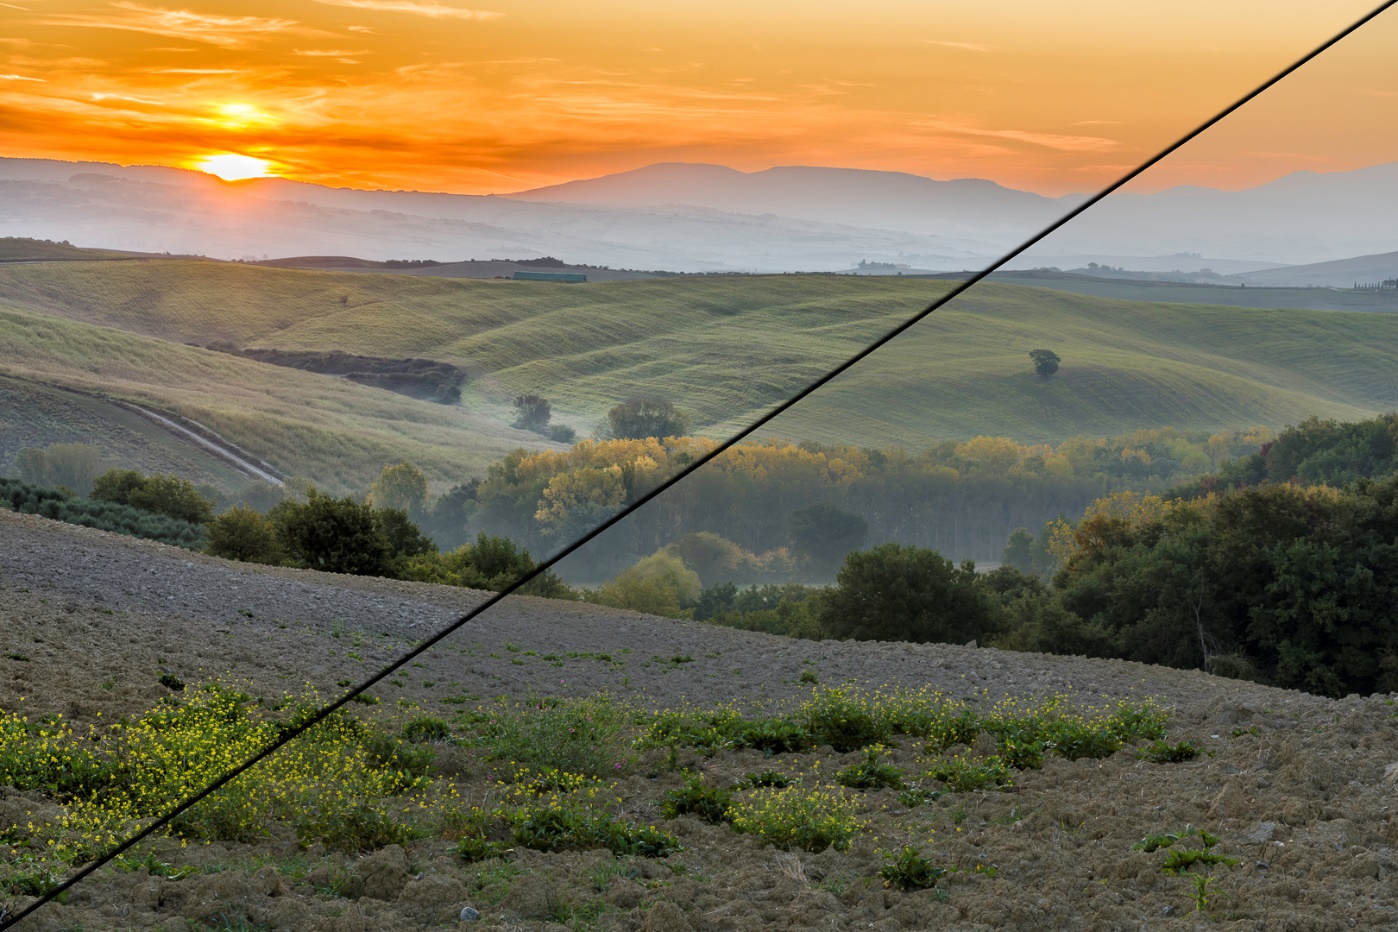
Here is a sky replacement with trees against the sky. Imagine trying to add a new sky and make it blend with the details of the tree branches. A few years ago it could be done, but it would have been difficult and tedious. Now two or three clicks and done.


Maybe you’re like me, and don’t know much about astronomy, or you don’t want to be out at 3 AM to catch the milky way in just the right place. There are some milky way skies in sky replacement and many more available for download. Again this was a couple of clicks, a couple of seconds, and I wasn’t up all night.


Here’s a discussion I’ve had several times, most recently with a fellow PSC member. I won’t say who, but you know who you are, Randy. Some photographers may consider sky replacement going a bit too far, but if it helps you create the image you envision, why is it any different from cropping, removing elements, color balance, contrast or any of the many adjustments we routinely do. If you are strictly a documentary photographer or photojournalist, such extreme edits are unethical and unacceptable. But if are creating art, you can (and should) use all of the tools and techniques available to you that bring your image to match your vision. It’s not “cheating” or an unfair advantage, it’s just using all of your knowledge and techniques to create the image you like.
Photography (Slightly Beyond) Basics
Sky Replacement
Mickey Rountree
As I usually do, I’m calling this article beyond basic because it involves Photoshop rather than Lightroom or other basic editing programs. With that said, this is now a pretty easy technique.
One of the most important elements in outdoor photography is the sky. It can it can complement our subject, be plain and neither add or detract, or be downright ugly and ruin an otherwise good image. A couple of years ago Adobe added sky replacement to Photoshop, and if you haven’t tried it, you should.
I’ll start with an image I shot back in 2016. I’m happy with the helicopter, but the sky isn’t helping the image, even if it is that nice clear blue we associate with the postcards of the past. Back in 2016, I’m not sure if I even had the skills to do a sky replacement, and if I did it would have taken a lot of tedious time consuming work, but as I’m about to show you, now it’s a couple of clicks and a few seconds.

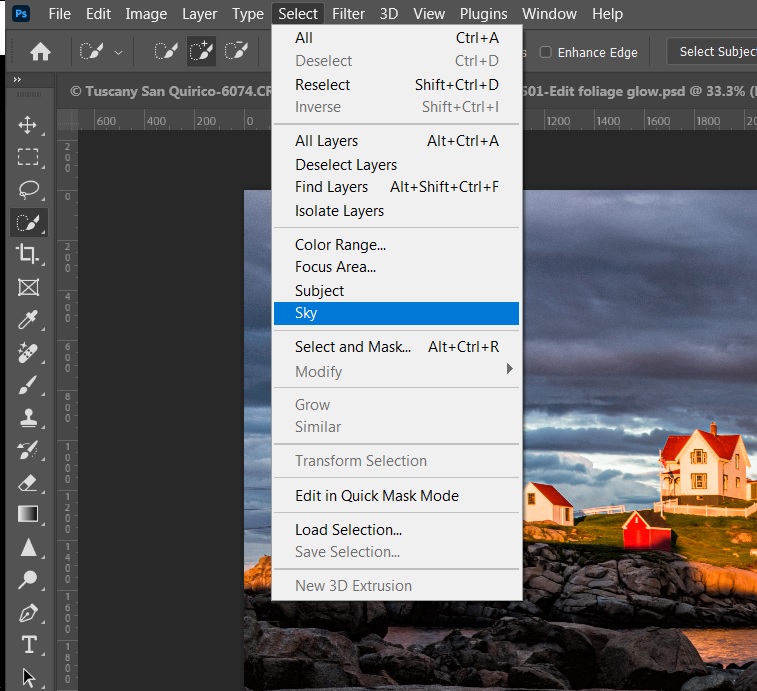
Open the image and go to Edit/sky replacement. There are several skies already available in Photoshop, or you can use your own (more about that later).
Here I selected one of the skies from a collection of skies I have shot.
I actually tried this with two different skies. Notice how the skies blend in perfectly with the blurred rotor. This is the part of sky replacement that was very difficult in the past.
After trying sky replacement a few times, you will probably want more skies than are in Photoshop. You can search and find sky sets to download, and some are even free. Or you may want to create collections of your own skies for more variety, and perhaps to feel that it makes the sky replacement feel more like “your” image. With sky replacement open, click on the gear icon for settings, and select “Create new collection” and “import sky images” and a browser will let you select your sky images. I created three collections of my own; blue skies, sunset/sunrise, and cloudy skies.
Whenever you are out shooting and see interesting skies, shoot some images of just the skies. Shoot vertical and horizontal, and shoot at different focal lengths. You could save all of your cloud files into a single folder so you know where to find them. I tag mine with the key word “clouds” and in Lightroom I created a smart collection of all images containing the keyword “clouds” so I can see all of my cloud pictures with one click.
Once you have selected and imported cloud images into your collection, there is an option to export selected skies. This puts all of the images into a single file with the suffix “.sky”. I would encourage you to do this for all of your own sky collections for two reasons; first, it makes it easy to share your skies with friends, and second, but more importantly, these files can act as a backup, and also save time the next time you install Photoshop on a new machine. As with any backup, store these in a safe place.
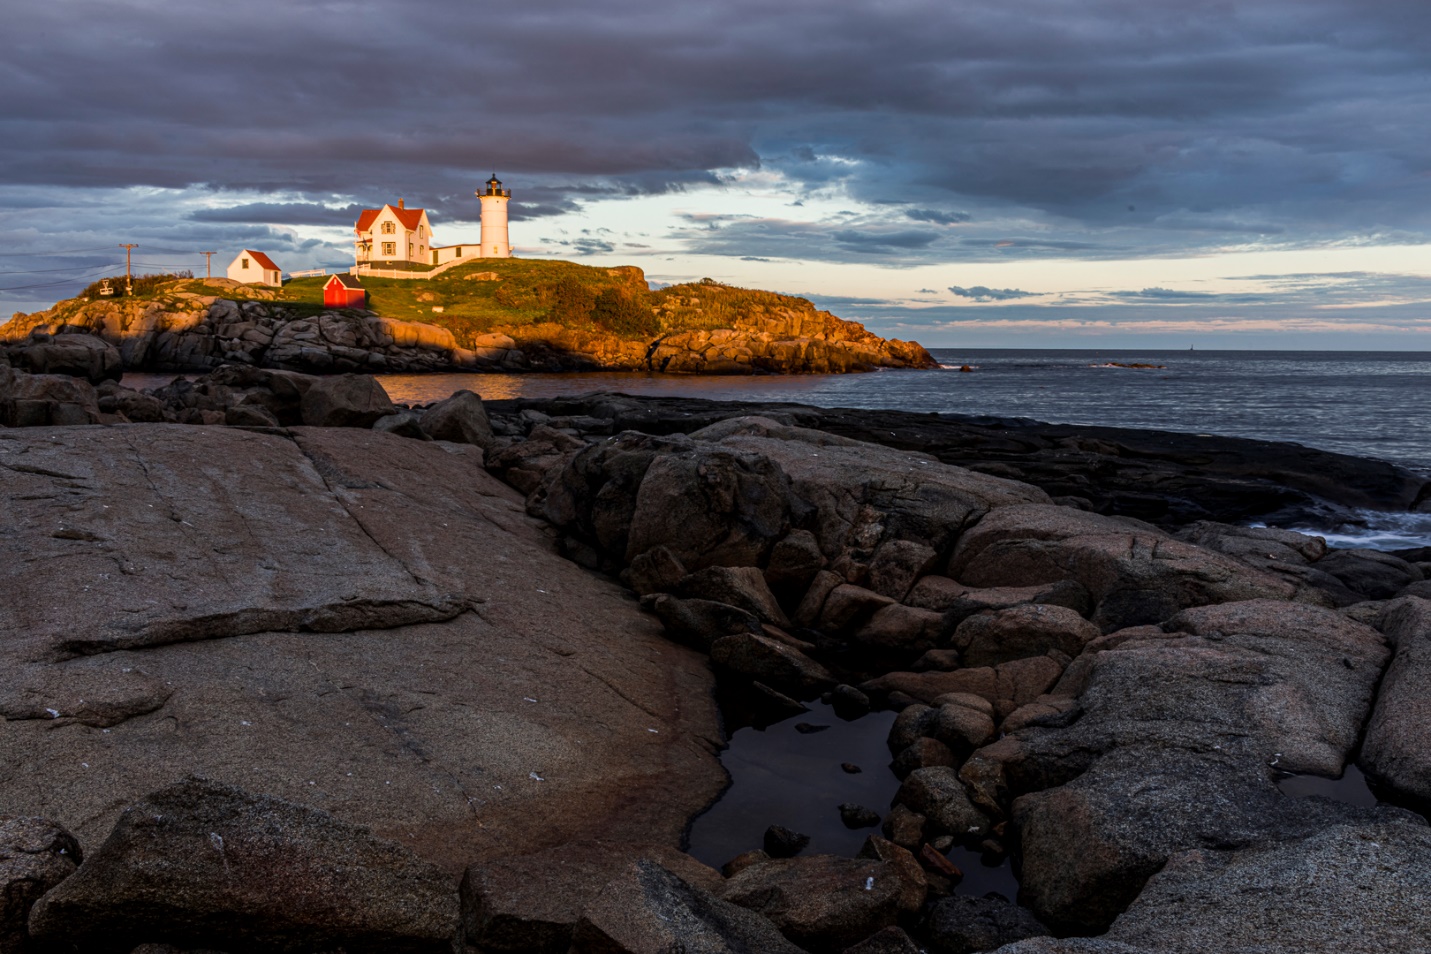
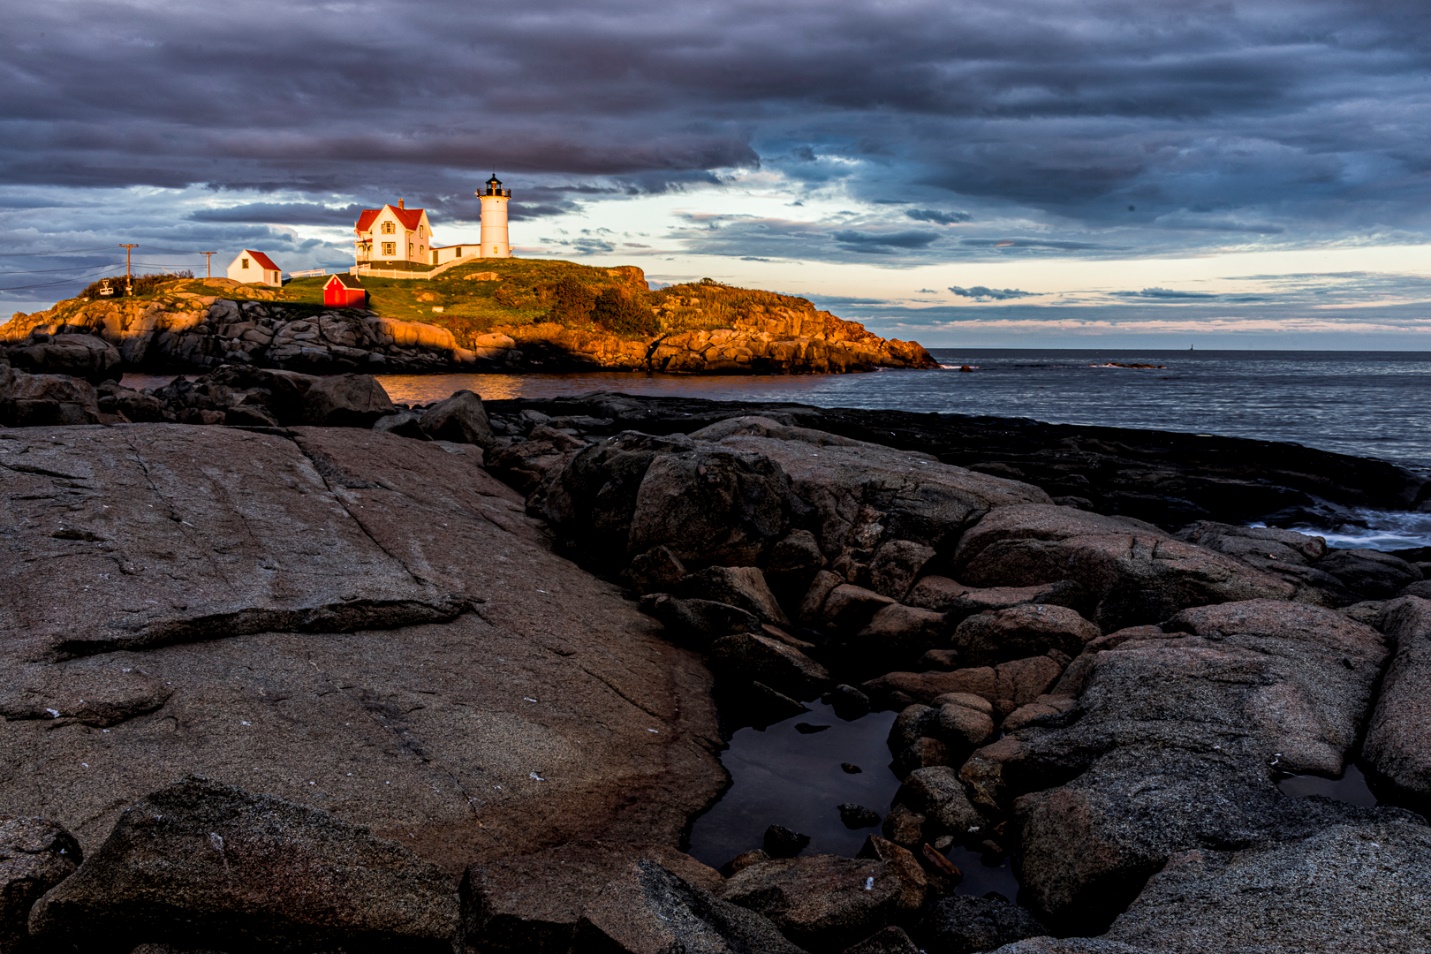
When you replace a sky, there are a couple of things to watch for. Look at the direction of light; if the clouds are lit from one direction and your subject from a different direction it will look obviously fake. The sky replacement allows you the option to flip the sky image to fix this. Also look at the color balance of your sky and subject. If the sky is very warm, but the subject is cool, either choose a different sky image, or there is a color balance adjustment within sky replacement. Also try to match the brightness of the sky and subject, and again there is an adjustment within sky replacement.
Here is a sky replacement with trees against the sky. Imagine trying to add a new sky and make it blend with the details of the tree branches. A few years ago it could be done, but it would have been difficult and tedious. Now two or three clicks and done.
Maybe you’re like me, and don’t know much about astronomy, or you don’t want to be out at 3 AM to catch the milky way in just the right place. There are some milky way skies in sky replacement and many more available for download. Again this was a couple of clicks, a couple of seconds, and I wasn’t up all night.
Here’s a discussion I’ve had several times, most recently with a fellow PSC member. I won’t say who, but you know who you are, Randy. Some photographers may consider sky replacement going a bit too far, but if it helps you create the image you envision, why is it any different from cropping, removing elements, color balance, contrast or any of the many adjustments we routinely do. If you are strictly a documentary photographer or photojournalist, such extreme edits are unethical and unacceptable. But if are creating art, you can (and should) use all of the tools and techniques available to you that bring your image to match your vision. It’s not “cheating” or an unfair advantage, it’s just using all of your knowledge and techniques to create the image you like.