This is another article that is a bit beyond basic, because it makes use of layers and layer masks in Photoshop. Other editing programs that allow the use of layers and masks such as Photoshop Elements would also work. My workflow starts in Lightroom, but it’s possible to load the images directly from Photoshop.
Shooting the Images
This technique works best with your camera on a tripod. You could hand hold your camera if you resist the temptation to follow and track the action. But since you already know all of the advantages of a tripod, why wouldn’t you use it? I prefer to use a shutter speed that freezes (or almost freezes) the action. So my camera is usually set either to shutter priority or manual mode so that I am in control of the shutter speed. Set your camera to its highest frame rate, frame up your composition and then hold down the shutter through the whole action sequence.
I shot this sequence of a canoe going over Baby Falls, which is just up the road from Bald River Falls in Tellico. My settings were 1/800 sec, f/8, ISO 200, 10 frames/sec, 35mm with a 24-105 on a Canon 7D Mark II. And of course I was using a sturdy tripod.
Selecting the Images
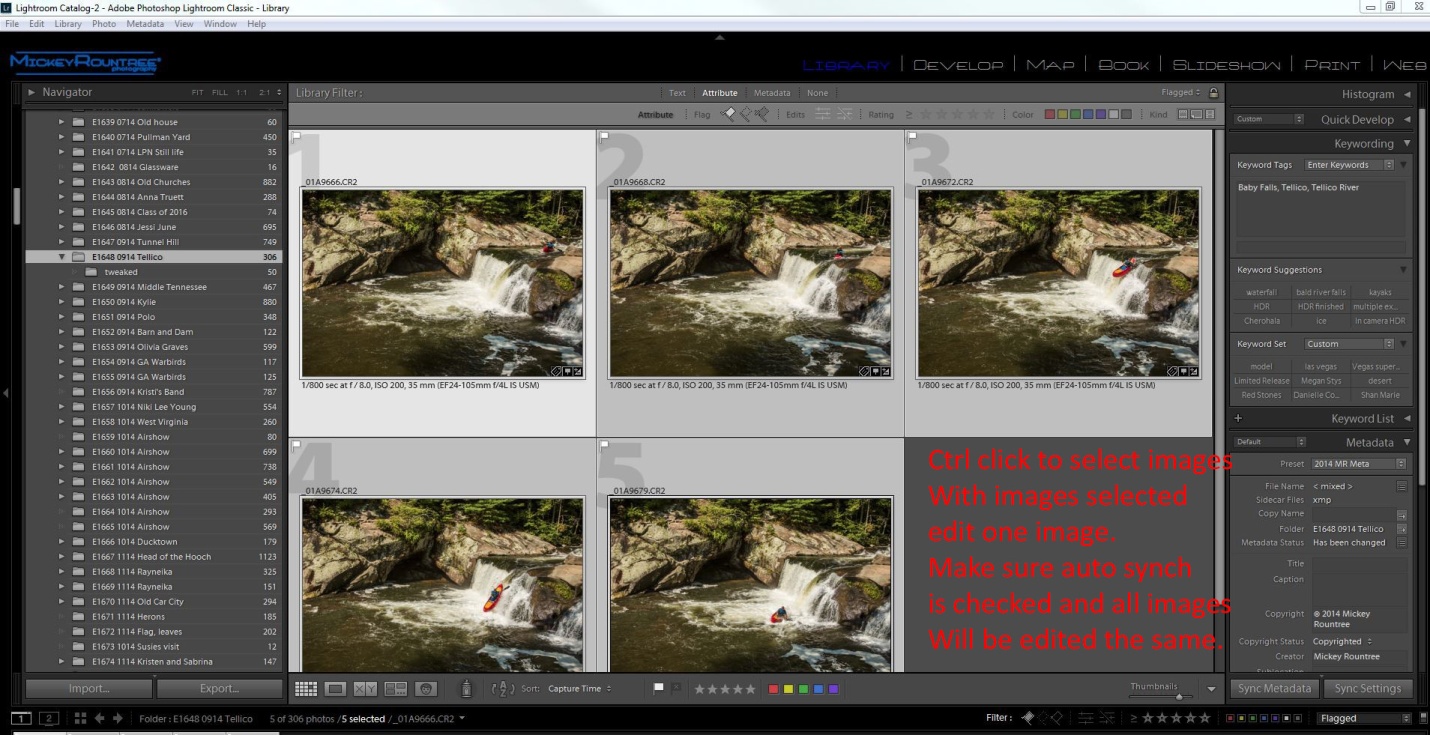
At ten frames/sec, I had way too many images and that would create more image overlap than I like. If your camera has a lower frame rate this may not be much of a problem. Or you may decide to use every other or every third image. Here is my original sequence and I chose to use the five images marked in yellow. Depending on your subject and frame rate, you may choose to use more or fewer images.
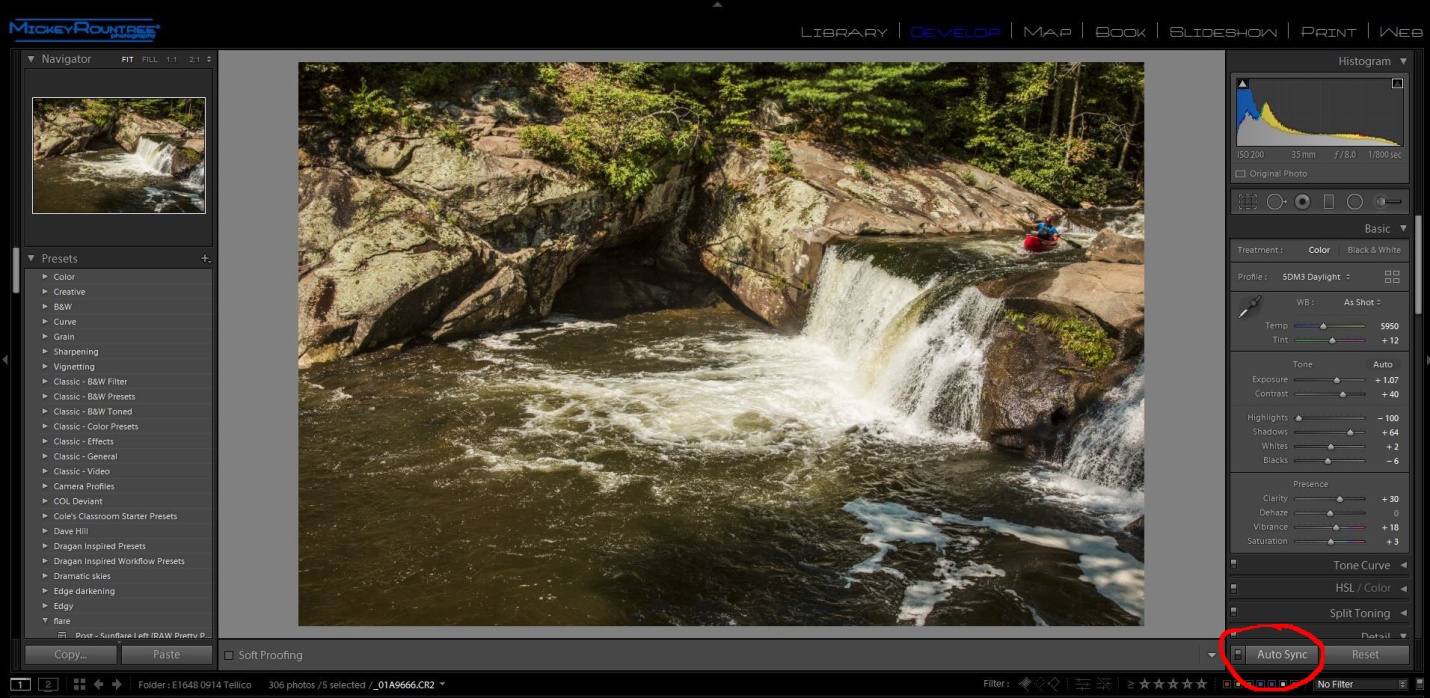
Select your images by ctrl-clicking (cmd clicking for you Apple fans) each image that you want to use. At this point go to the develop module, make sure that auto synch is on and edit your picture and the edits will be applied to all images. If you edit each image individually they may not look consistent when blended into the final image.
Getting the images into Photoshop
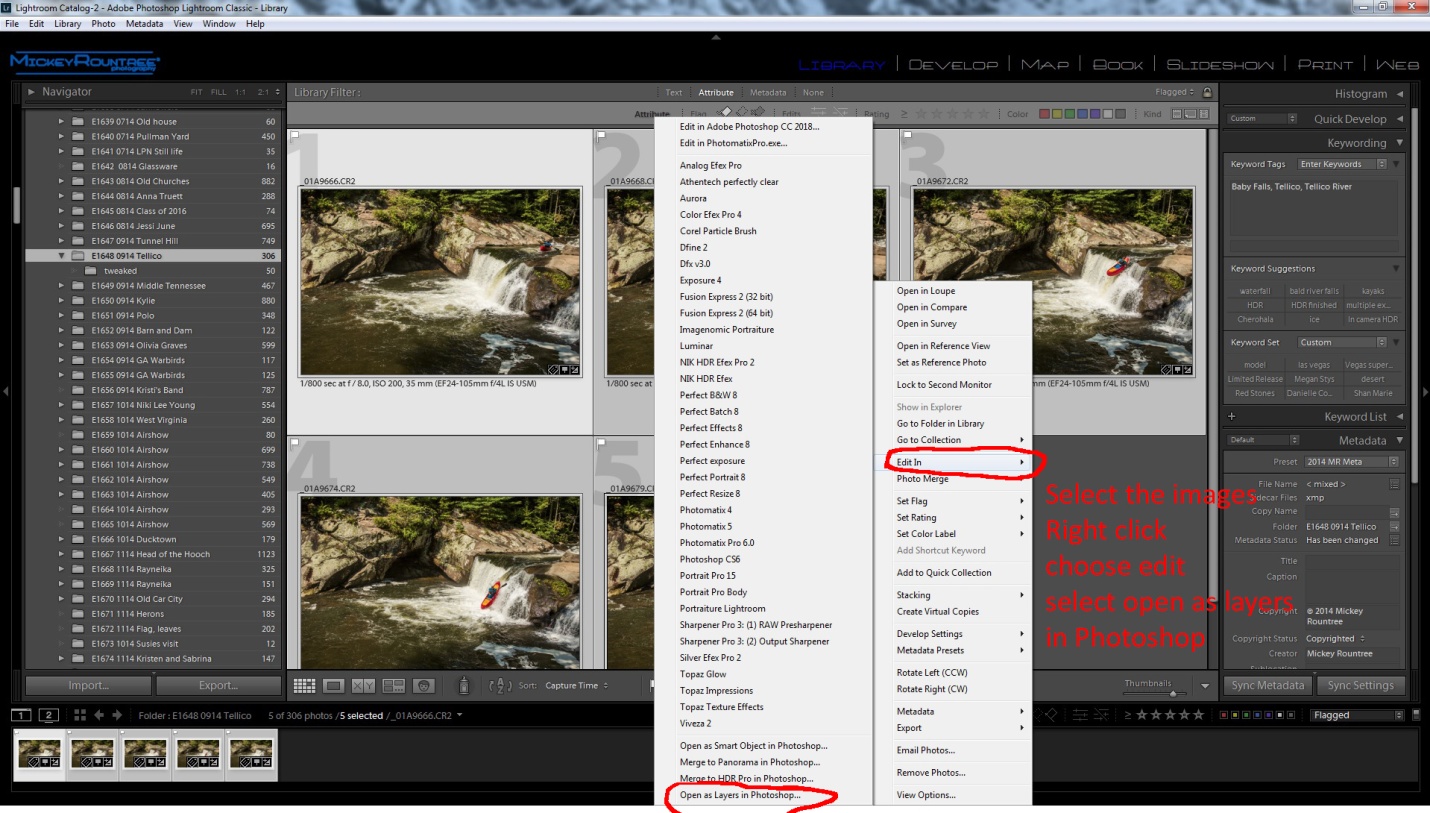
With the images still selected return to the library module and right click, select “edit in” and then choose “open as layers in Photoshop”.
Creating the Composite in Photoshop
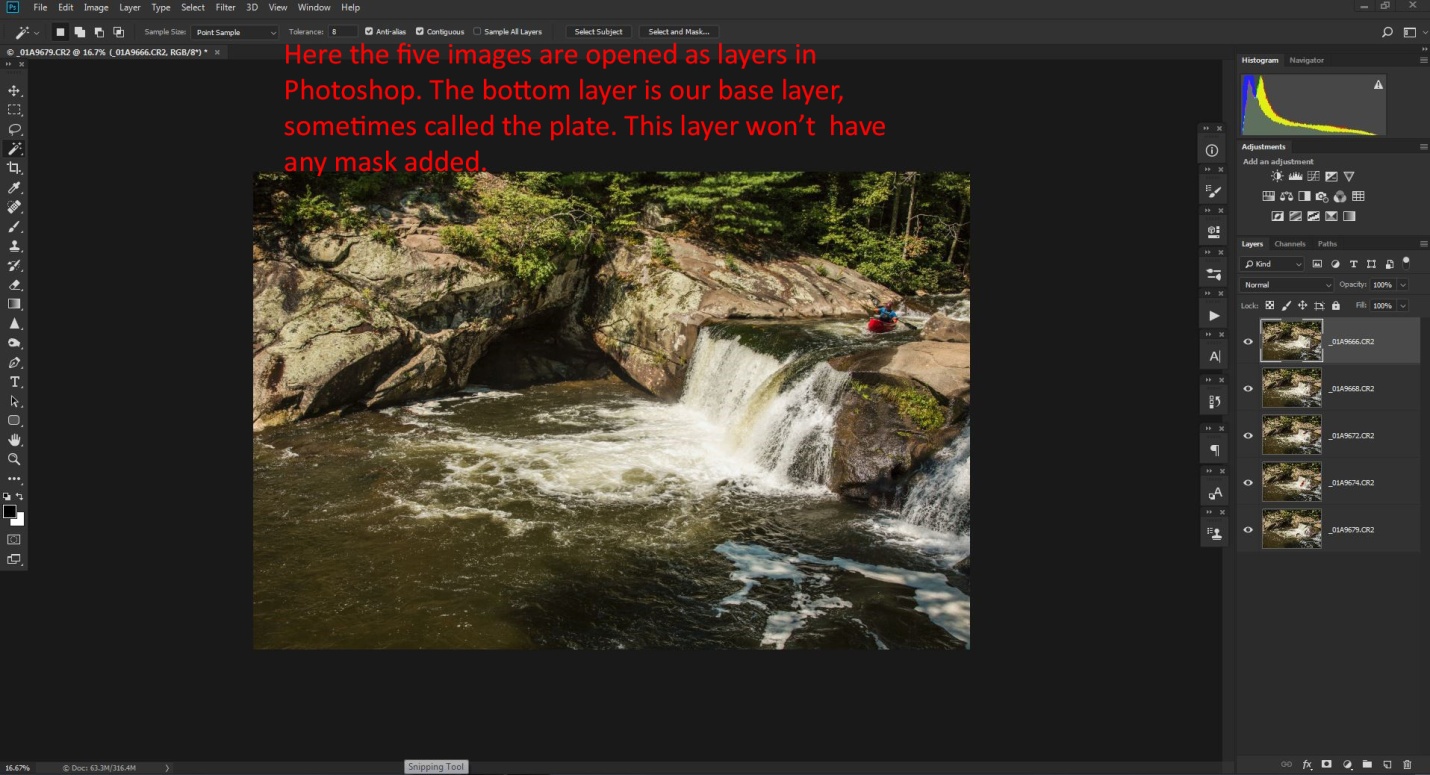
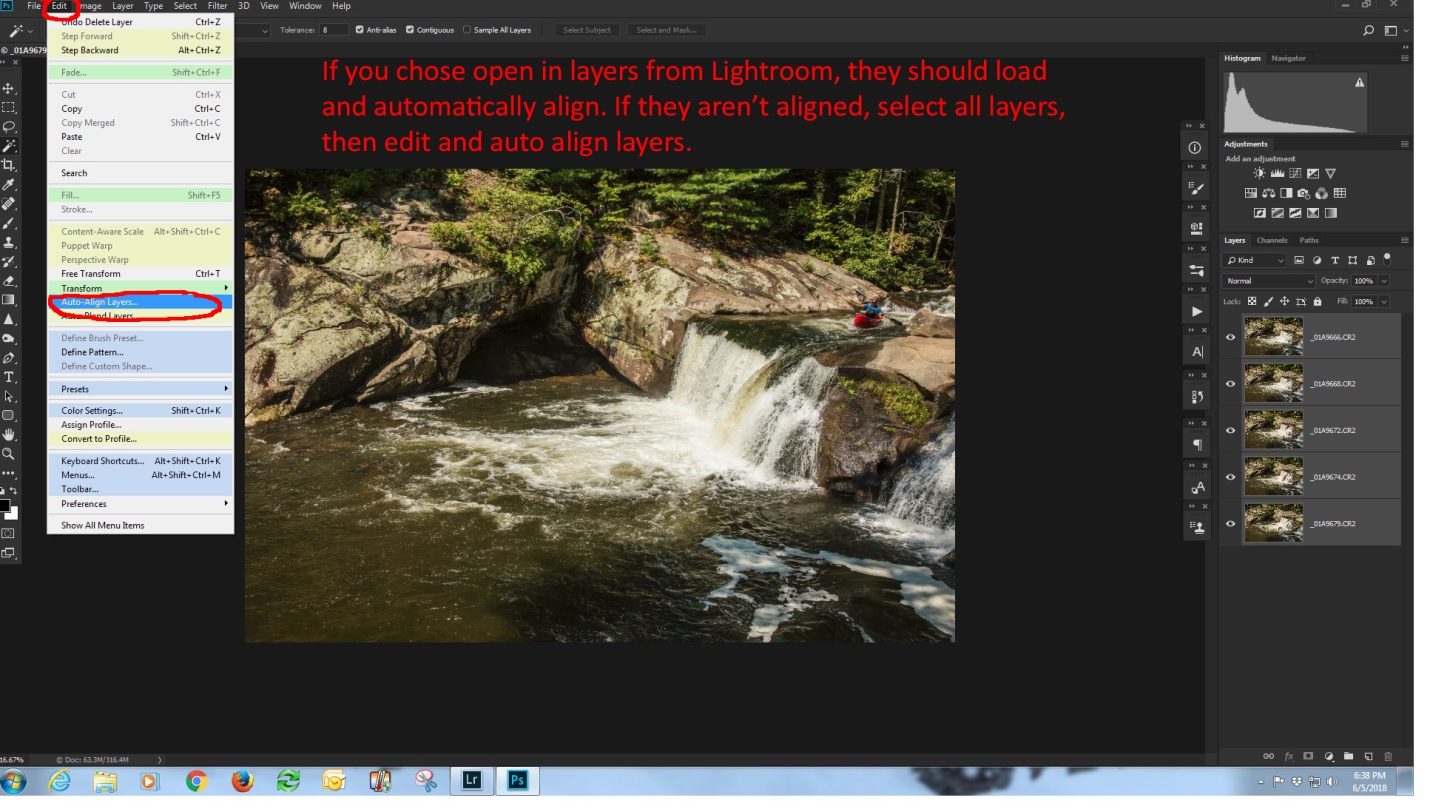
At this point, all of the images should be open as layers in Photoshop and if you used a tripod (you did, didn’t you?) they should be perfectly aligned.
If you didn’t use a tripod (Oh the shame of it all), then ctrl (cmd) click on each layer, choose “edit” and then choose “Auto align layers”.
Creating the layer masks
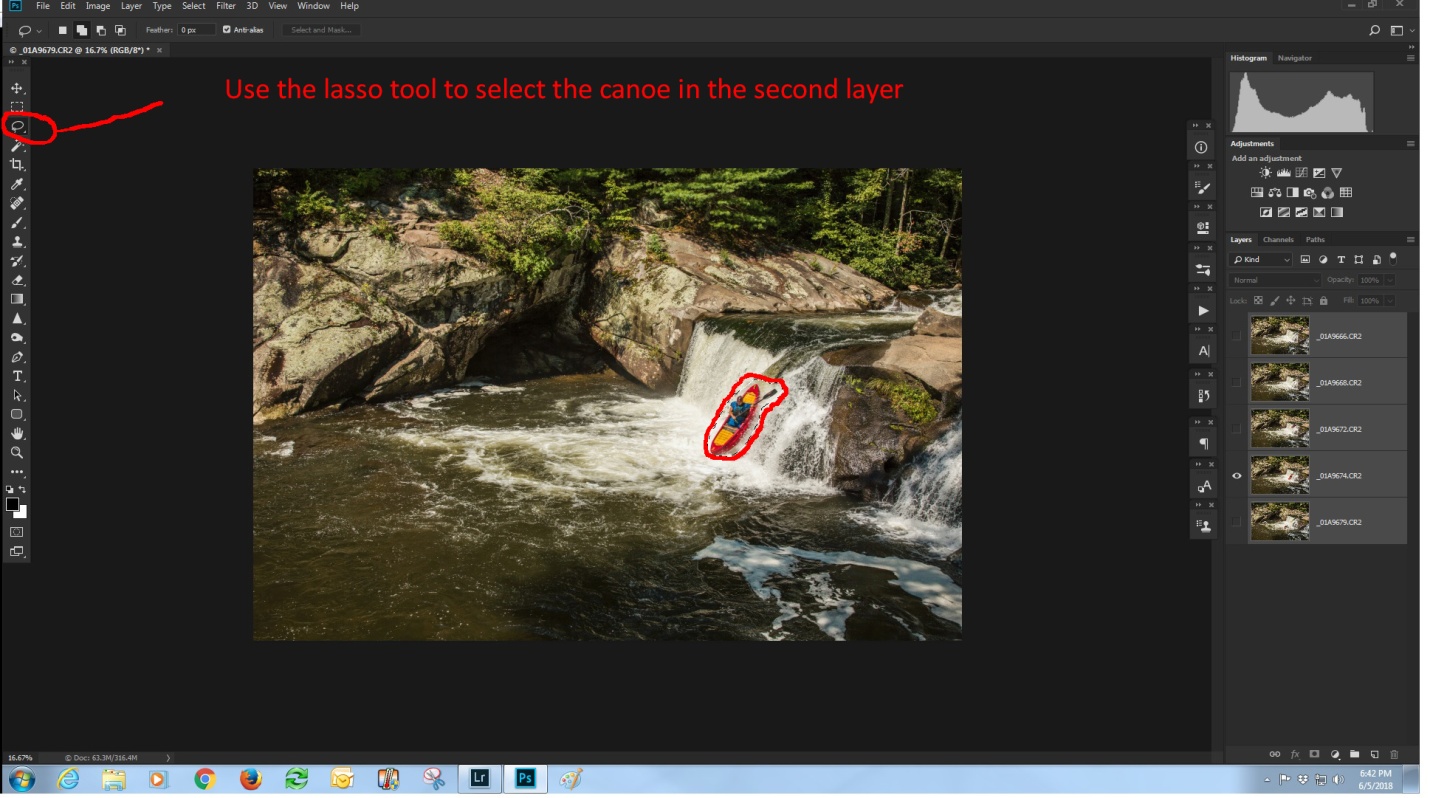
The bottom layer is our background layer, also called the “plate” in compositing. This layer contains one canoe image and our entire scene. We won’t be masking this layer at all. Uncheck the “eyeball on all of the layers except the second layer. Select the lasso tool and draw a fairly tight selection around the canoe.
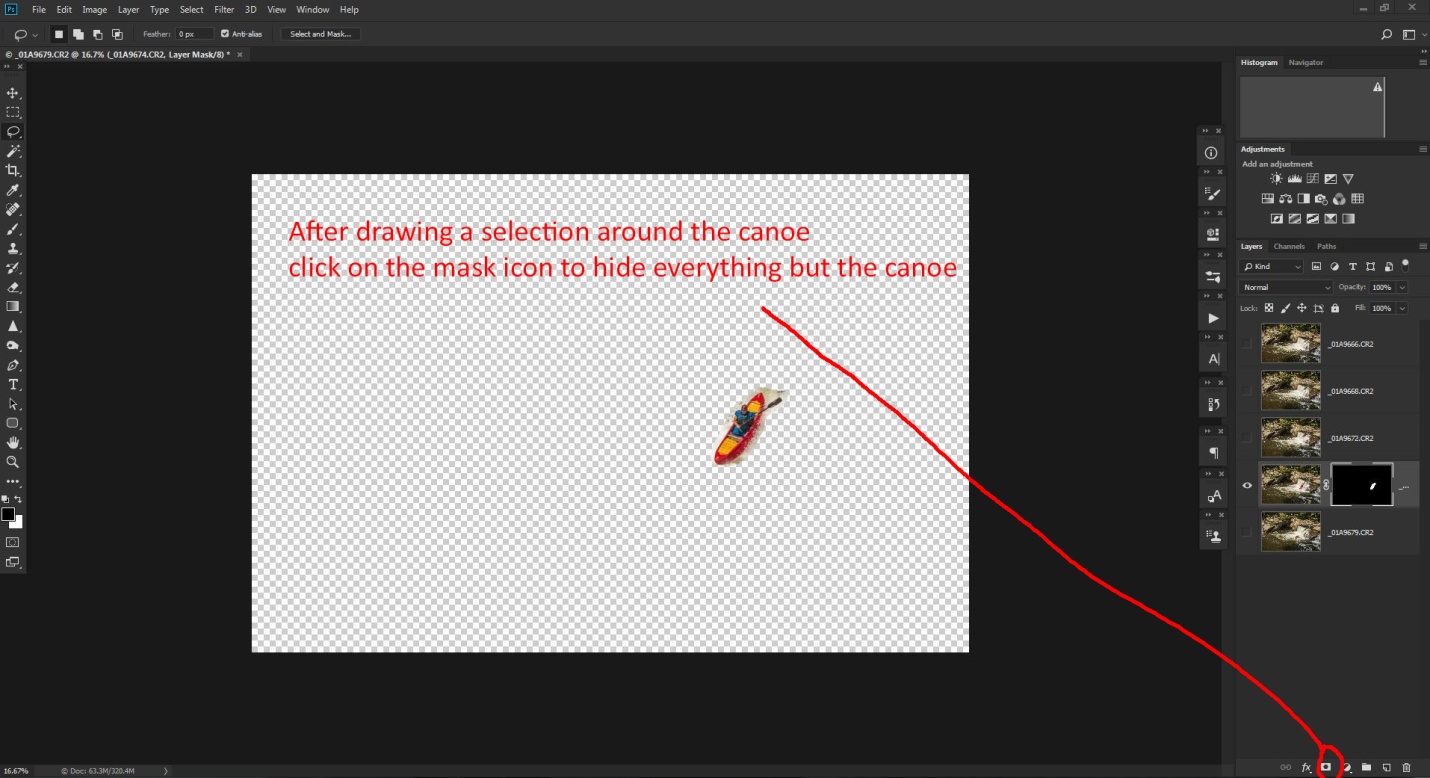
With your selection in place, go to the bottom right and select the third icon from the left to create a layer mask. You will see the mask is all filled in black, except your selected area. With just this layer turned on, everything but the canoe is transparent (indicated by the checkered pattern).
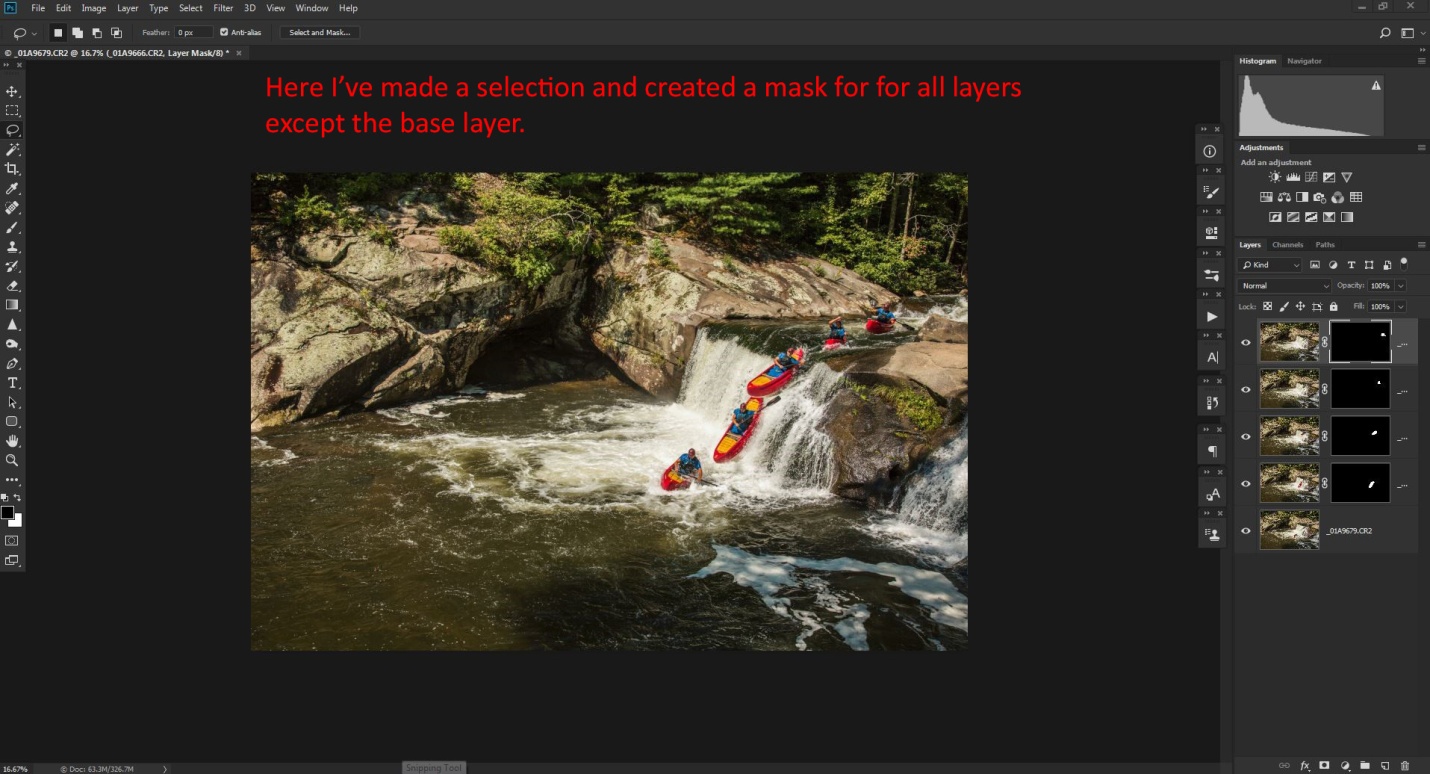
Repeat the process with each succeeding layer. After creating the mask for each layer, check all of the “eyeballs” to make all of the layers visible. If you need to hide part of a layer, paint on the mask with the brush set to the color black and 100% opacity. If you don’t want to completely hide something, set the brush to about 20% opacity and paint in black to make the area transparent. Each new brush stroke will increase the transparency. If you need show more of the image in a layer, paint on the mask with a white brush.
When working with masks, remember “White reveals, black conceals.”
Flatten the image by selecting “layer” and “flatten image”
Finishing the Image
I improved the contrast by using NIK Color Efex 4 and then the tonal contrast filter, using the “standard” setting. I then flattened the image.
At this point, the image felt a little dark, so I opened the Camera RAW filter (ctrl-shift-A) and increased the exposure, increased shadow brightness, and decreased highlights slightly.
And here is the final image with all of the edits.
With a little imagination, you will think of many other uses for this technique. It would work well for track and field sports like pole vaulting or hurdles, or even for doing a multiple image portrait with your subject in different locations within the image.