This article is actually a little beyond “basic” as it involves Photoshop CC rather than Lightroom, Photoshop elements or Nikon or Canon image editing software.
In my last article on composition, I mentioned that cropping could be used to improve composition. Most of the time you would think of cropping as the removal of unwanted areas from the periphery of a photograph to remove an unwanted object or irrelevant noise from the periphery of a photograph, or to change its aspect ratio, or to improve the overall composition. In other words, we’re cropping in.
However about a year ago Adobe quietly added a new feature named “content aware cropping” to Photoshop CC. This new feature actually allows us to crop out, not just in, and it generates new image to fill in the blank areas. I’ll show you a couple of examples so you can see what it does and how to use it.
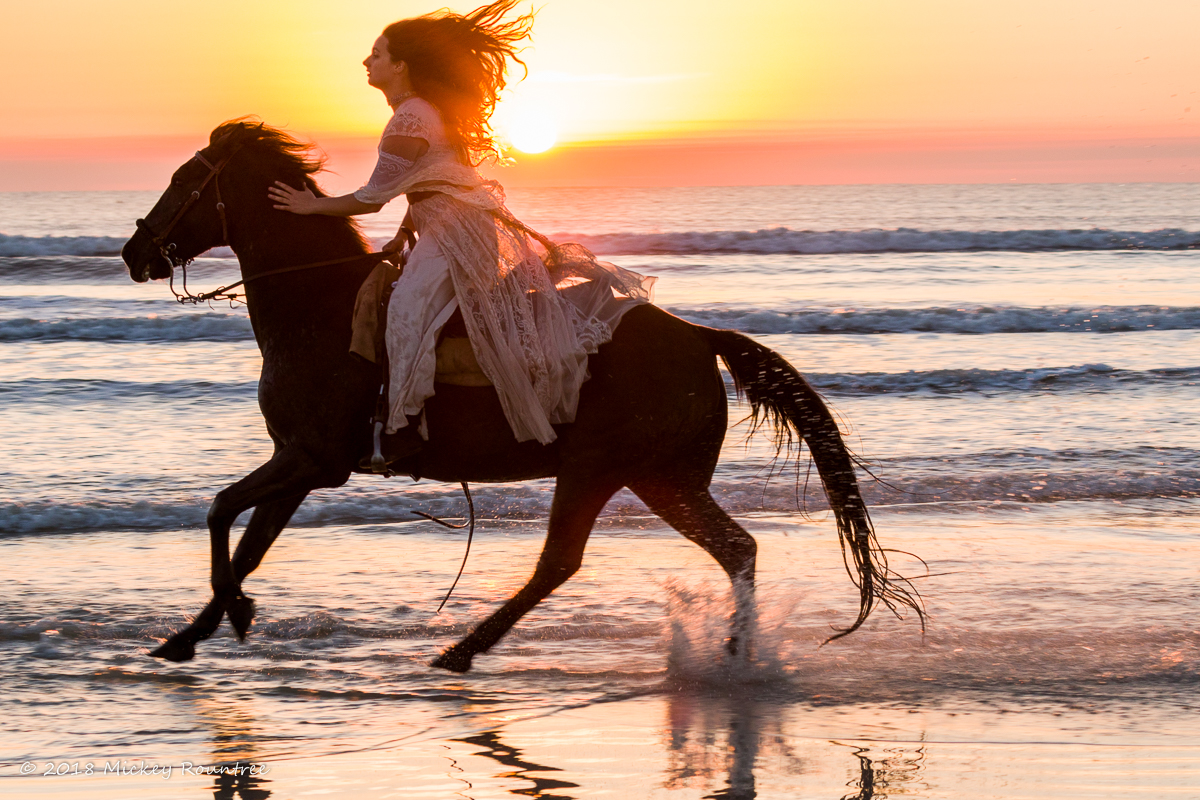
Here’s an image shot at Photofest 2018. There are a couple of problems with the image; the rider’s hair is touching the upper border of the image, and there should be more room in front of the horse and rider. A couple of years ago this image would have either been deleted or required a lot of tedious cloning to salvage it.
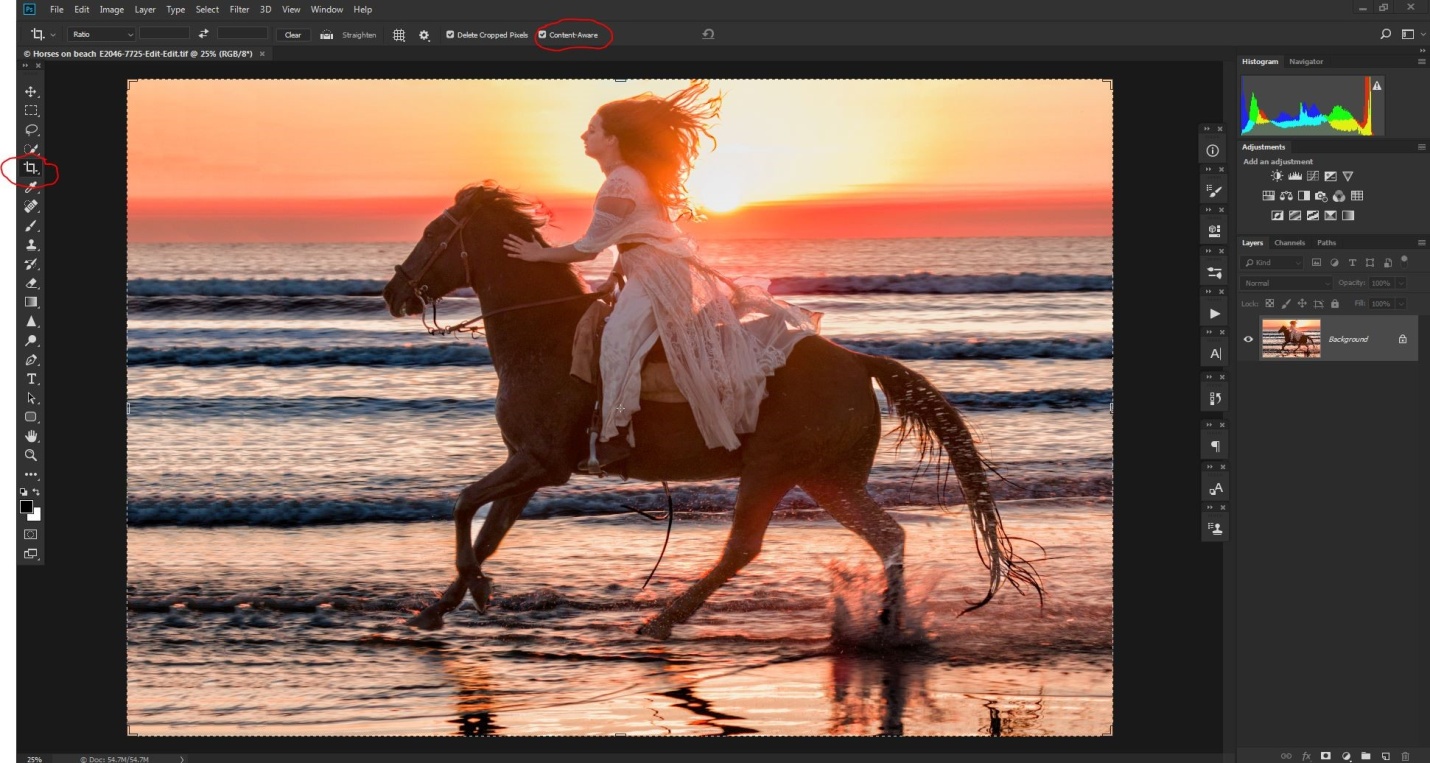
Here I’ve opened the image in Photoshop, and selected the crop tool, and most importantly checked the content aware option (circled in red).
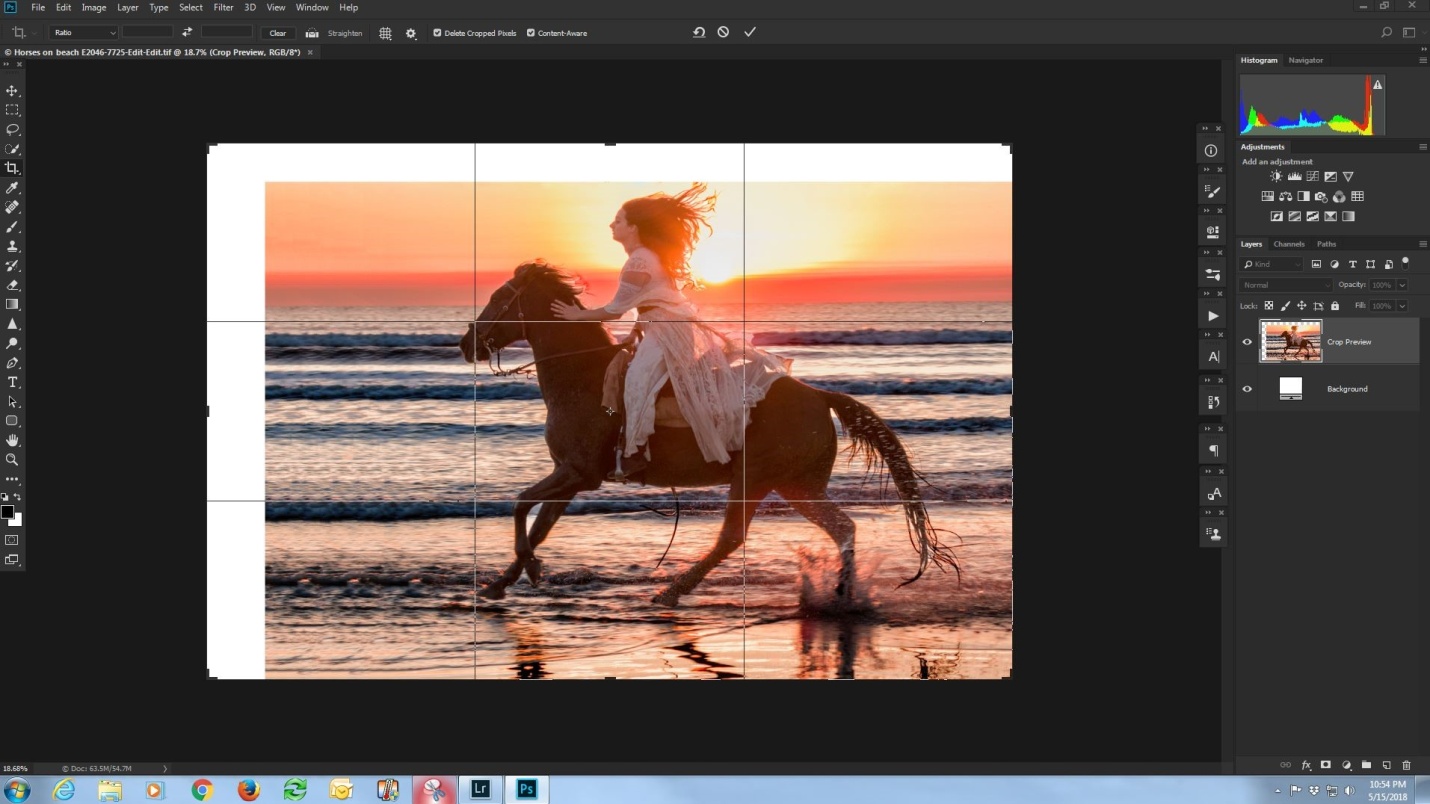
In the shot below, I’ve dragged my cropping borders up and to the left. In the bad old days, the white areas would have remained white. But now, press enter, and prepare to be amazed.
Using some really powerful math, Photoshop evaluates the area next to the areas to be filled, and generates new image to fill the blanks areas. Sometimes it is perfect or almost perfect, and sometime we did need to do some touch up work with the clone tool. How well it works seems to depend on how much extra space is added, and how much detail is in the surrounding areas.
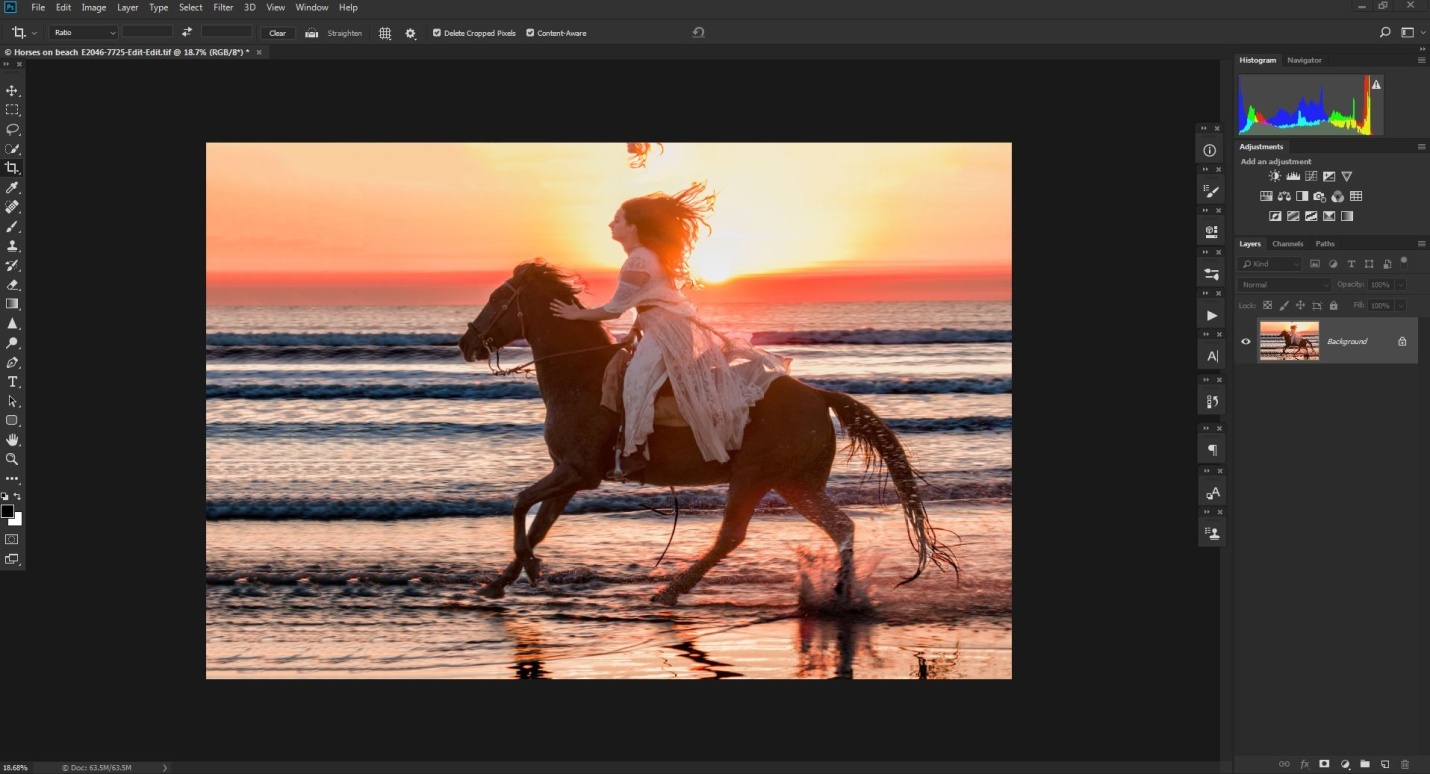
In the shot below, content aware has done a pretty good job, but it has copied some extra hair above the rider, and it has repeated a series of highlights in the waves in front of the horse’s hooves.
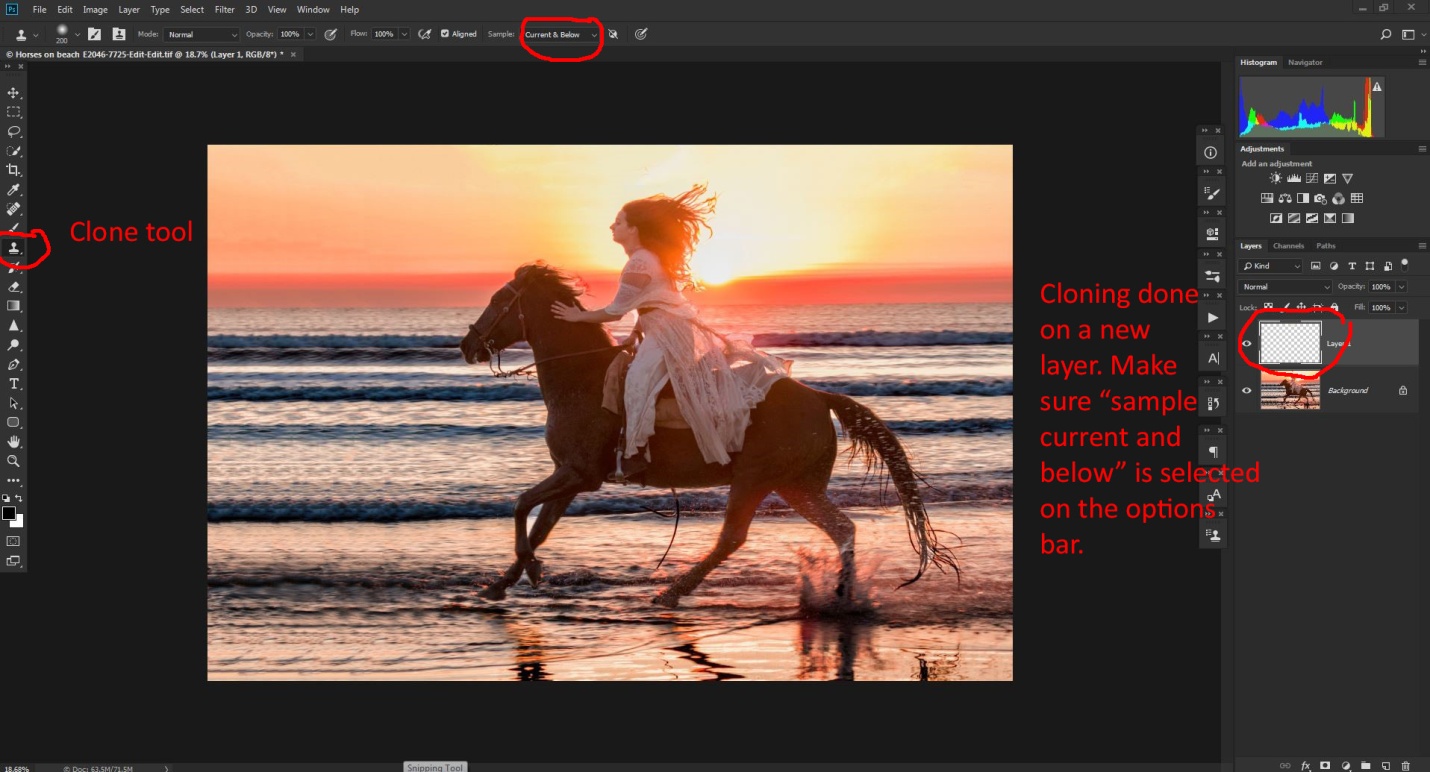
Below I’ve done my cloning to remove the extra hair and the pattern in the waves. It’s not necessary, but I always clone into a new blank layer. That way I can turn the layer on and off to see my results, and if I really mess up, I can just delete the layer and start over. If I cloned on the image layer, I might have to quit without saving and lose any other edits I had already done.
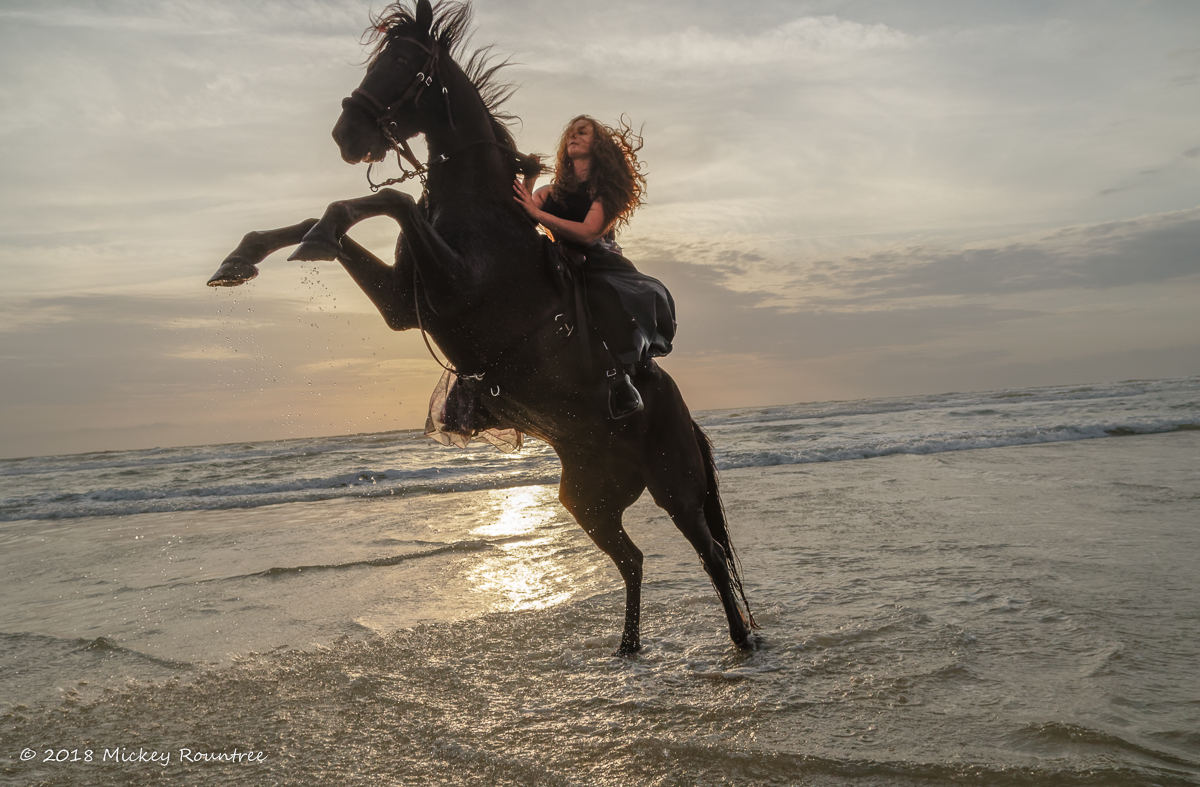
Below is the final image with all changes. By the way, as I said earlier just a few years ago, this image might have been deleted. When you have an image that is good, but not quite perfect, don’t be too quick to delete it. You never know what new features may be coming in the future that will make it possible to fix the image.
Here is another image from Photofest 2018 which has several problems that can be fixed with content aware cloning. Here the horse’s mane is clipped, there needs to be more space in front of the horse and rider, and the horizon is way beyond crooked. In my defense, this happened quickly, right beside me while I was shooting in another direction, and I barely got turned around in time for two quick shots at the wide end of my zoom lens. With the horse up in the air (and a little too close for comfort), I didn’t have time for perfect composition and leveling the horizon.
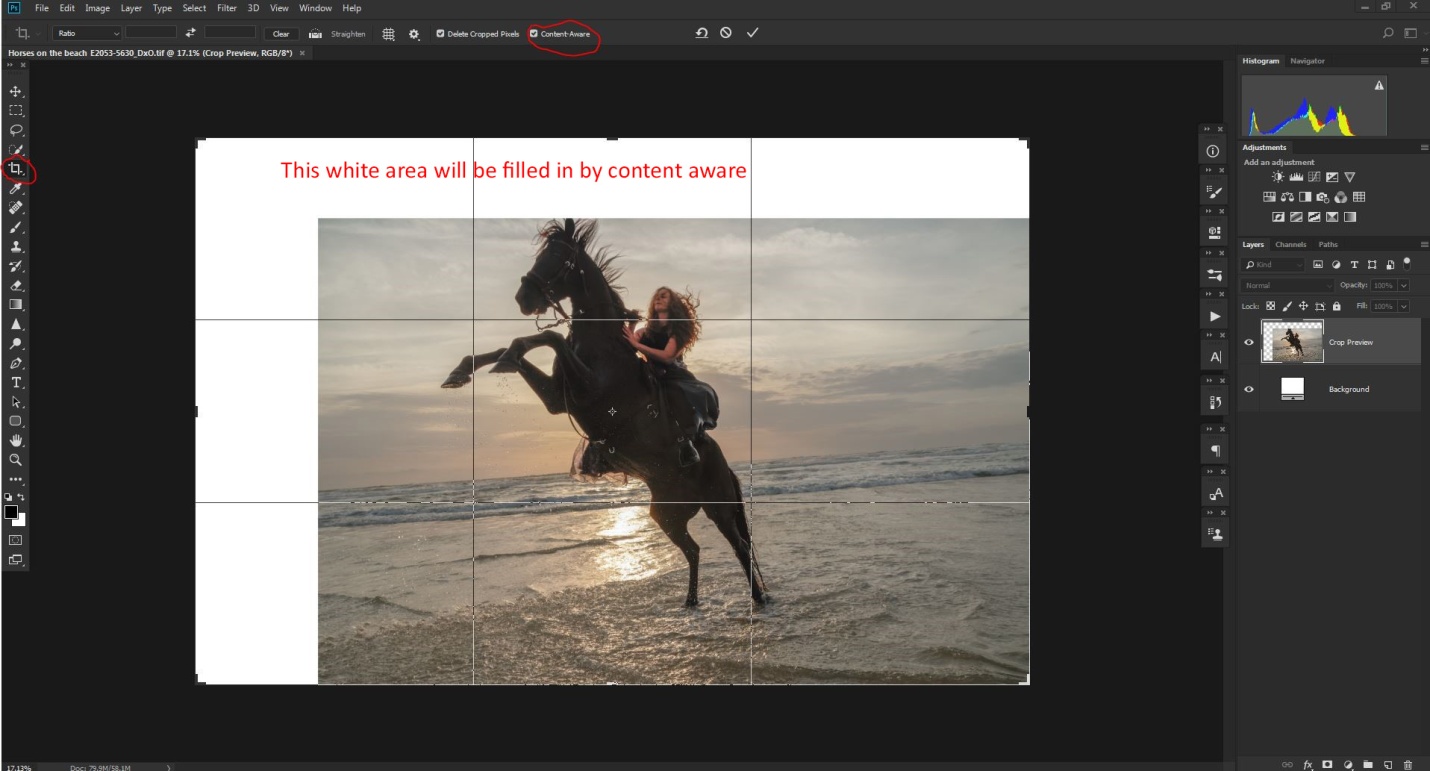
First I’ll add some extra space above and in front of the rider. I was generous in adding space, because I’ll need it in a later step. Again I selected the crop tool, and made sure content aware was checked on the option bar.
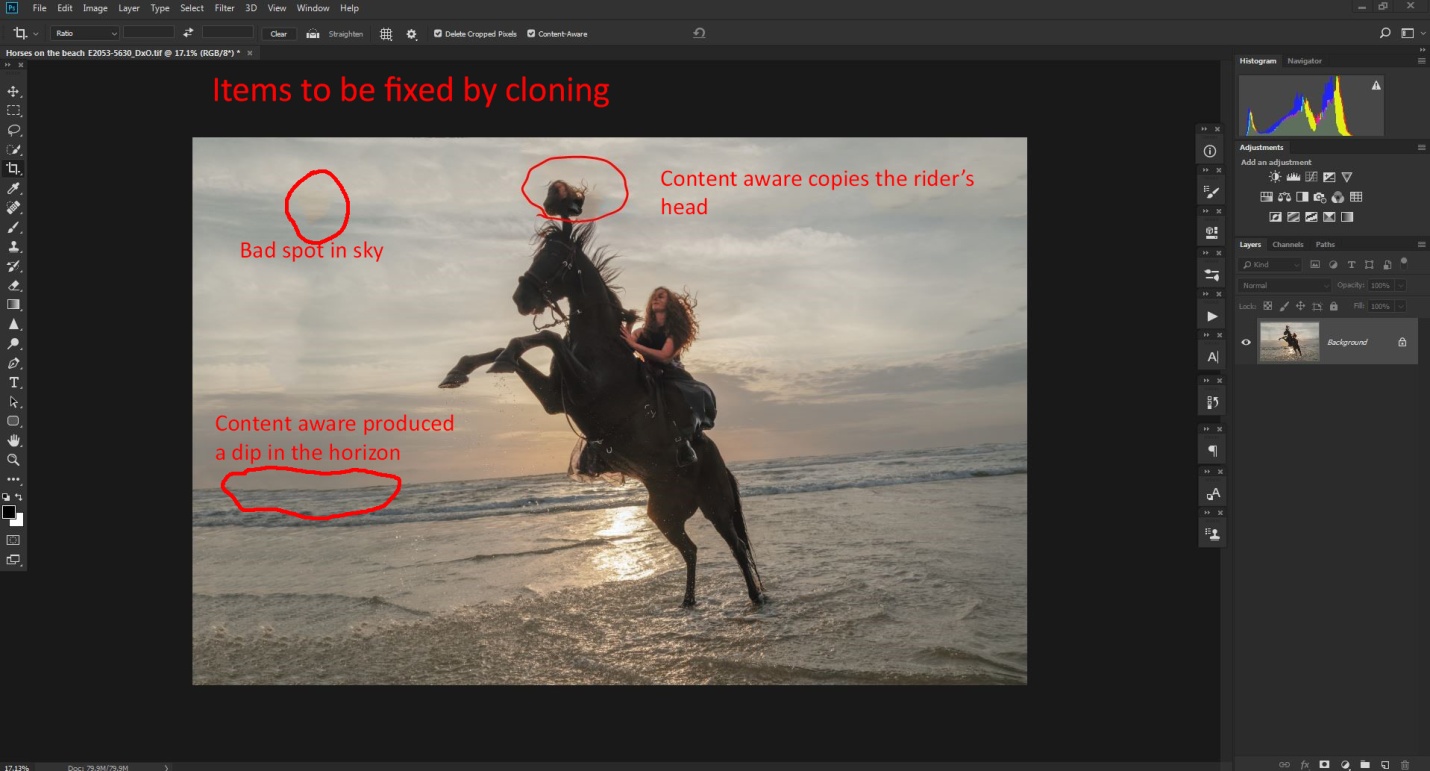
Again, content aware did a pretty good job, but it added a copy of part of the rider’s head, a bad spot in the sky and a dip in the horizon.
Here I cloned out the extra head and the bad spot in the sky. I decided to wait until after the next step to fix the dip in the horizon. I added the tip of the horse’s ear and extended some of the mane hair so that it didn’t look clipped. Again I did my cloning on a new blank layer.
To fix the crooked horizon, I selected the crop tool, and then selected the straighten tool on the option bar. I dragged this along the horizon line and the image was rotated just the right amount. With content aware checked, the white areas will be filled with computer generated image. If this isn’t checked, Photoshop will crop the image down to remove the white areas.
And here is the final image with all of the cropping and straightening done. I also applied NIK Color Efex 4 Tonal Contrast filter to the sky and water.