In this article I’ll show you my most used plugin, Tonal Contrast which is found in the DXO NIK Collection. Version 6 has just recently been released, but I am still using version 5. I use this program on almost every image of landscapes or inanimate objects, and its usually my second step after using Topaz Photo AI. Also as I said in my earlier article, even though this can run as a stand-alone program, or from within Lightroom, I use it as a plugin in Photoshop. This gives me the benefits of masking, blend modes, and “blend if” controls. I actually use this so frequently that I created a Photoshop action, so I can apply the effect and a blank mask with a single click. The NIK plugins offer “control points” which allows for localized adjustments within an image. You may find them useful, but my workflow has always revolved around layers and masking, and that’s what I’ll be describing.
You can find more detailed information on how to use any of the NIK programs, including the use of control points at:
When these articles are converted to PDF and sized for the newsletter, the resolution and quality of the images is seriously degraded. If you would like to read the article and see the images as I did, you can see this article on my website at this link.
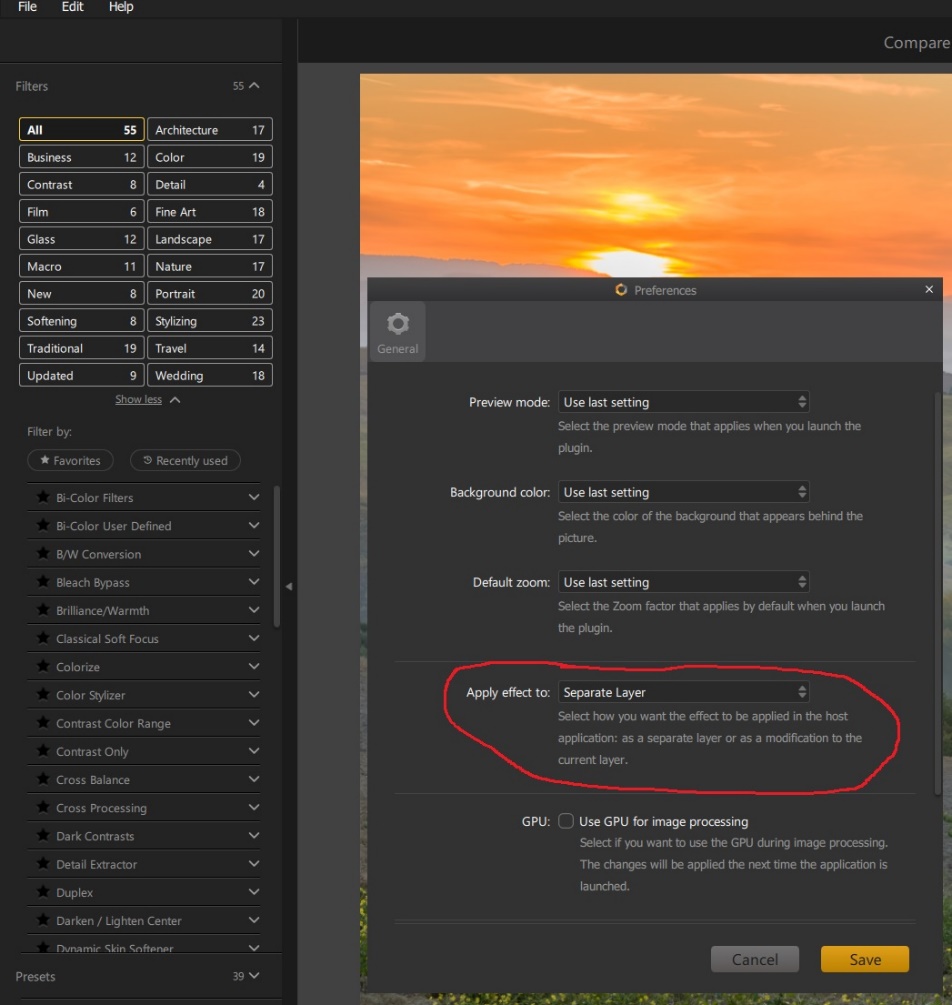
Since I work in Photoshop and use layers, I open Color Efex, and go to File/Preferences and choose “apply effect to separate layers”. This gives me the ability to use masks and opacity for greater control.
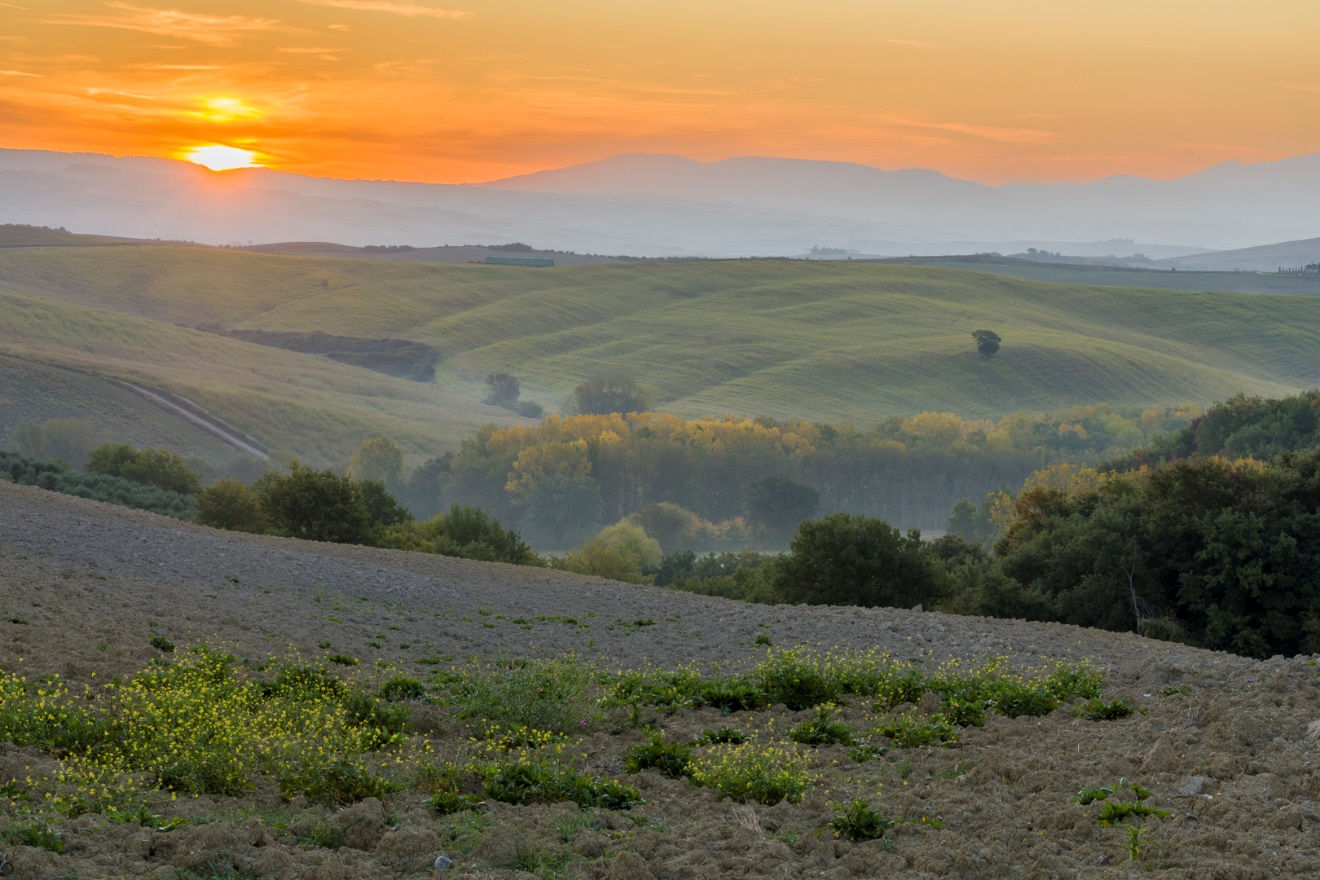
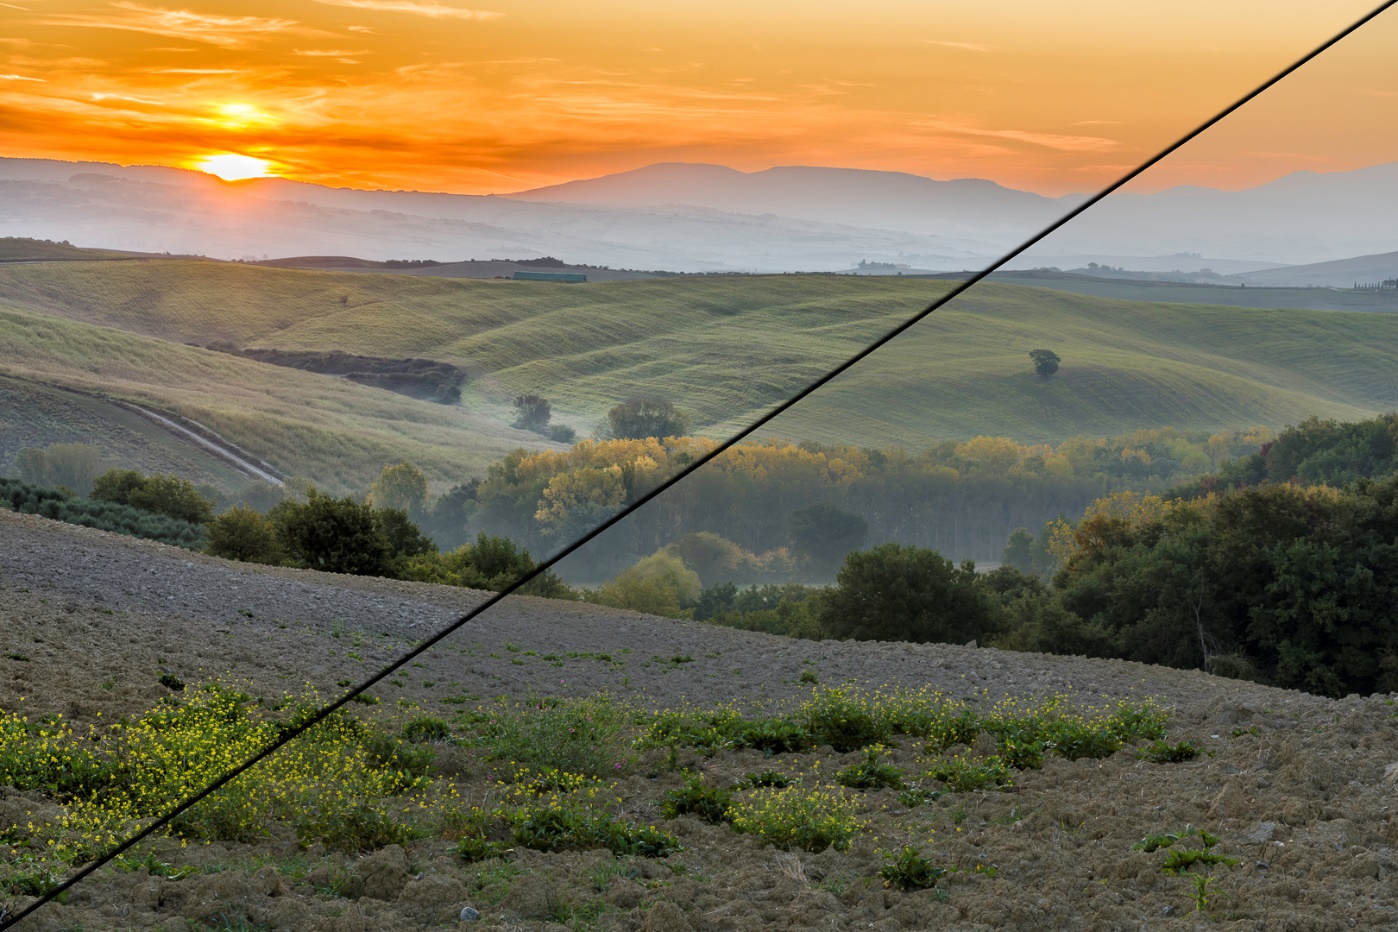
We’ll start with this image of a field in Tuscany. This has only basic editing done in Lightroom.
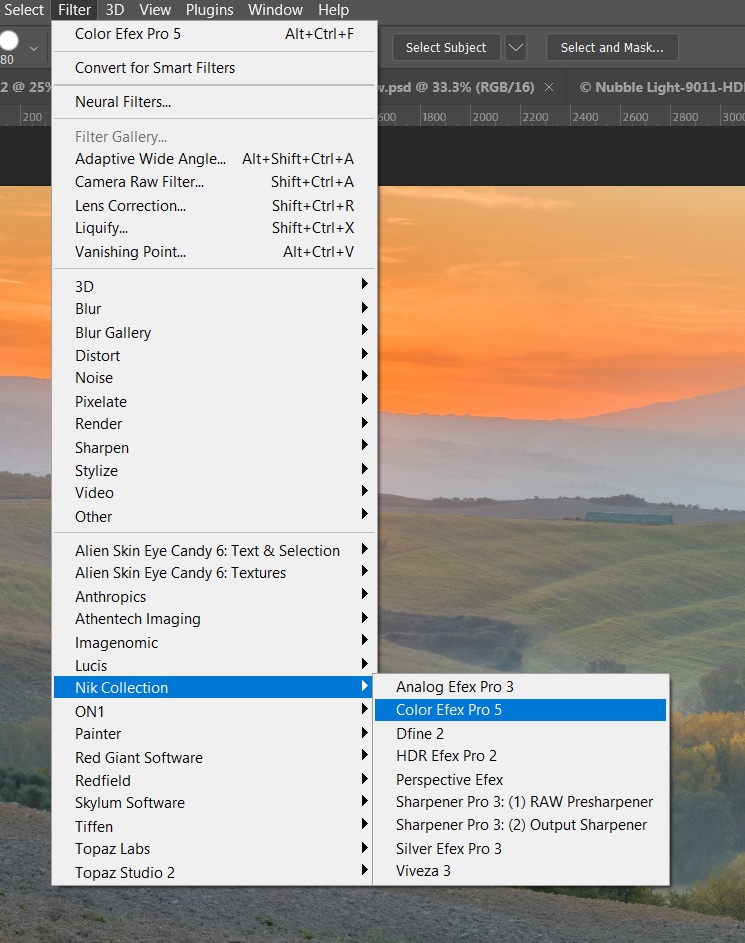
With the image open in Photoshop, open NIK Color Efex by selecting filter/NIK Collection/Color Efex Pro 5.
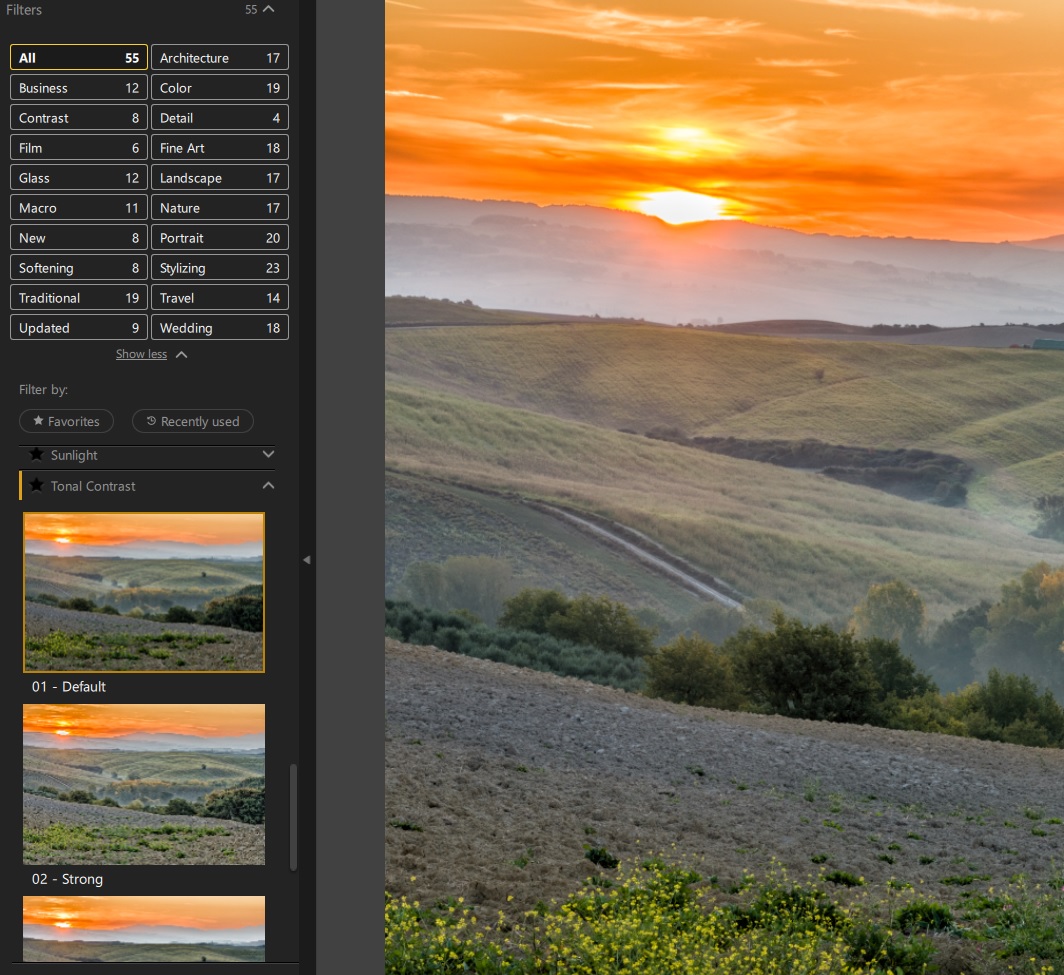
Within Color Efex, select all filters, and scroll down to Tonal Contrast. There are presets for default, strong, high pass, and softening. I almost always use the default preset. Once you select that, there is a panel that opens allowing you to refine the settings, but I rarely find that I need to change the default settings. The strong setting is a bit extreme even for my tastes, high pass includes some extreme sharpening and usually looks like a bad HDR from 2010, and softening actually reduces contrast adding a haze effect.
Here I did a split screen effect with Tonal Contrast on the left and no filter on the right. You see that the right side is more flat, while the contrast between light and shadow on the left adds depth and dimension to an otherwise flat image.
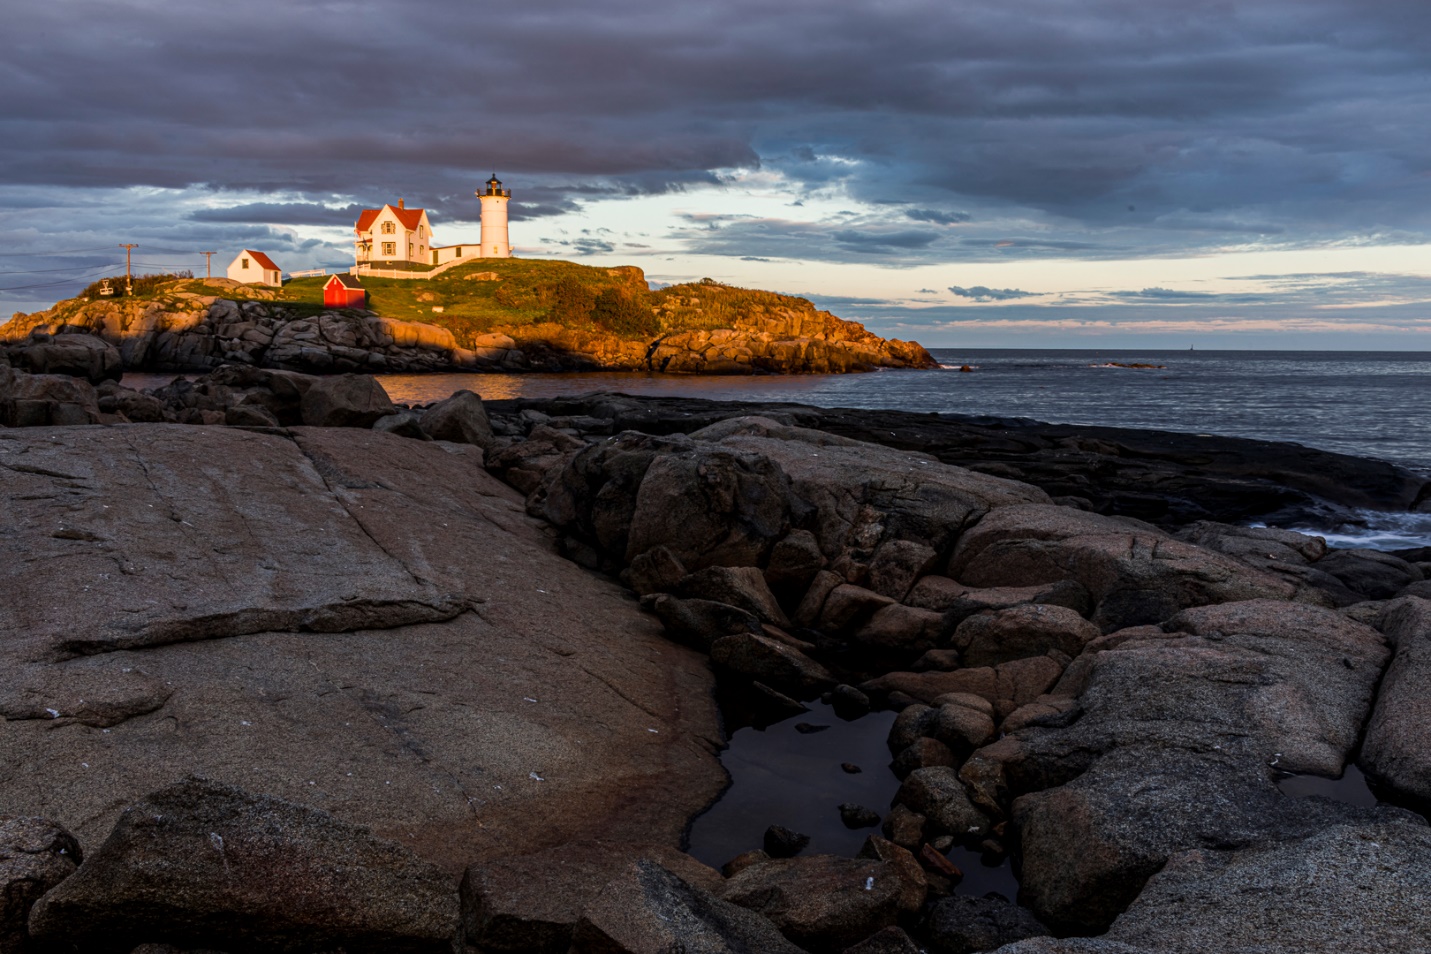
We’ll work on this next image to show how to deal with one of the problems that often arises when an image has sky and clouds. Here is the image with basic editing done in Lightroom only.
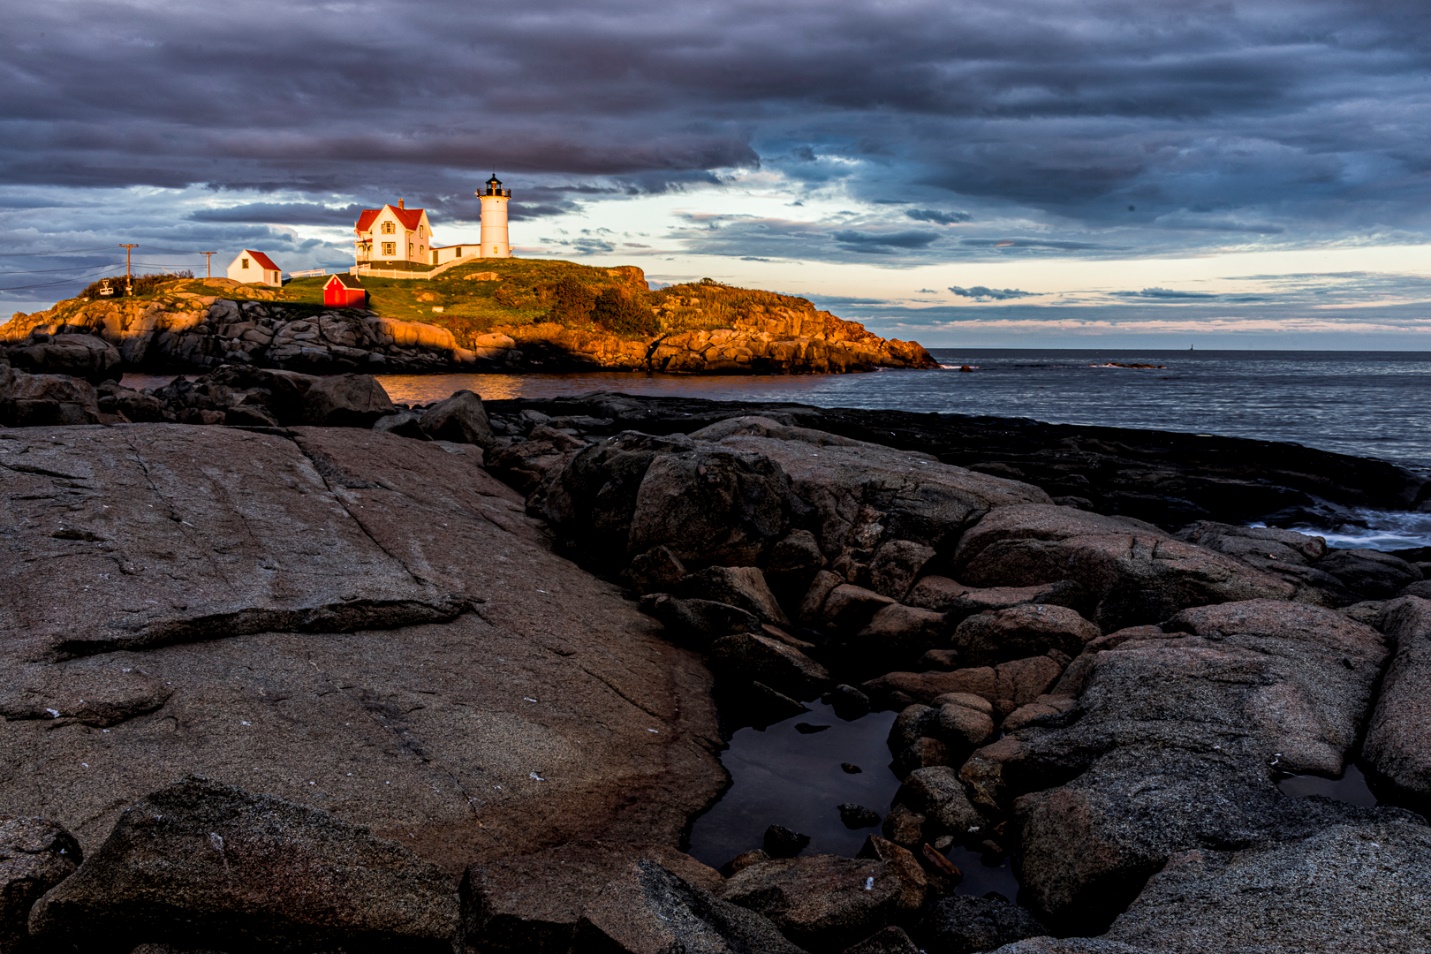
Here I’ve opened the image in Lightroom, and applied Tonal contrast. Notice that while the rocks and lighthouse look good, the effect is a bit too much on the sky, and the clouds look “Crunchy”.
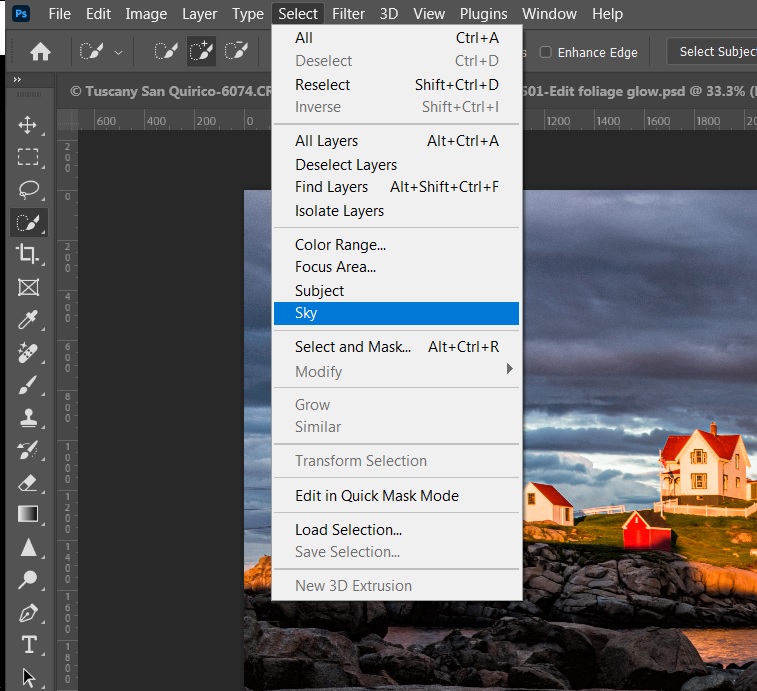
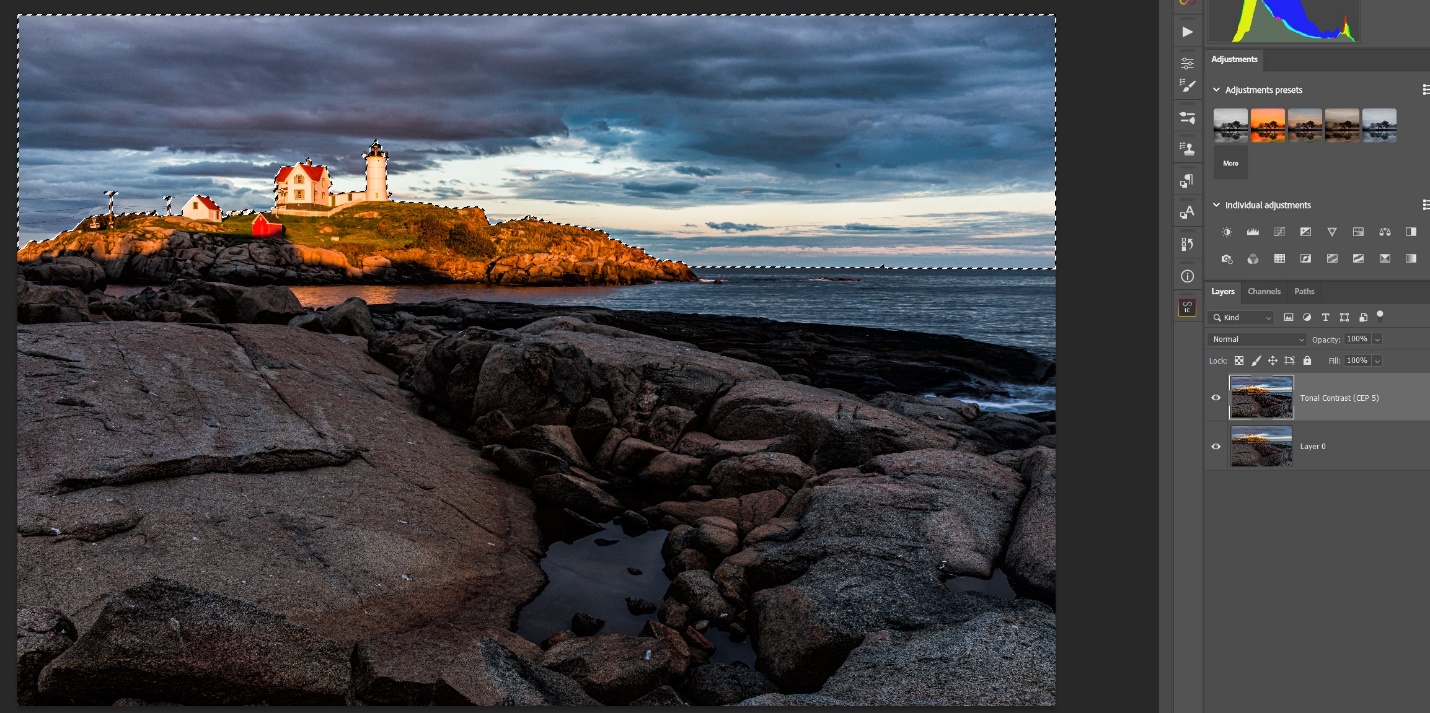
This is where the power of layers and masking really comes to the rescue. We’ll start by going to select/sky to create a selection of just the sky.
Sometimes it’s perfect with one click, or you may need to refine it with the various selection tools, as I did on this image. Here you can see my final sky selection.
Now we’ll create a mask to block the effect from just the sky. With the sky selection still in place, hold down alt (Opt) and click the mask icon at the bottom of the layers palette. This creates a black mask over the sky. Without holding alt, the foreground and light house would have been masked out. If you ever forget to hold the alt key and mask the wrong part of the image, click on the mask and then ctrl-i (cmd-i) to invert the mask.
Here you see the mask we created. When working with masks, remember “White reveals, Black conceals”.
This completely removes the contrast effect from the sky, but maybe we do want a little of the effect, so the sky blends more naturally with the rest of the image. Double click on the mask to open the mask properties, and you can use the slider to adjust the density of the mask. I find something between 30 and 50% usually works, but move the slider back and forth and adjust to taste.
Here the sky has been masked about 50% and the sky and clouds look a bit more realistic. There is still a lot to do to finish this image, but notice how much just applying Tonal Contrat has improved the image.
Here is one final image with basic editing in Lightroom.
I added tonal contrast, and since there was no sky, there was no need to do any masking. Notice how much just this one step has increased the feeling of dimension and direction of light.