I went out yesterday and grabbed a couple of shots of a train coming out of a tunnel. I got into position with about 10 minutes to spare and had time to plan my composition, and check my camera settings.
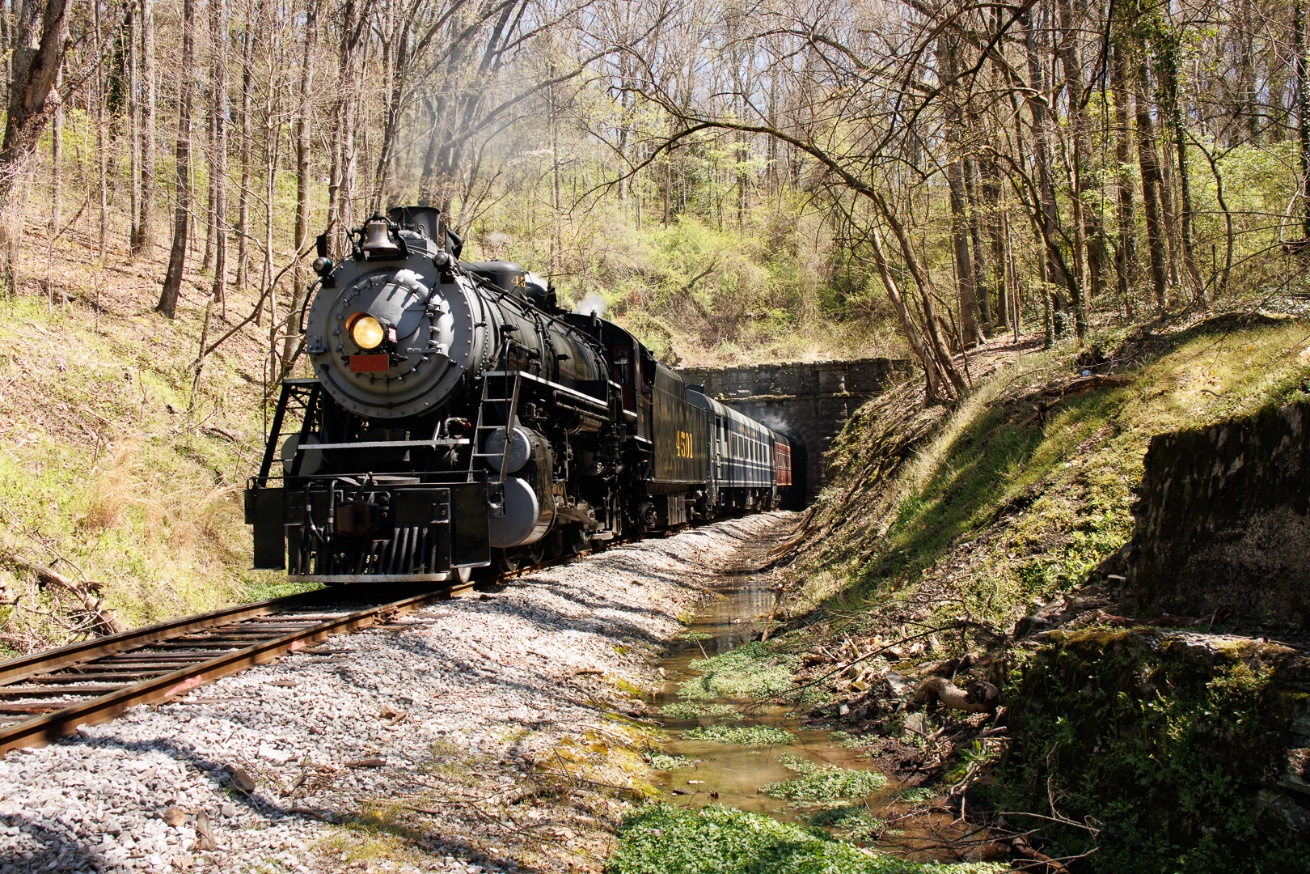
If you look at the first image below and pay attention to the shadows, you’ll see that the sun was high overhead and slightly to the right. The tunnel and tracks are in a gully, so the hillside on the left was brightly lit, the train was mostly lit by overhead raw sunlight, and the hillside on the right was more shaded. I chose to use manual exposure at 1/250 and f/8 and ISO 400. I needed the fast shutter speed to freeze the motion of the train, and I wanted f/8 for depth of field. These settings dictated the ISO 400 which is well within the good range for my camera. Once the train left the tunnel I only had about 20 seconds to shoot about 15 images, while continuously zooming out to capture the train as it got closer, so it was fortunate that I had the time to get all of my settings locked in. I also shot in RAW which gave me the most latitude in processing.
Because of the high angle of the sun on the train, the lower parts were a bit underexposed, and the brighter sun on the left hill was overexposed, but not blown out. The exposure was the best compromise, and I knew I could bring down the highlights and open up the shadows in editing. If I had increased the exposure for the train, I would have blown out highlights on the hillside that I would not have been able to recover. If I had decreased exposure for more detail in the hillside, I would have had very dark shadows in the undercarriage of the train that would not lighten without lots of noise and loss of detail.
Here is the image straight out of camera. It’s not exactly pretty, but there is enough detail to work with in both the shadows and highlights.
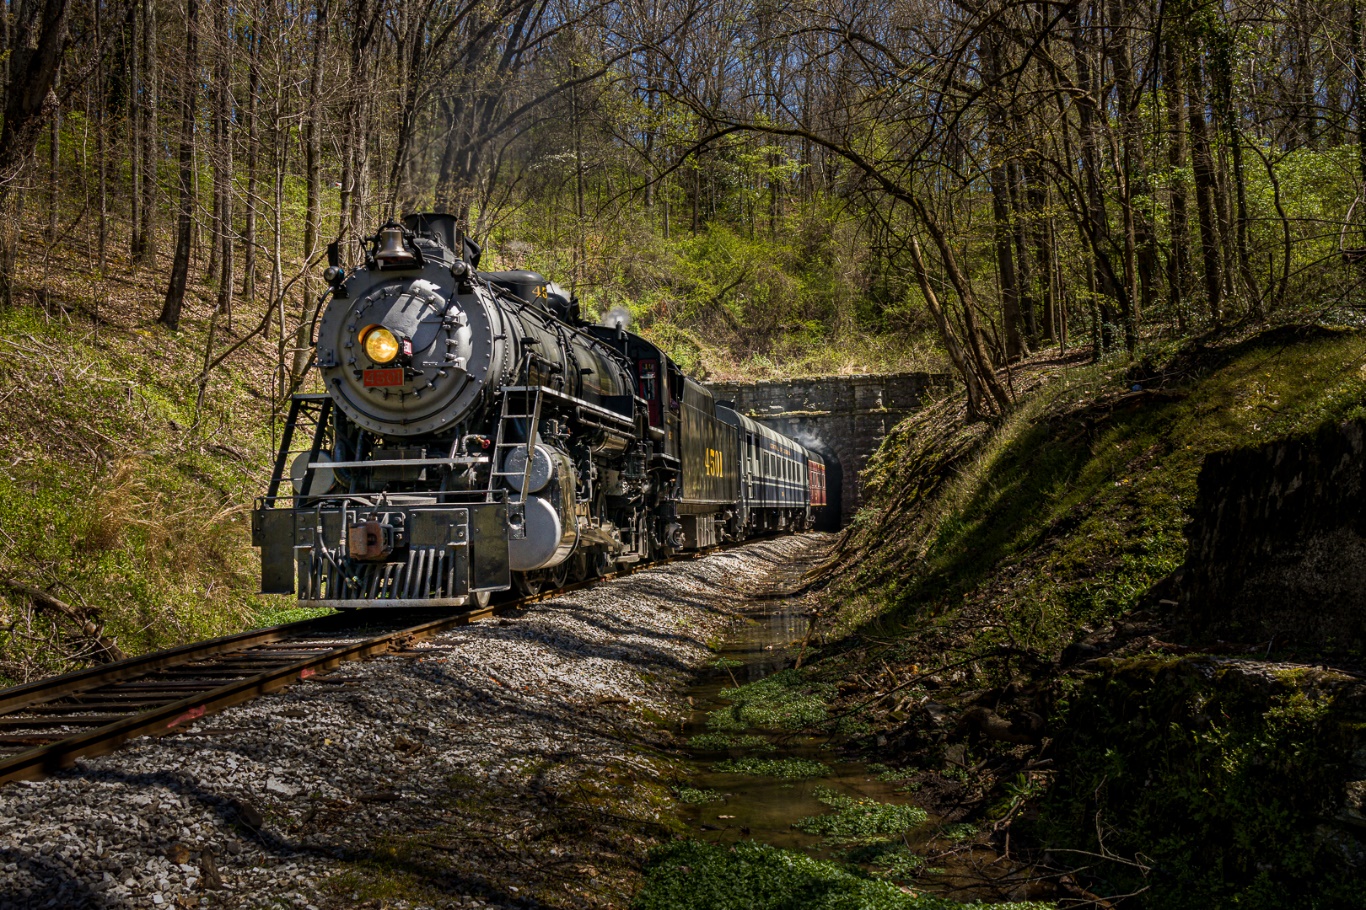
I was able to get the image looking much better in Lightroom, before moving on the Photoshop for final tweaks.
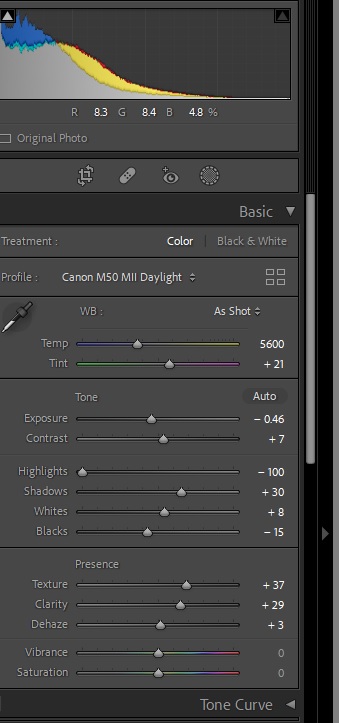
In Lightroom, I decreased exposure slightly, decreased highlights all the way, increased shadows a bit, and added texture, clarity and a bit of dehaze.
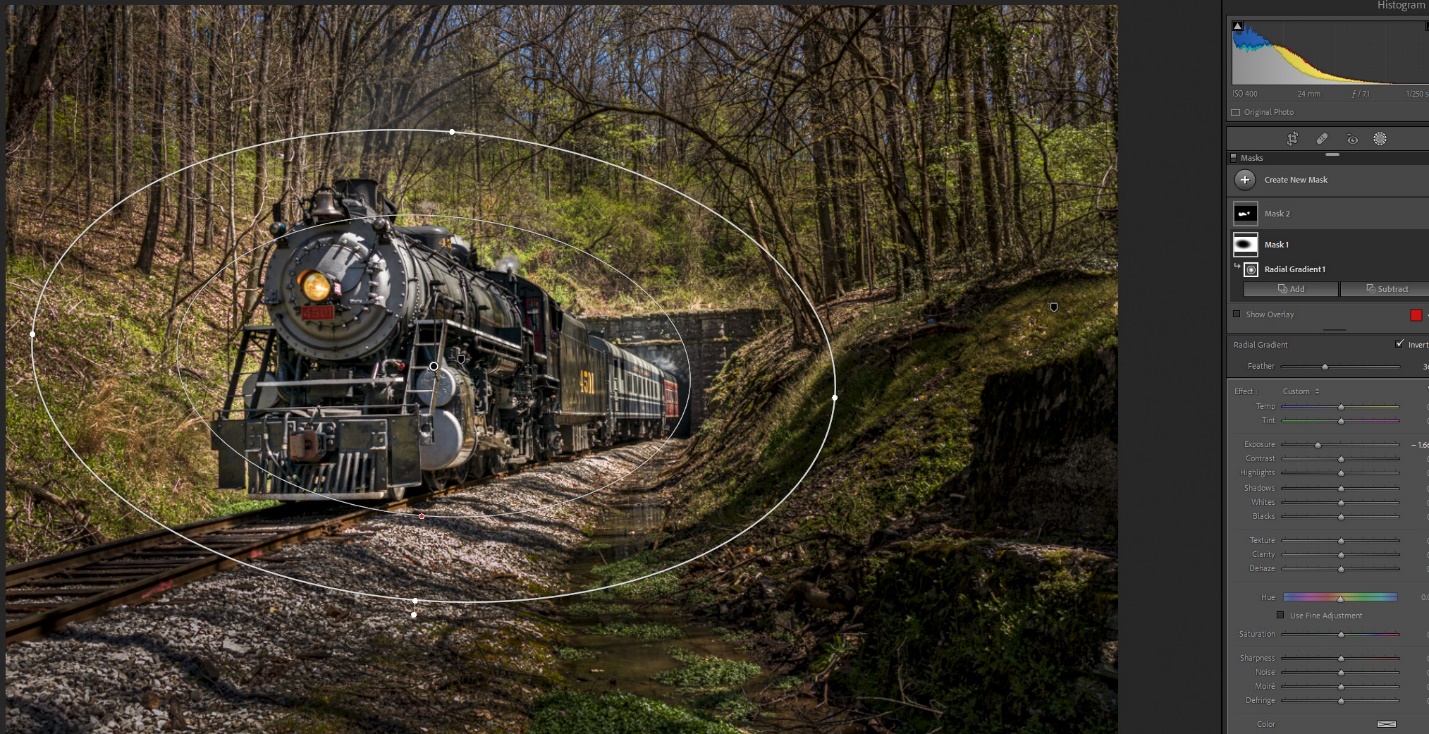
The Lightroom adjustments that really brought the image to life were the local adjustments using the new masking features. These have been available in the last several versions of Lightroom; they just weren’t referred to as masking. First and most important I used the radial filter inverted so changes affected what was outside of the gradient. I darkened everything but the train by 1.6 stops to pull interest toward the train. Generally, the eye goes toward the lighter parts of the image, so the extreme darkening made the train more obviously the center of interest. Certainly this was extreme and not anything like what my eye (or camera) saw, but now we’re moving toward artistic, and not just realistic.
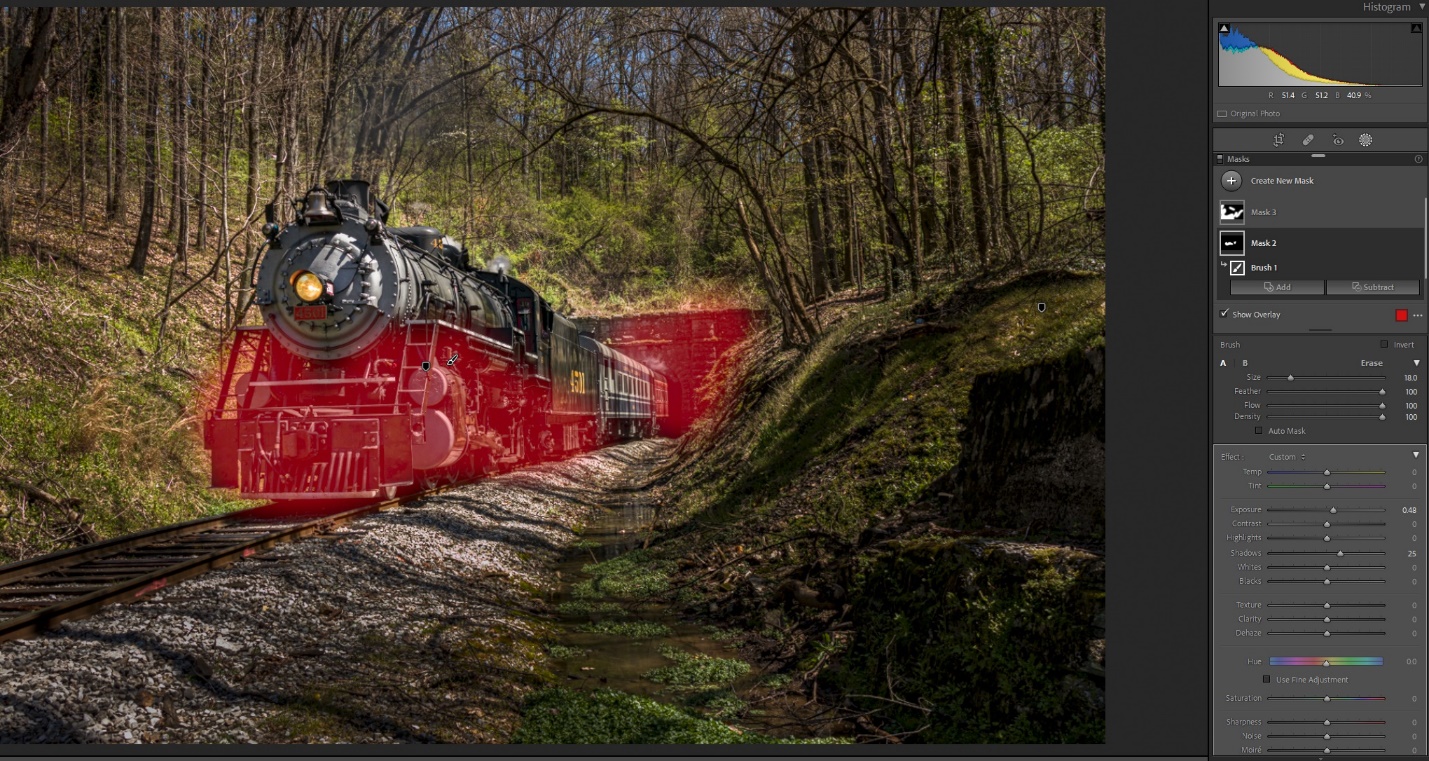
Next I used a brush to lighten the train’s undercarriage, the front of the engine and the tunnel wall. I increased exposure by about ½ stop and increased the shadows by about 25%. You can see the areas I painted highlighted in red.
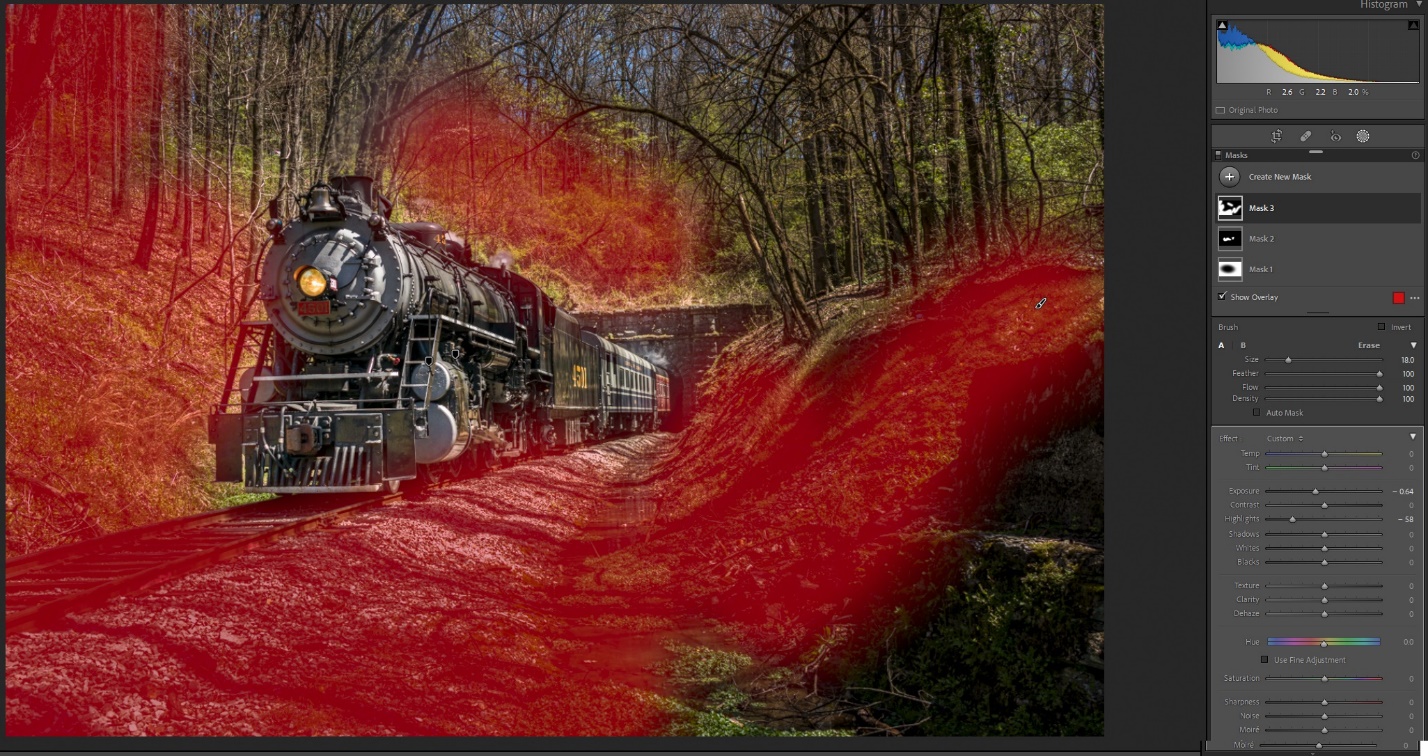
I used a second brush to do some additional darkening by decreasing exposure .64 stops, and also decreasing highlights. Again the idea is to use light and dark to bring the eye to the train.
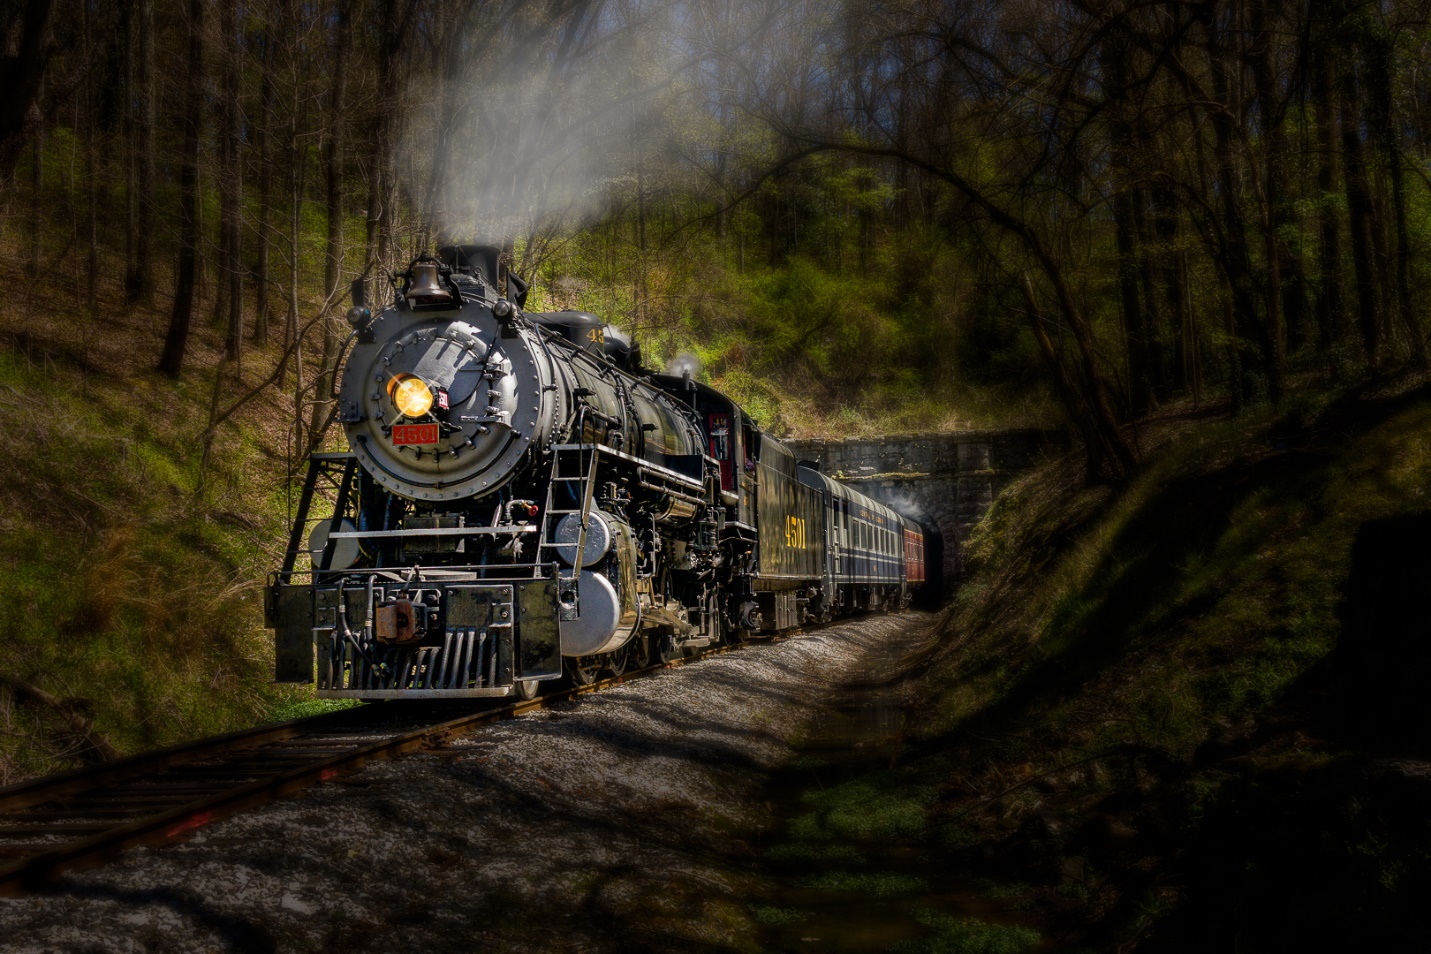
Photoshop is where I do my final detail tweaks. On this image I cropped in just a bit to improve the composition. My biggest Photoshop tweak was to add smoke to the engine. A well run engine doesn’t produce a lot of smoke, although the engineer can make more for the visual effects. Also where’s there’s smoke, there’s fire, or at least a few embers. We’re under a burn advisory, and I suspect that had a lot to do with the lack of smoke. There are lots of smoke brushes for Photoshop that you can download for free. I used a combination of several to create my smoke and varied the opacity of the layer until it looked right to me.
Just to take it a bit further in Photoshop I applied a Gaussian blur to everything but the train. I then created a copy, and changed the blend mode to multiply which drastically darkens the image. I masked out the train, and then decreased the opacity until I like the effect.
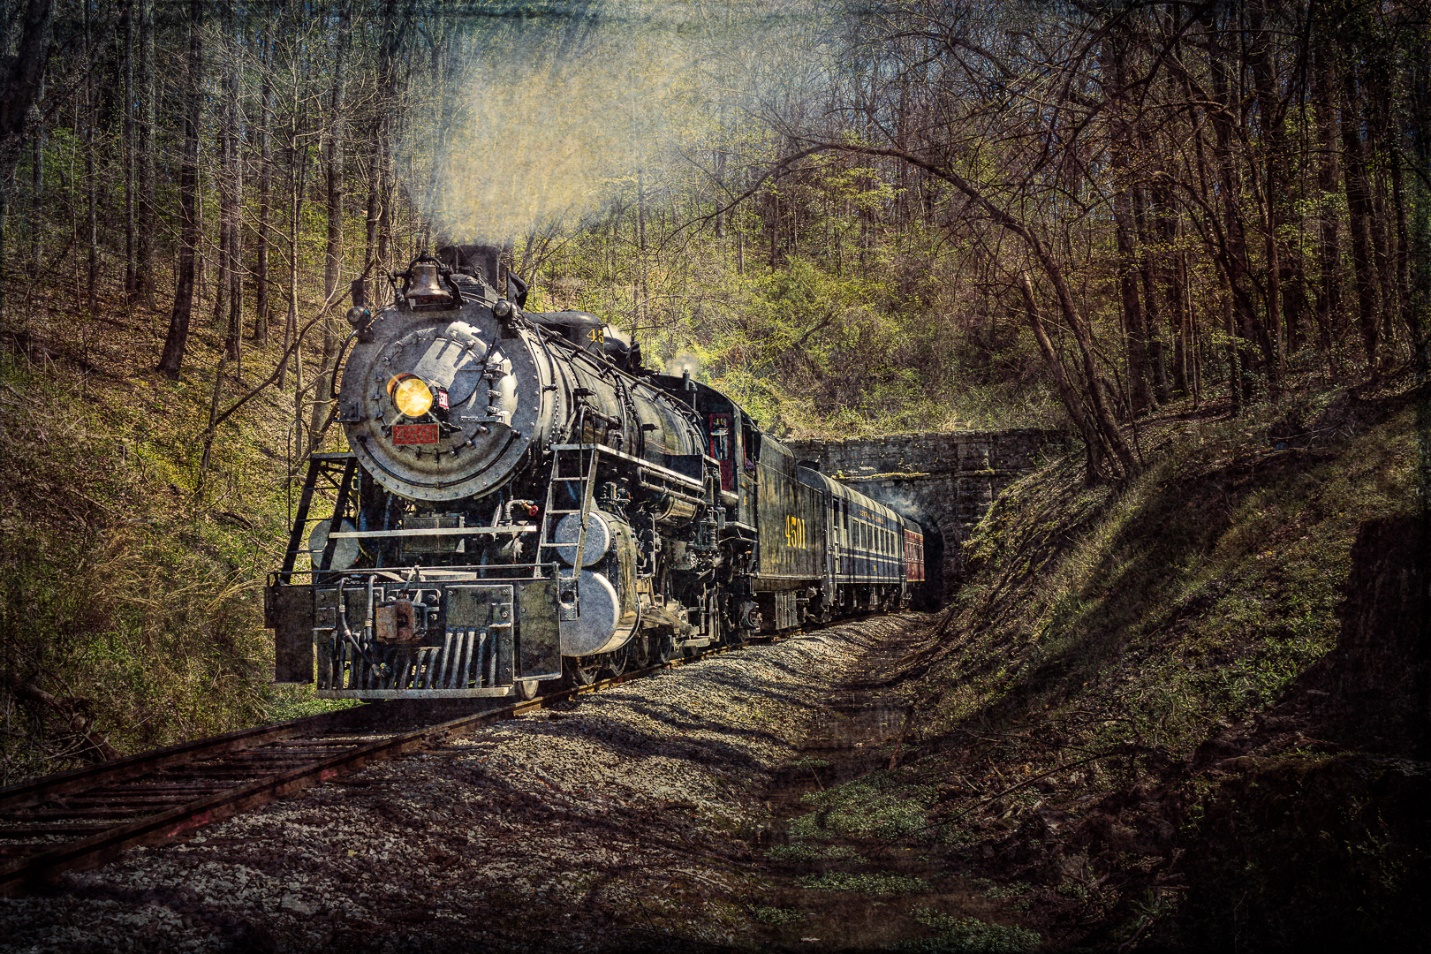
That pretty much finished the image, but lately I’ve been experimenting with textures for that extra artistic look. Here I used Topaz Lab’s Texture Effects to add a texture effect, and then added three other textures and varied the opacity and blend modes to get the desired effect. The textures decreased contrast and lightened the image, so I finished with a contrast layer.
Here is another before and after shot, but without all of the details. In short I darkened everything but the train, lightened the train’s undercarriage, and also added some blur to everything except the train.
I hope this has given you some ideas for visualizing the possibilities in an otherwise bland image. Some of this may seem a bit extreme to you, or totally doesn’t suit your tastes. You may like the Photoshop edits, but not the textures. We don’t all have to envision an image the same way, and I would be a bit disappointed if we did. That difference in expression is what makes us photographers and artists.