I’m going to talk about night photography in the context of photographing cityscapes. That’s the main subject of my night photography and I am not an expert at other more specialized areas of night photography like astrophotography.
When to shoot
What is the best time to shoot night photographs? If you said “at night, of course” you’re actually wrong. The best time is actually during the “blue hour” which is from about 30 min before sunrise to about 10 min before sunrise, and from about 10 or 15 min after sunset till dark. I tend to think of the very first part of the blue hour as the “silver time” since the golden glow is gone, but the blues aren’t prominent yet.
If I’m shooting in the evening, I usually try to be in place and ready to shoot just before sunset. That way hopefully I get a colorful sunset as well as my night shots. I shoot until my exposures are at about 15 seconds at f/8 at ISO 100. The reason I stop then is not that my camera can’t capture a good image, but that by then the sky and shadows are getting black without detail or interest. If I’m shooting in the morning I try to be in place and ready to shoot at least 30 min before sunrise and I’ll shoot until the sun is a few degrees above the horizon.
I also find that if I’m shooting a city at night December through February work well because it’s dark earlier and more businesses and offices will have their lights on. Also you may get more lights on during the work week rather than on the weekend.
Exsate Golden Hour is an app available for both androids and IPhones that will calculate sunrise and sunset times, blue hour and golden hour times for your location. It will even integrate weather forecasts to predict colorful sunrises or sunsets. Definitely a must have for night photography.
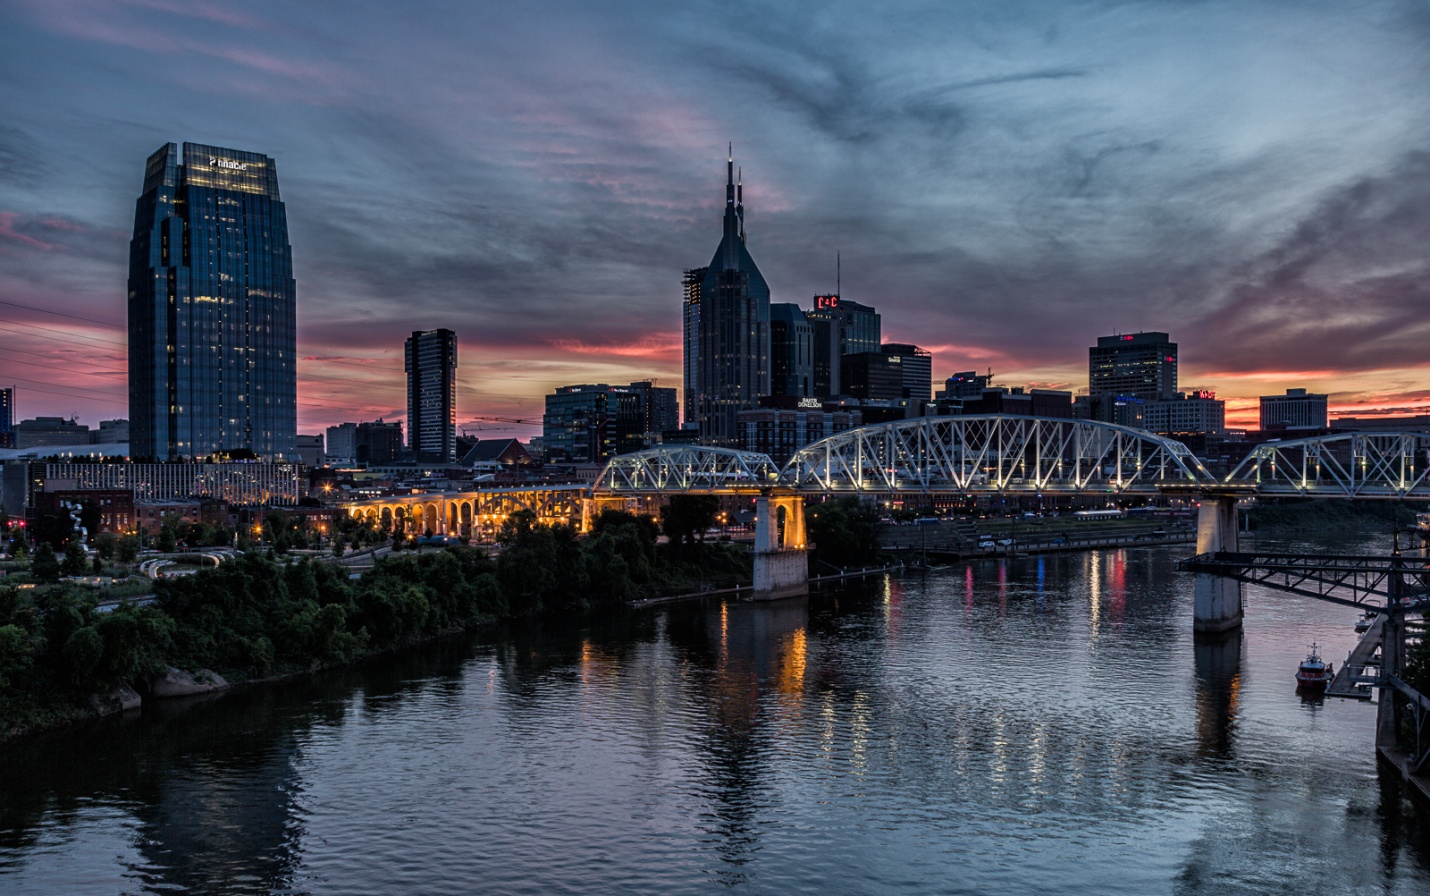
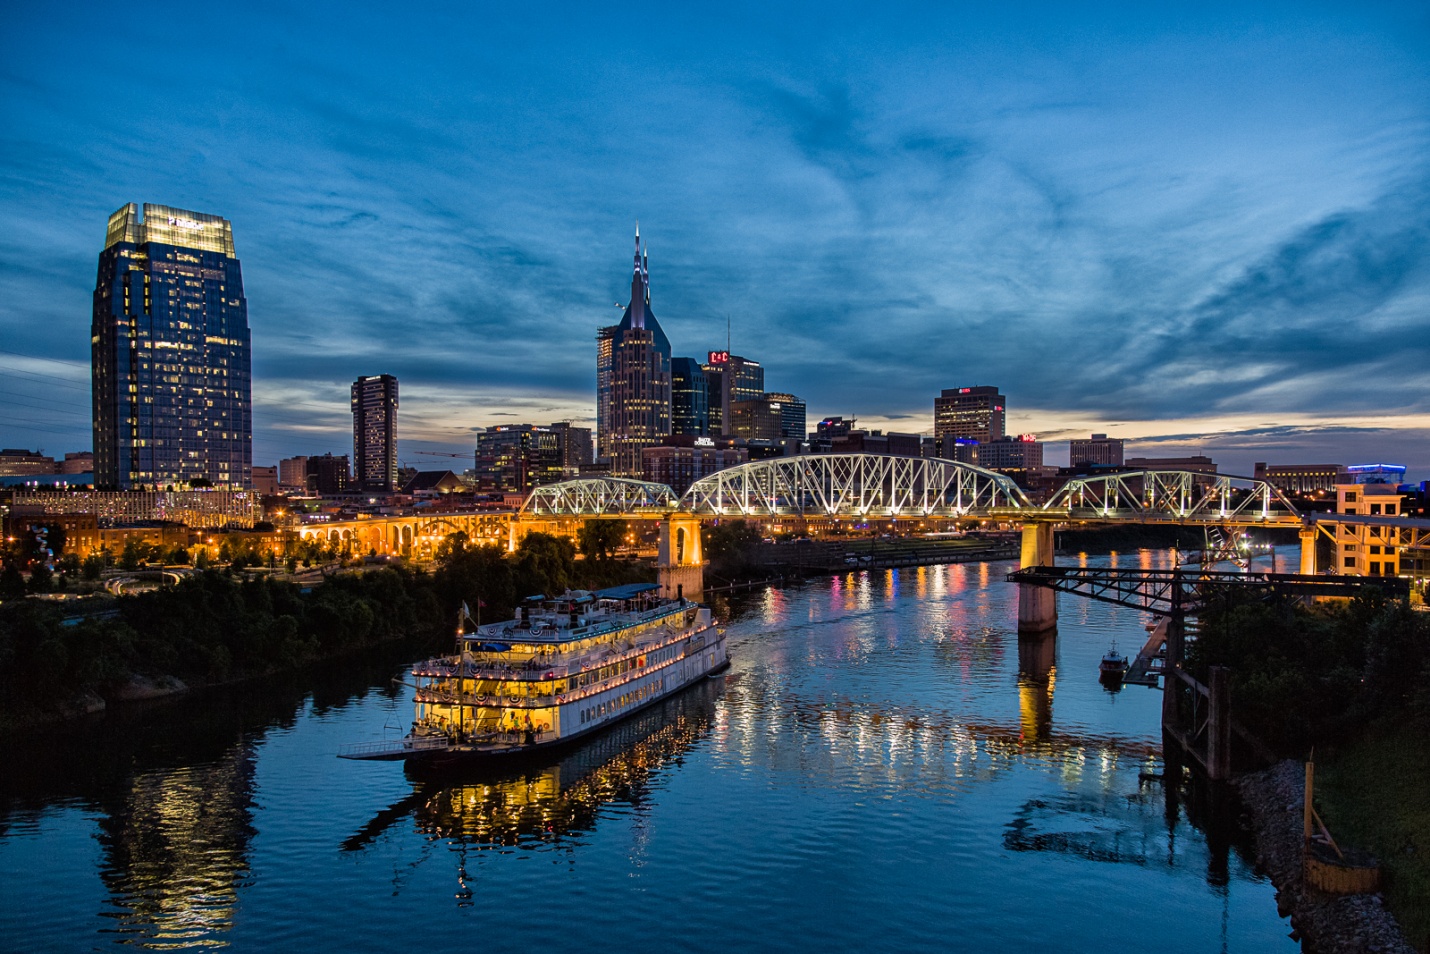
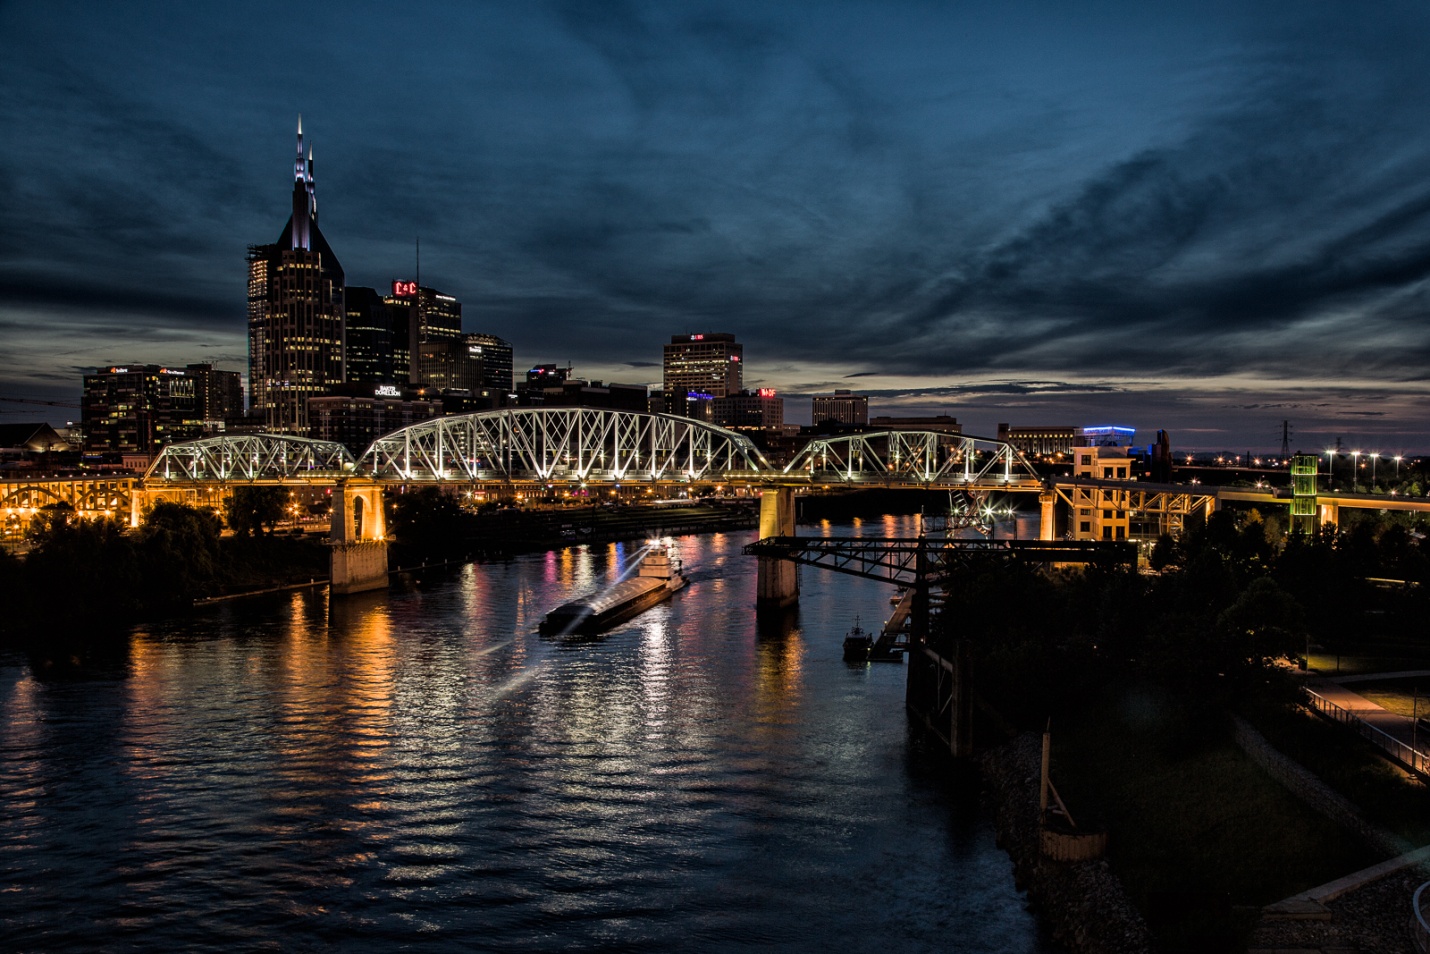
Here is a sequence of Nashville from just after sunset to early blue hour then to late blue hour.
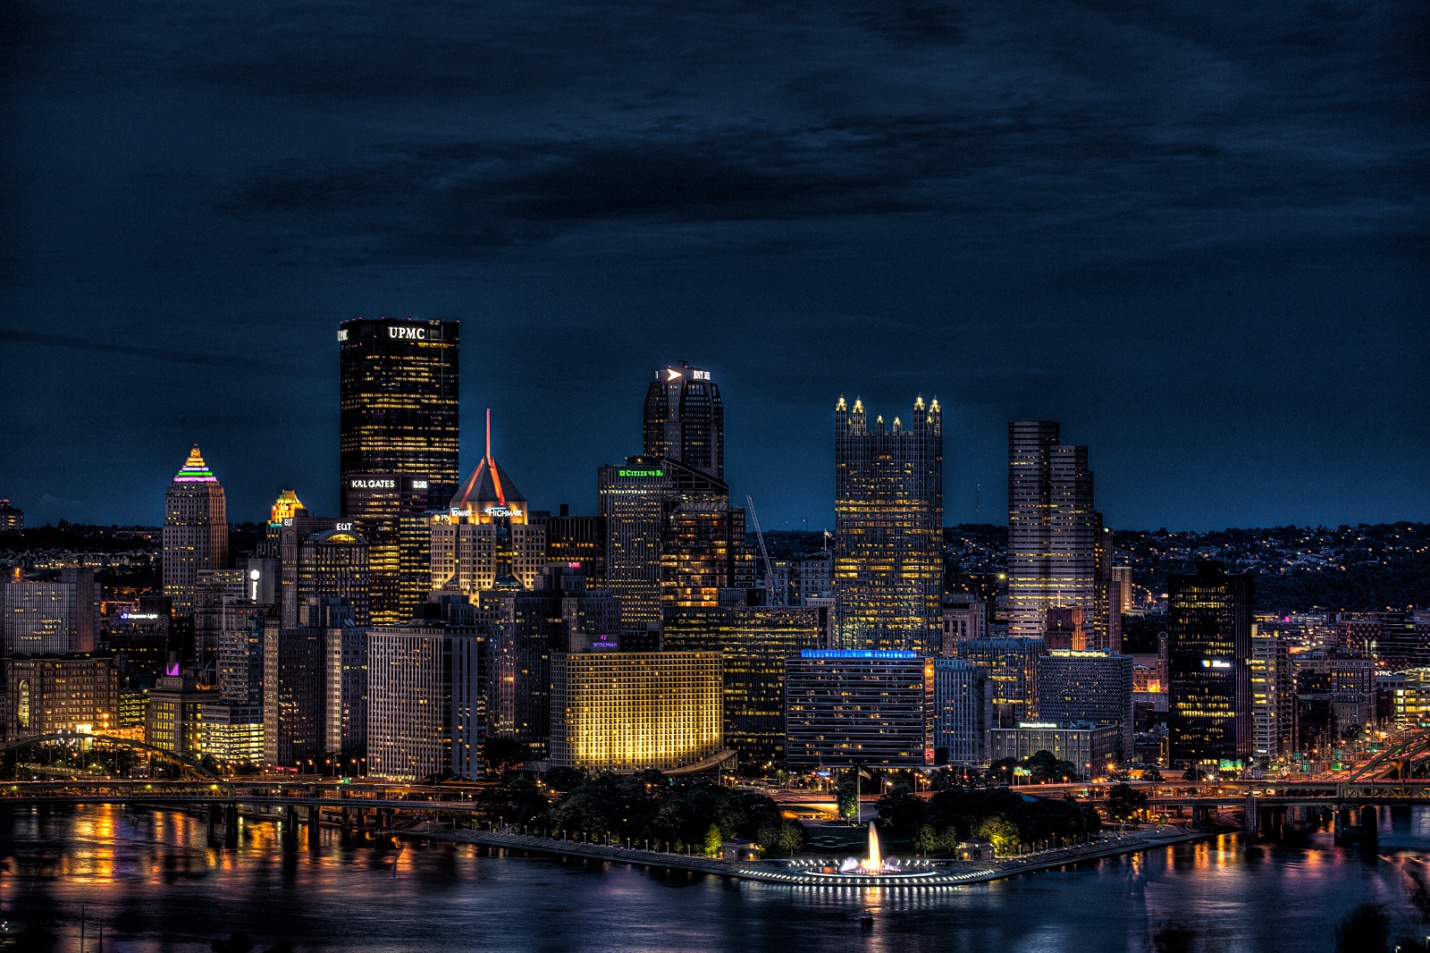
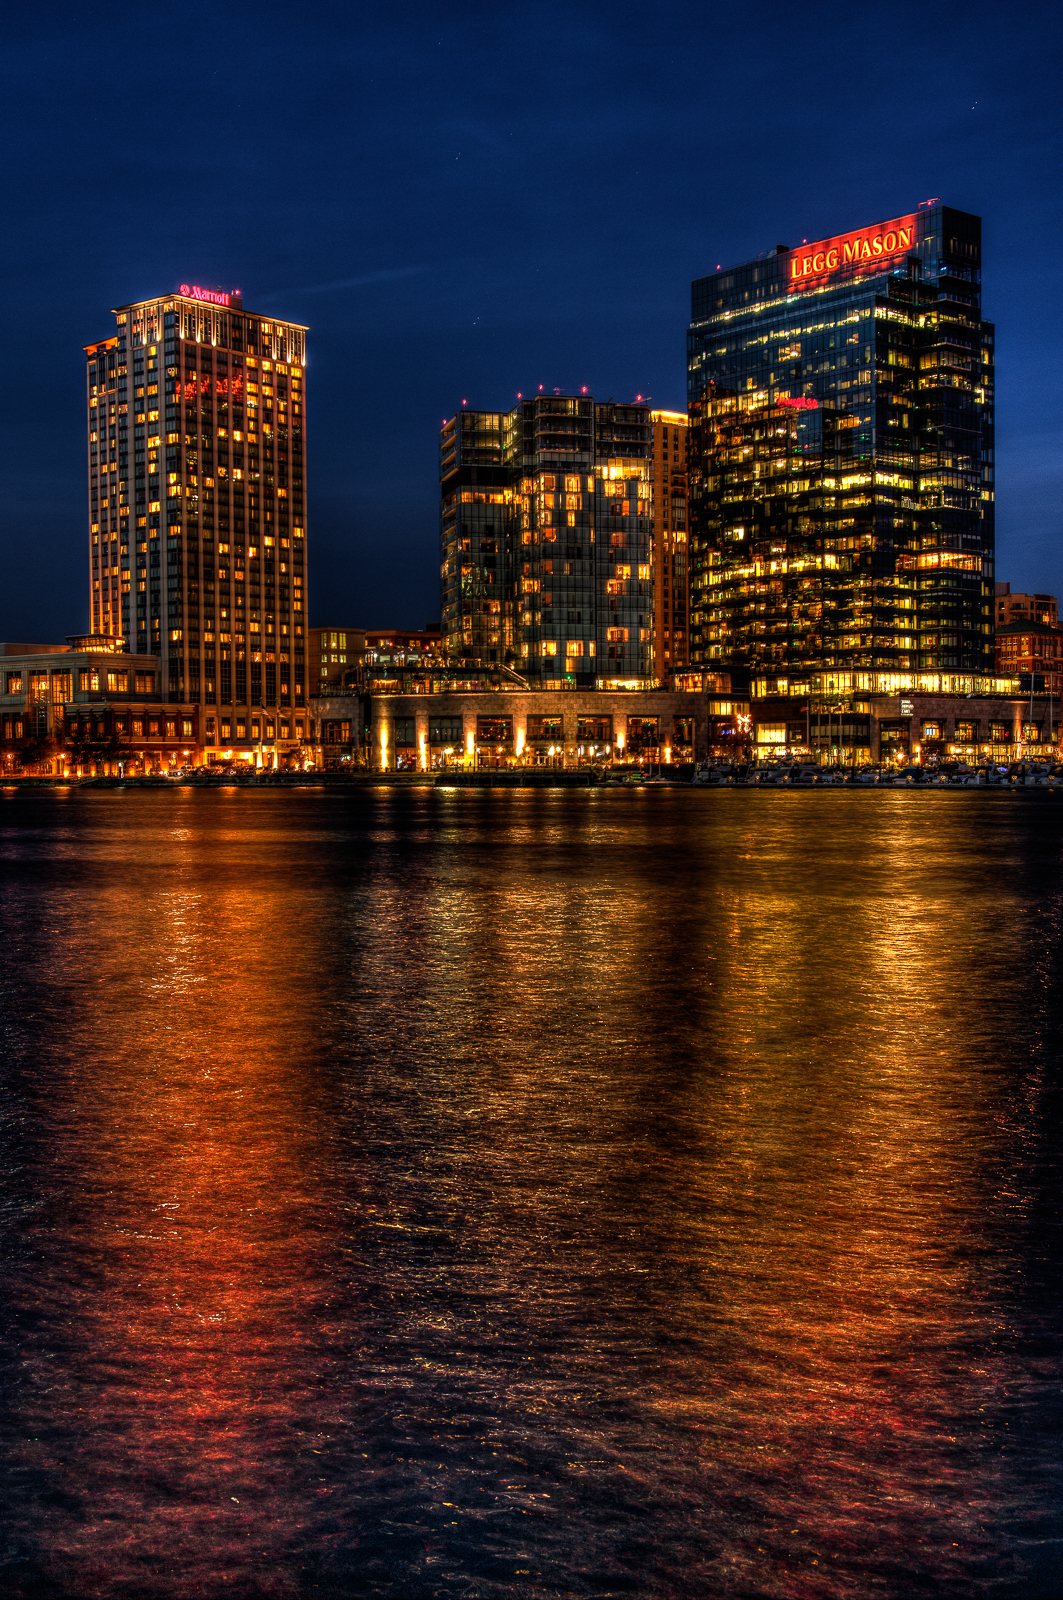
This shot of Pittsburgh was taken very late into blue hour.
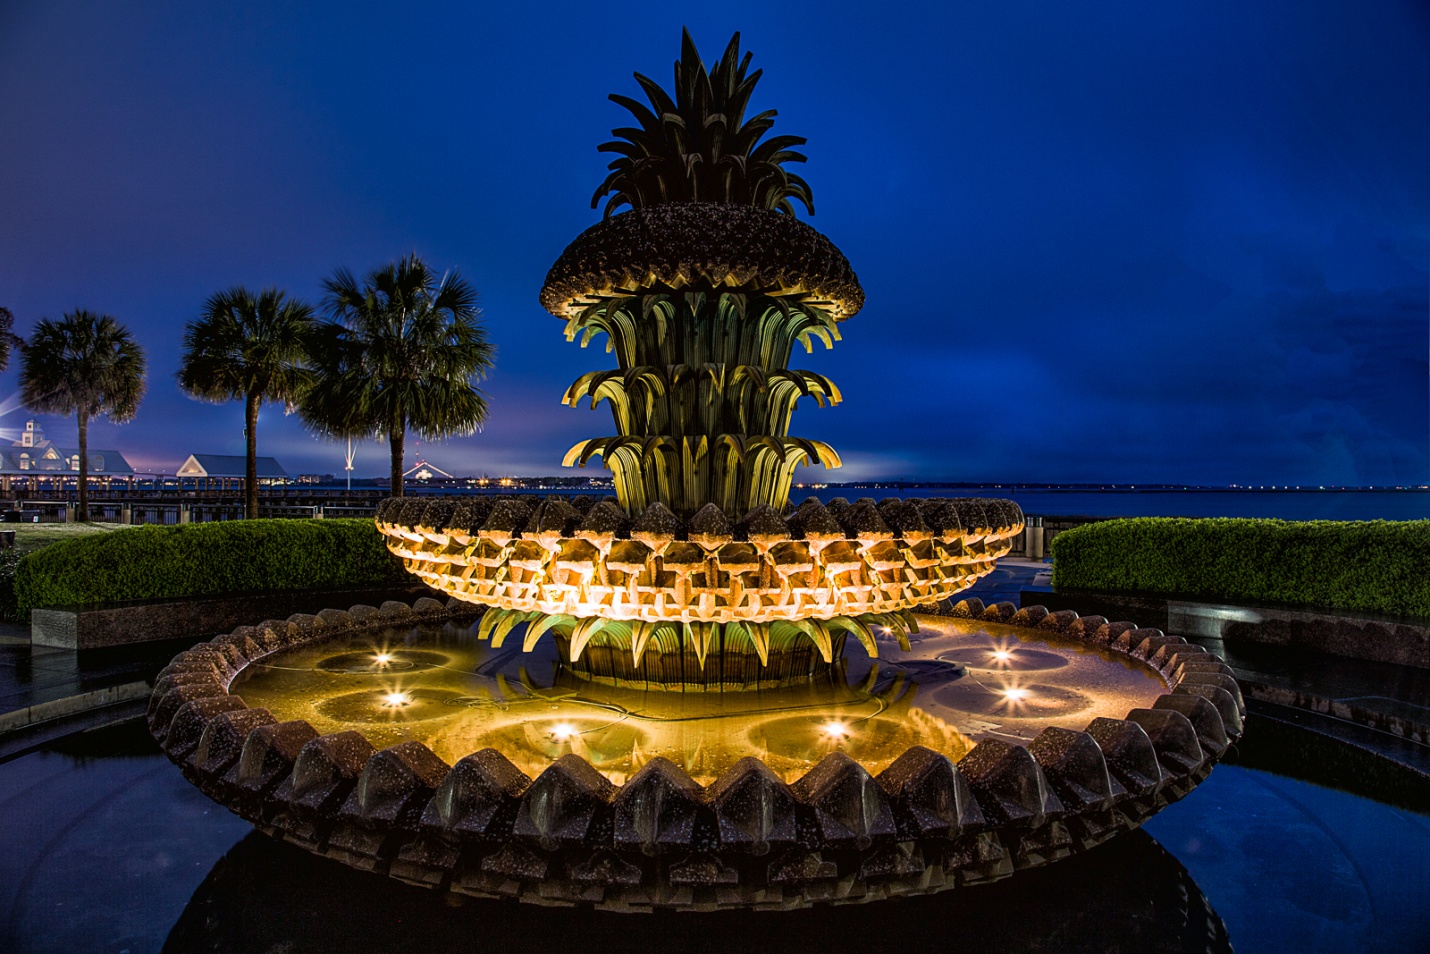
This shot was taken in Charleston, SC about 20 minutes before sunrise. A side benefit is that most of the tourists are still sleeping soundly.
What to shoot
Generally the best scenes include bright lights, neon lights and signs, moving lights like car headlights or tail lights, and maybe reflections of lights in water. You may also want to try light painting, which is a specialty of its own.
Reflections of the lights below are a natural for night photography.
Equipment
It should go without saying that other than a camera with adjustable settings, the most important piece of equipment is a good sturdy tripod, since your shutter speeds will be much too long to hand hold. To make maximum use of the tripods stability, either use a cable release or set your self-timer so your finger on the shutter doesn’t cause vibrations. Also on most stabilized lenses (IS, VR, OS etc), turn off image stabilization when shooting on a tripod.
You can use wide angle lenses for whole cityscapes or longer lenses for details. My favorite cityscape lens is the 17-40 mm on a full frame body. I always have the appropriate lens hood attached, both to protect the lens from bumps and to minimize lens flare. I have also heard that night photography is one time that you should remove any clear or UV filters, although I rarely think to do this.
Some photographers like to use a 4, 6, or 8 point star filter. This is a clear glass filter with lines etched into it to make point sources of light create a star patter. I don’t like to use them because the degrade the image overall and cause a loss of contrast and sharpness. Also if you want the choice of stars or no stars, you will be constantly swapping the filter on or off. You can get a natural star effect by stopping down to f/16 or f/22. Or my choice is to use software like Topaz Labs star effects. That way I can add the stars later and control the size and number of rays.
You will find a small flashlight or head lamp useful for checking camera settings and seeing your in or out of position. Many of the small LED lights are even bright enough to do some light painting.
How to Meter
I usually use aperture priority mode or sometimes manual mode, and I use Evaluative metering (Matrix on Nikon). Early in the blue hour it is pretty accurate. As the sky gets darker, the meter will try to compensate by increasing exposure. So as the blue hour progresses I will be dialing in exposure compensation, so that by the time I stop shooting, I’ll usually be at about -2 stops compensation. You can check your exposure on the LCD, by using the histogram, and by turning on the highlight warning to make sure you aren’t blowing out highlights. You will also have much more latitude and ability to correct your images later if you shoot in RAW rather than JPEG.
Since I like to shoot HDR, and find that it works well for night photography, I usually shoot a three shot bracket at -2, normal and +2 stops. Even with brackets, I’m usually dialing in exposure compensation as the sky gets darker. I may not always create an HDR image, but then I have a range of exposures to choose from when I process.
Here’s a quick tip to save some time. As it gets dark, your exposures may be as long as 30 seconds. If you want to shoot a test shot, each test will take 30 secs. To save time while you test, set your ISO to 1600, make your test shot and then reset your ISO to 100 or 200 for your actual shot. If you are in aperture priority, you don’t have to do anything. If you are in manual mode, remember to increase your exposure time 3X longer for ISO 200 or 4X longer for ISO 100.
Color Balance
Color balance can vary a lot depending on the lighting in the location you are photographing as well as personal taste. I always shoot in RAW, so I normally just stay on daylight balance and adjust later. This doesn’t work well if you shoot in JPEG. In JPEG, you may want to try auto color balance, or tungsten. Tungsten balance will also make the sky go even bluer. One trick to try is to set your camera on LiveView mode and then scroll through all of the color balance settings on your camera until you find the one that looks best to you.
This picture was shot in daylight balance, but later corrected to tungsten balance. This is also later than I would normally shoot, since the sky is almost black. but the reflections help fill the empty blackness.
One problem that is becoming more common is sodium vapor lighting. Cities are increasingly using it because it is more cost efficient and requires less maintenance than incandescent lighting. It casts a yellow or orange cast that is impossible to correct. That is because most light sources produce light with varying amounts of all of the colors of the spectrum. We can color correct by decreasing the dominant wavelengths and bringing up the weaker wavelengths. The sodium vapor lights have only a single wavelength – yellow. If we decrease yellow, there are no other colors to bring up and balance the yellow color, so we’re basically stuck with what we get.
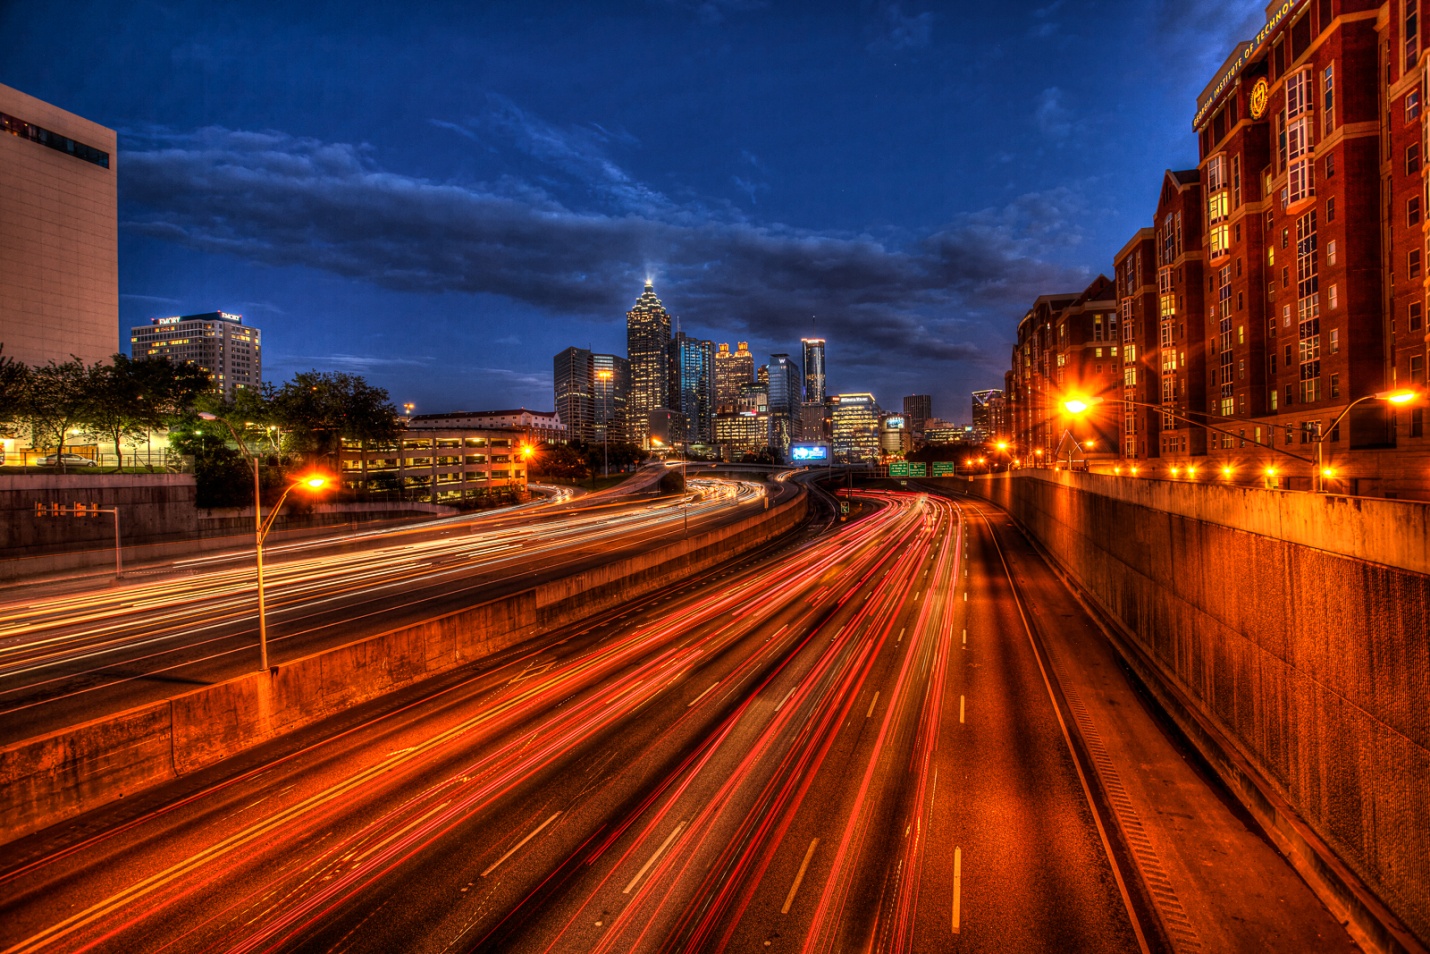
The shot of Atlanta, below shows the effect of sodium vapor lighting on the right side of the shot.
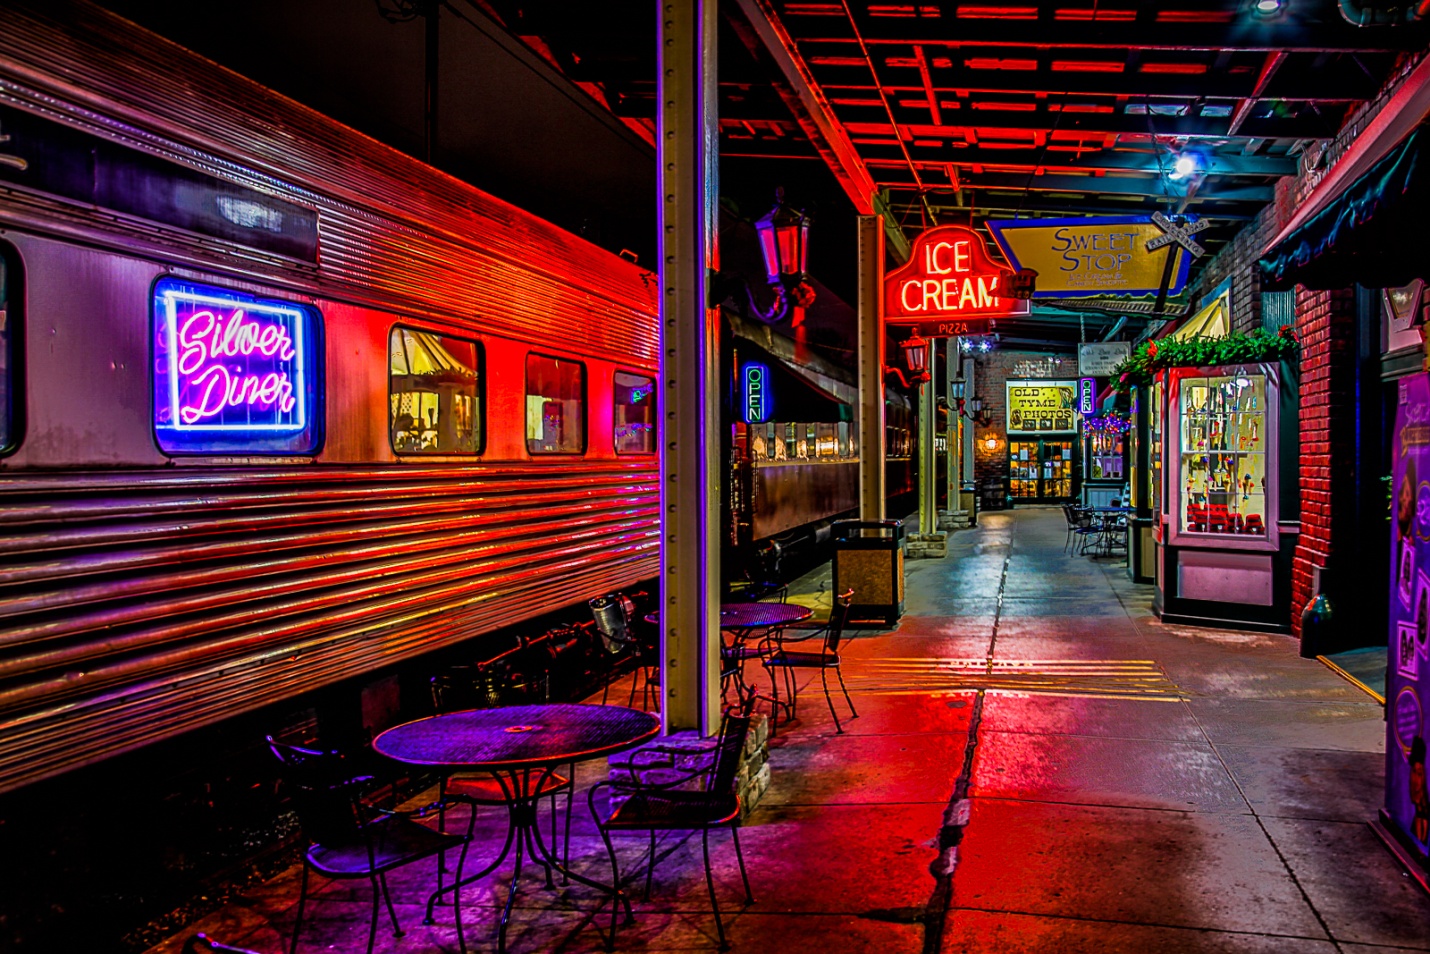
Neon lights look good in daylight balance. There is no need to color correct, and why would you want to, since the colors are so attractive they become the subject.
Motion trails
Motion trails are produced by moving light sources and slow shutter speeds. The faster the objects move, and the slower the shutter speed, the longer the trails. The classic effect is cars headlights or tail lights on streets, but they could also include skiers with head lamps, planes, or even pedestrians with flashlights or headlamps.
Special Problems
Some of the best cityscape views are from pedestrian bridges or street bridges and overpasses. The movement of people walking by, or cars passing can cause vibrations that will ruin your shot. Try to shoot when no one or thing will create vibrations, and if it does happen try to reshoot that shot.
Also don’t forget traffic safety. Stay out of roadways, wear light or reflective clothing, and maybe even a light. Keep your eyes open and don’t trust that everyone out there is driving safely and alertly.
Also I hate to have to mention this, but be very aware of your surroundings and personal safety. It is very easy to get totally absorbed in the details of night photography, and not be aware of danger around you. The bad guys can certainly be out at any time of day, but they tend to prefer the dark They know the good spots for photography and where they can steal high end cameras and cash, and their favorite prey is clueless and paying no attention to what’s around them. A friend and I were photographing the Nashville skyline form the pedestrian bridge at dusk. It was cold, and we were the only people out until a shady looking character came out and chose the bench right across from us (out of dozens) and facing down river where there was nothing of interest. I really felt something was wrong and we quietly agreed to take turns shooting and watching this potential threat. Every time he looked over his shoulder at us, one of us was staring right back. Finally, right when I thought the robbery was about to go down, a large group of photographers came out on the bridge, and our friend decided it was time to leave. The moral of the story is BE AWARE, and if something feels dangerous, it probably is, so leave if you safely can.